当前位置:网站首页>Pytorch (environment, tensorboard, transforms, torchvision, dataloader)
Pytorch (environment, tensorboard, transforms, torchvision, dataloader)
2022-06-26 05:40:00 【Yuetun】
Table of contents title
Software use anacoder and pycharm
Environment configuration and installation
solve pip The problem of slow installation
install anaconda

conda create -n pytorch python=3.6
Active version
conda activate pytorch
View Toolkit 
install pytorch
pytorch Official website 
Installation instructions
conda install pytorch torchvision cudatoolkit=9.2 -c pytorch -c defaults -c numba/1abe1/dev
Install the appropriate version according to the official website
CommandNotFoundError: No command ‘conda creat’. Did you mean ‘conda create’?
Get into python Environmental Science

Test local gpu Whether it can be pytorch Use
>>> import torch
>>> torch.cuda.is_available()
pycharm install
To configure anaconda


error Cannot run program “D:…\venv\Scripts\python.exe“ (in directory ): CreateProcess error=2
jupyter

Get into Anaconda Prompt terminal
conda activate pytorch

jupyter notebook


python Study
python Learn two magic weapons
dir() function , It can let us know what is in the toolbox and the partition in the toolbox .
help() function , Let us know how each tool is used , How to use the tool .
pycharm
data

Download datasets
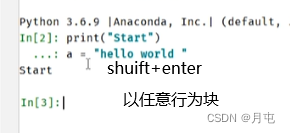
jupyvter Use

pycharm
image Use


example
from torch.utils.data import Dataset
from PIL import Image
import os
class MyData(Dataset):
def __init__(self,root_dir,label_dir):
self.root_dir=root_dir
self.label_dir=label_dir
self.path=os.path.join(self.root_dir,self.label_dir)
self.img_path=os.listdir(self.path)
def __getitem__(self, idx):
img_name=self.img_path[idx]
img_item_path=os.path.join(self.root_dir,self.label_dir,img_name)
img=Image.open(img_item_path)
label=self.label_dir
return img,label
def __len__(self):
return len(self.img_path)
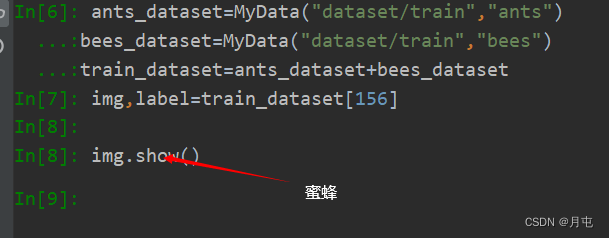
ants_dataset=MyData("dataset/train","ants")

Dataset addition
On the basis of the above
ants_dataset=MyData("dataset/train","ants")
bees_dataset=MyData("dataset/train","bees")
train_dataset=ants_dataset+bees_dataset
establish label

import os
root_dir = "dataset/train"
target_dir = "ants_image"
img_path = os.listdir(os.path.join(root_dir,target_dir))
label=target_dir.split("_")[0]
out_dir = "ants_label"
for i in img_path:
    file_name = i.split( "_jpg ")[0]
    with open(os.path.join(root_dir,out_dir,"{}.txt".format(file_name)),'w') as f:
        f.write(label)
tensorboard
Tensorboard It was Google TensorFlow Visual tools , It can be used to record training data 、 Evaluation data 、 Network structure 、 Image, etc , And you can web On display , It is very helpful to observe the process of neural network .
install
pip install tensorboard
SummaryWriter
add_scalar
from torch.utils.tensorboard import SummaryWriter
writer=SummaryWriter("logs")
for i in range(100):
    writer.add_scalar("y=2x",2*i,i)#  In turn, is tag,y,x
writer.close()

AttributeError:module ‘distutils‘ has no attribute ‘version
add_image
from torch.utils.tensorboard import SummaryWriter
import numpy as np
from PIL import Image

writer=SummaryWriter("logs")
image_path='dataset/train/bees_image/17209602_fe5a5a746f.jpg'
img_PIL=Image.open(image_path)
img_array=np.array(img_PIL)
print(type(img_array))
print(img_array.shape)

writer.add_image("test",img_array,3,dataformats='HWC')#  Mark , picture , step , Format
for i in range(100):
    writer.add_scalar("y=2x",2*i,i)#  In turn, is tag,y,x
writer.close()

transforms
transforms.ToTensor Picture format conversion tensor type
from torchvision import transforms
from PIL import Image

img_path="dataset/train/ants_image/7759525_1363d24e88.jpg"
img=Image.open(img_path)
print(img,"\n")

tensor_trans=transforms.ToTensor()
tensor_img=tensor_trans(img)
print(tensor_img)

install opencv-python
pip --default-timeout=300 install opencv-python -i https://pypi.douban.com/simple
pip._vendor.urllib3.exceptions.ReadTimeoutError: HTTPSConnectionPool(host=‘files.pythonhosted.org’, port=443): Read timed out
Mirror image 
torch.Tensor Exhibition add_image
from torchvision import transforms
from PIL import Image
from torch.utils.tensorboard import SummaryWriter

img_path="dataset/train/ants_image/7759525_1363d24e88.jpg"
img=Image.open(img_path)

writer=SummaryWriter("logs")

tensor_trans=transforms.ToTensor()
tensor_img=tensor_trans(img)
writer.add_image("Tensor_img",tensor_img)
writer.close()

Add __call__
class person:
    def __call__(self,name):
        print( " __call__"+" Hello " + name)
    def hello(self,name):
        print( "hello"+ name )
person = person( )
person("zhangsan")
person.hello("lisi")
Easy to use
from PIL import Image
from torch.utils.tensorboard import SummaryWriter
from torchvision import transforms

writer=SummaryWriter("logs")
img=Image.open("dataset/train/ants_image/5650366_e22b7e1065.jpg")
print(img)

# 1.ToTensor
trans_totensor=transforms.ToTensor()
img_tensor=trans_totensor(img)
writer.add_image("ToTensor",img_tensor)

# 2.Normalize normalization
print(img_tensor[0][0][0])
# output = (input - mean) / std
# mean: The mean value of each channel
# std: Standard deviation of each channel  rgb Three
trans_norm=transforms.Normalize([2,6,5],[3,2,1])
img_norm=trans_norm(img_tensor)
writer.add_image("Normalize",img_norm,2)
print(img_norm[0][0][0])

#3.resize
print(img.size)
trans_resize=transforms.Resize((512,512))
#img PIL->resize->img_resize PIL
img_resize=trans_resize(img)
# img_resize PIL ->totensor->img_resize tensor
img_resize=trans_totensor(img_resize)
writer.add_image("Resize",img_resize,0)
print(img_resize)


#4. compose resize-2
trans_resize_2=transforms.Resize(256)
#PIL->PIL->tensor
trans_compose=transforms.Compose([trans_resize_2,trans_totensor])
img_resize_2=trans_compose(img)
writer.add_image("Resize",img_resize_2,1)

#5. Then cut
trans_random=transforms.RandomCrop((100,200))
trans_compose_2=transforms.Compose([trans_random,trans_totensor])
for i in range(10):
    writer.add_image("RandomCrop",trans_compose_2(img),i)

writer.close()
torchvision Data sets using
import torchvision
# Download datasets
train_set=torchvision.datasets.CIFAR10(root="./data_set_train",train=True,download=True)
test_set=torchvision.datasets.CIFAR10(root="./data_set_test",train=False,download=True)

#  A category of a dataset
print(train_set[0])
# // The category name attribute in the dataset
print(train_set.classes)
# Return picture and target value
img,target=train_set[0]
print(img)
print(target)
print(train_set.classes[target])
img.show()

Transforming data tensor type
import torchvision
dataset_tansform=torchvision.transforms.Compose([
    torchvision.transforms.ToTensor()
])
train_set=torchvision.datasets.CIFAR10(root="./data_set_train",train=True,transform=dataset_tansform,download=True)
test_set=torchvision.datasets.CIFAR10(root="./data_set_test",train=False,transform=dataset_tansform,download=True)
print(test_set[0])

import torchvision
from torch.utils.tensorboard import  SummaryWriter
# / Type conversion
dataset_tansform=torchvision.transforms.Compose([
    torchvision.transforms.ToTensor()
])
train_set=torchvision.datasets.CIFAR10(root="./data_set_train",train=True,transform=dataset_tansform,download=True)
test_set=torchvision.datasets.CIFAR10(root="./data_set_test",train=False,transform=dataset_tansform,download=True)
# View the type conversion results
print(test_set[0])

writer=SummaryWriter("p10")
for i in range(10):
    img,target=test_set[i]
    writer.add_image("test_set",img,i)
writer.close()
dataloader Use
import torchvision
from torch.utils.data import DataLoader
#  Prepared dataset
test_data=torchvision.datasets.CIFAR10("./data_set_test",train=False,transform=torchvision.transforms.ToTensor())
#  Test the first picture and target
test_loader=DataLoader(dataset=test_data,batch_size=4,shuffle=True,num_workers=0,drop_last=False)


img,target= test_data[0]
print(img.shape)
print(target)

for data in test_loader:
    imggs,targets=data
    print(imggs.shape)
    print(targets)

SummaryWriter Look at the dataset
import torchvision
from torch.utils.data import DataLoader
#  Prepared dataset
from torch.utils.tensorboard import SummaryWriter

test_data=torchvision.datasets.CIFAR10("./data_set_test",train=False,transform=torchvision.transforms.ToTensor())
#  Test the first picture and target, Parameters : Data sets , Quantity per piece , Shuffle or not ,0, Do you want the last remainder
test_loader=DataLoader(dataset=test_data,batch_size=4,shuffle=True,num_workers=0,drop_last=False)


img,target= test_data[0]
print(img.shape)
print(target)

writer=SummaryWriter("dataloader")
step=0
for data in test_loader:
    imgs,targets=data
    print(imgs.shape)
    print(targets)
    writer.add_images("test_data",imgs,step)
    step+=1
writer.close()

边栏推荐
- 【ARM】讯为rk3568开发板buildroot添加桌面应用
- How to make your big file upload stable and fast?
- 售前分析
- Mongodb image configuration method
- 第九章 设置结构化日志记录(一)
- 【 langage c】 stockage des données d'analyse approfondie en mémoire
- 适配器模式
- The model defined (modified) in pytoch loads some required pre training model parameters and freezes them
- 11 IO frame
- Red team scoring method statistics
猜你喜欢

国务院发文,完善身份认证、电子印章等应用,加强数字政府建设
![[arm] build boa based embedded web server on nuc977](/img/fb/7dc1898e35ed78b417770216b05286.png)
[arm] build boa based embedded web server on nuc977

pytorch(网络模型)

DOM文档

Leetcode114. Expand binary tree into linked list

Red team scoring method statistics
![C# 40. Byte[] to hexadecimal string](/img/3e/1b8b4e522b28eea4faca26b276a27b.png)
C# 40. Byte[] to hexadecimal string
![[red team] what preparations should be made to join the red team?](/img/03/f246f18f8925167dbd5e9d63912faa.png)
[red team] what preparations should be made to join the red team?

AutowiredAnnotationBeanPostProcessor什么时候被实例化的?
![[arm] add desktop application for buildreoot of rk3568 development board](/img/9a/28015cdea7362261c39ffc7f6e13a9.png)
[arm] add desktop application for buildreoot of rk3568 development board
随机推荐
ZigBee learning in simple terms lesson 3 external interruption
自定义WebSerivce作为代理解决SilverLight跨域调用WebService问题
How to make your big file upload stable and fast?
When was the autowiredannotationbeanpostprocessor instantiated?
虚拟项目失败感想
June 3 is a happy day
使用Jedis监听Redis Stream 实现消息队列功能
C# 39. Conversion between string type and byte[] type (actual measurement)
Customize WebService as a proxy to solve the problem of Silverlight calling WebService across domains
Gram 矩阵
There are applications related to web network request API in MATLAB (under update)
睛天霹雳的消息
What management systems (Updates) for things like this
Serious hazard warning! Log4j execution vulnerability is exposed!
A new journey
Source code of findcontrol
Ad tutorial series | 4 - creating an integration library file
Last flight
DOM document
cartographer_ backend_ constraint