当前位置:网站首页>WPF from zero to 1 tutorial details, suitable for novices on the road
WPF from zero to 1 tutorial details, suitable for novices on the road
2022-06-24 12:37:00 【Programmer Ken】
Video related links :https://www.bilibili.com/video/BV1iY411w7zD
Windows Presentation Foundation ( abbreviation WPF)
WPF Overview :
WPF The core of is a resolution independent vector based rendering engine , Designed to take full advantage of modern graphics hardware . WPF The core is extended through a set of perfect application development functions , These features include Extensible Application Markup Language (XAML)、 Control 、 Data binding 、 Layout 、 2D and 3D graphics 、 Animation 、 style 、 Templates 、 file 、 The media 、 Text and layout . WPF Belong to .NET, Therefore, integration can be generated .NET API Application of other elements .
brief introduction :
Windows User interface framework , Unified programming model 、 Language and framework , The interface design is separated from the back-end development .
characteristic :
1. The rendering effect is not affected by the resolution
2. be based on DirectX 3d technology , Can make a cool interface
3. Provide UI frame , Integrated vector graphics 、 Mobile text support 、3d Visual effects and control model framework 、
4. UI Completely separate from the business logic ,UI-XAML describe ( Bottom wpf The engine interprets elements as corresponding objects )
5. xp server2003 To window7 And later operating system versions Can support
6. Based on data driven , Data is the core
Learning premise :
Basics : First we need to get started C# / VB
development tool : Visual Studio 2019
( Download link : https://pan.baidu.com/s/1uMH8C2rg5T8pNXrObXddXw Extraction code : hatd )
Framework environment : .net core 3.1 perhaps .net framework4.0+
All controls :
| System.Windows.Controls ( Assembly :PresentationFramework.dll) | ||
|---|---|---|
| Document address :https://docs.microsoft.com/zh-cn/dotnet/api/system.windows.controls?view=windowsdesktop-6.0 | ||
| Label ( Represents the text label of the control , And provide access key support .) | TextBox( Display or edit unformatted text ) | TextBlock( A lightweight control , Used to display a small amount of stream content ) |
| Border ( Border control , effect Draw a border and... Around another element / Or background ) | Button( Button control ) | Calendar ( calendar control ) |
| CheckBox( Selection box ) | ComboBox ( A drop-down box ) | Image ( The image control ) |
| Menu( menu ) | ContextMenu( Content menu ) | RadioButton( Represents a button that can be selected by the user but cannot be cleared , Code can clear ) |
| DataGrid( Data grid –Table) | ListBox( Contains a list of options ) | ListView( Represents a control used to display a list of data items ) |
| DockPanel( Define an area , From it, the sub elements can be arranged horizontally or vertically according to their relative positions .)— wharf ; Port area | Grid( Define a flexible grid area consisting of columns and rows .) | GroupBox( Group control — Represents a control , This control is used to create a user interface with (UI) Container for content borders and titles .) |
| PrintDialog( Call standard Microsoft Windows Print dialog ) | ProgressBar( Indicates the progress of the operation ) | Canvas ( Canvas controls ) |
| RichTextBox( Said to FlowDocument Object to operate on ) | ToolBar( A set of commands or controls provides a container ) | Expander( Collapse control ) Represents a control , This control displays the title of a window with collapsible content . |
| TabControl( Represents a control that contains multiple items , These items share the same space on the screen ) | Frame( A content control that supports navigation ) | Rectangle( Rectangular area ) |
| StackPanel( Arrange child elements in a horizontal or vertical line .) | WrapPanel ( Position the child elements from left to right , Switch the content to the next line at the edge of the containing box .) |

What is? XAML
XAML Is a declarative markup language . be applied to .NET Core Programming models ,XAML Simplified to .NET Core Application creation UI The process of . XAML The file is usually with .xaml Extended name XML file . It can be done by any XML Encoding encodes a document , But usually in the form of UTF-8 code .
<StackPanel>
    <Button Content="Click Me"/>
</StackPanel>
Object element syntax
Object element syntax yes XAML Tag Syntax , It declares XML Element to instantiate CLR Class or structure . This syntax is similar to other markup languages ( Such as HTML) Element syntax of .
- Single label format . .
- Double label format . 【 Other tags can be embedded 】
XAML Root element
One XAML A file can only have one root element , In this way, it can also be used as a well formed XML Documentation and valid XAML file . For typical WPF programme , Can be used in WPF Root elements with outstanding significance in the application model ( for example , Page Window or Page).
There can be only one secondary label under the root label . We can write more than three levels in the secondary label Level 4 labels .
<Window>

<【 Layout labels 】>
  【 Other labels ....】
</【 Layout labels 】>

</Window>
<Page>
    <Window.Resources>
      ....
    </Window.Resources>

<【 Layout labels 】>
  【 Other labels ....】
</【 Layout labels 】>

</Page>
WPF and XAML Namespace declaration
In many XAML In the namespace declaration in the root tag of the file , Usually you can see two XML Namespace declaration . The first declaration maps the entire... By default WPF client / frame XAML Namespace :
xmlns=“http://schemas.microsoft.com/winfx/2006/xaml/presentation”
The second declaration maps to a separate XAML Namespace ,( Usually ) Map it to x: Prefix .
xmlns:x=“http://schemas.microsoft.com/winfx/2006/xaml”
The relationship between these statements is x: Prefix mapping is supported as xaml Language defines a part of the internal function , and WPF Is a kind of will xaml As an implementation of the language , And for xaml A vocabulary that defines its object .
<Window x:Class="MyWpfApp.MainWindow" xmlns="http://schemas.microsoft.com/winfx/2006/xaml/presentation" xmlns:x="http://schemas.microsoft.com/winfx/2006/xaml" xmlns:d="http://schemas.microsoft.com/expression/blend/2008" xmlns:mc="http://schemas.openxmlformats.org/markup-compatibility/2006" xmlns:local="clr-namespace:MyWpfApp" mc:Ignorable="d" Title="MainWindow" Height="450" Width="800" >
//d   expression
//mc  Marking compatibility

    <【 Layout labels 】 >

    </【 Layout labels 】>


</Window>
(CLR Refers to the common language runtime )
Course objectives
The objectives of the first six chapters :
Realize a movable square box :
<Window x:Class="Ken.Wpf. Move the square .WindowMoveBox" xmlns="http://schemas.microsoft.com/winfx/2006/xaml/presentation" xmlns:x="http://schemas.microsoft.com/winfx/2006/xaml" xmlns:d="http://schemas.microsoft.com/expression/blend/2008" xmlns:mc="http://schemas.openxmlformats.org/markup-compatibility/2006" xmlns:local="clr-namespace:Ken.Wpf. Move the square " mc:Ignorable="d" Title="WindowMoveBox" Height="450" Width="800" KeyDown="Grid_KeyDown">
    <Grid ShowGridLines="True" Background="Teal" Name="gridContent">

        <!--  Use Grid.ColumnDefinitions take grid  Divided into three columns  -->
        <Grid.ColumnDefinitions>
            <ColumnDefinition></ColumnDefinition>
            <ColumnDefinition></ColumnDefinition>
            <ColumnDefinition></ColumnDefinition>
        </Grid.ColumnDefinitions>

        <!--  Use Grid.RowDefinitions take grid  Divided into three lines  -->
        <Grid.RowDefinitions>
            <RowDefinition></RowDefinition>
            <RowDefinition></RowDefinition>
            <RowDefinition></RowDefinition>
        </Grid.RowDefinitions>

        <Border Name="b1" Background="Transparent" Grid.Row="0" Grid.Column="0"></Border>
        <Border Name="b2" Background="White" Grid.Row="0" Grid.Column="1"></Border>
        <Border Name="b3" Background="Transparent" Grid.Row="0" Grid.Column="2"></Border>


        <Border Name="b4" Background="Transparent" Grid.Row="1" Grid.Column="0"></Border>
        <Border Name="b5" Background="Transparent" Grid.Row="1" Grid.Column="1"></Border>
        <Border Name="b6" Background="Transparent" Grid.Row="1" Grid.Column="2"></Border>


        <Border Name="b7" Background="Transparent" Grid.Row="2" Grid.Column="0"></Border>
        <Border Name="b8" Background="Transparent" Grid.Row="2" Grid.Column="1"></Border>
        <Border Name="b9" Background="Transparent" Grid.Row="2" Grid.Column="2"></Border>
    </Grid>
</Window>
        private void Grid_KeyDown(object sender, KeyEventArgs e)
        {
            // First, determine the orientation of the keys   Like up and down

            // Move up   Move to the grid and subtract each time 3   Move down the    Move to the grid and add... Each time 3
            // Move to the left    Every reduction 1   To the right   Every time add 1

            // Get white border Elements

            UIElementCollection children = gridContent.Children;

            Border curBorder =null;
            for (int i = 0; i < children.Count; i++)
            {

                if (children[i] is Border )
                {
                    if(((children[i] as Border).Background as SolidColorBrush).Color.Equals(Colors.White))
                    {
                        curBorder = children[i] as Border;
                    }
                    (children[i] as Border).Background = new SolidColorBrush(Colors.Transparent);
                }
            }

            string name = curBorder.Name;
            int index = Convert.ToInt32(name.Replace("b", ""));

            if (e.Key.Equals(Key.Up))// On
            {
                index = index - 3 >= 1 ? index - 3 : index;
            }
            else if (e.Key.Equals(Key.Down))// Next
            {
                index = index + 3 <= 9 ? index + 3 : index;
            }
            else if(e.Key.Equals(Key.Left))// Left
            {
                index = index - 1 >= 1 ? index - 1 : index;
            }
            else if (e.Key.Equals(Key.Right))// Right
            {
                index = index +1 <=9 ? index +1 : index;
            }

            object control = gridContent.FindName("b" + index);

            if (control != null)
            {
                (control as Border).Background = new SolidColorBrush(Colors.White);
            }
        }
【 later stage 】 Show list 、 newly added / Edit page ( It's about databases )


【 later stage 】 Mimic the interface

Control section :
Inheritance relationships

| object :System.Windows.FrameworkElement | ||
|---|---|---|
| attribute | ||
| Property name | object type | effect |
| Width | double | Gets or sets the width of the element .【( Height of element ( With Equipment independent units ( Every unit 1/96 Inch ) In units of ). )】 |
| Height | double | Gets or sets the height of the element .【 Height of element ( With Equipment independent units ( Every unit 1/96 Inch ) In units of ). 】 |
| ActualWidth | double | Get the width of the rendering of this element . |
| ActualHeight | double | Get the rendering height of this element . |
| Name | string | Gets or sets the identity name of the element . This name provides a reference to , For code hiding ( Such as event handler code ) You can reference markup elements ( stay XAML After the element is constructed during the processing of the processor ). |
| Style | Style | Gets or sets the style used when this element is rendered . |
| Margin | Thickness | Gets or sets the outer margin of the element . |
| HorizontalAlignment | HorizontalAlignment | Gets or sets the ( Such as Panel Or item control ) Horizontal alignment feature applied when combining this element in .【 Horizontal alignment settings , It is an enumeration value .】 |
| VerticalAlignment | VerticalAlignment | Gets or sets the ( Such as panel or item control ) Vertical alignment feature applied when combining this element in . |
| FocusVisualStyle | Style | Get or set a property , This attribute allows you to customize the appearance of this element to be applied to it when capturing keyboard focus 、 Effects or other style features . |
| FlowDirection | FlowDirection | Gets or sets the direction , Text and other The user interface (UI) The element flows in this direction in any parent element that controls its layout . |
| DataContext | object | Gets or sets the data context when the element participates in data binding . |
| Resources | ResourceDictionary | Gets or sets the locally defined resource dictionary . |
| Method | ||
| Method name | Parameters | effect |
| BringIntoView | Try putting this element in the view , It is contained in any scrollable area . | |
| BringIntoView(Rect targetRectangle) | Specify the size of the elements that are also placed in the view .(targetRectangle) | Try putting into view , It contains the area size provided by this element within any scrollable area . |
| FindName(string name) | The name of the requested element (name) | Find the element with the provided identifier name . |
| FindResource(object resourceKey) | Resource key identifier requested (resourceKey) | Search the resource with the specified key and throw an exception , If the requested resource cannot be found . |
| event | ||
| Event name | effect | |
| Loaded | When laying out elements 、 present , And it can be used for interaction . | |
| KeyDown | Occurs when a key is pressed while the focus is on the element . | |
| GotFocus | Occurs when this element gets the logical focus | |
| MouseDown | Occurs when the pointer is over this element and any mouse button is pressed . | |
| MouseMove | Occurs when the mouse pointer is over this element and the mouse pointer is moved . | |
| Click | Control's click event |
Control classification
The content of the control 、 Text control 、 Item control 、 Layout control 、 Other controls
| The content of the control (System.Windows.Controls.ContentControl) | ||
|---|---|---|
| System.Windows.Controls.Label | ||
| System.Windows.Controls.TextBlock | Inherited from FrameworkElement class | |
| System.Windows.Controls.Button | ||
| System.Windows.Controls.Border | Inherited from Decorator class | |
| System.Windows.Controls.RadioButton | ||
| System.Windows.Controls.CheckBox | ||
| System.Windows.Controls.ToolTip | ||
| System.Windows.Controls.GroupBox | ||
| System.Windows.Controls.Expander | ||
| System.Windows.Controls.Frame |
| Text control (System.Windows.Controls.TextBoxBase) | ||
|---|---|---|
| System.Windows.Controls.TextBox | ||
| System.Windows.Controls.RichTextBox |
| Item control (System.Windows.Controls.ItemsControl) | ||
|---|---|---|
| System.Windows.Controls.ComboBox | ||
| System.Windows.Controls.Menu | ||
| System.Windows.Controls.ContextMenu | ||
| System.Windows.Controls.TabControl | ||
| System.Windows.Controls.ToolBar | ||
| System.Windows.Controls.ToolBarTray | ||
| System.Windows.Controls.ListBox | ||
| System.Windows.Controls.DataGrid | ||
| System.Windows.Controls.TreeView |
| Layout control (System.Windows.Controls.Panel) | ||
|---|---|---|
| System.Windows.Controls.Grid | ||
| System.Windows.Controls.StackPanel | ||
| System.Windows.Controls.DockPanel | ||
| System.Windows.Controls.WrapPanel | ||
| System.Windows.Controls.Canvas |
| Other controls | ||
|---|---|---|
| System.Windows.Controls.Calendar | ||
| System.Windows.Controls.Image | ||
| System.Windows.Controls.ProgressBar | ||
| System.Windows.Shapes.Rectangle |
Code area
Public tools
using Ken.Wpf.Entity;
using System;
using System.Collections.Generic;
using System.Text;
using System.Windows.Media;

namespace Ken.Wpf.Utils
{

    public class MenuHelper
    {


        public static List<MenuInfo> CreateMenus()
        {

            List<MenuInfo> menus = new List<MenuInfo>();

            MenuInfo m1 = new MenuInfo(" In and out warehouse management ",null);
            MenuInfo m2 = new MenuInfo(" Leave management ", null);
            MenuInfo m3 = new MenuInfo(" The attendance management ",null);

            MenuInfo m3_1 = new MenuInfo(" Daily report management ", m3);
            MenuInfo m3_2 = new MenuInfo(" Leave management ", m3);

            MenuInfo m4 = new MenuInfo(" Commodity management ",null);
            MenuInfo m4_1 = new MenuInfo(" Unit management ", m4);
            MenuInfo m4_2 = new MenuInfo(" Category management ", m4);

            menus.Add(m1);
            menus.Add(m2);
            menus.Add(m3);
            menus.Add(m4);
            return menus;
        }
    }
}
Label The demo code of
    <!--  Width is width  The height is height  The content is content  Arrange the settings horizontally   Need to use HorizontalAlignment  Arrange the settings vertically   Need to use VerticalAlignment  Margin   Use Margin  Four Numbers   The corresponding directions are   Top left, bottom right , A number   Represents the outer margin in all directions   Two figures   Represent the   about   Up and down  -->
        <Label Width="180" Height="30" Content=" I am a label Control " HorizontalAlignment="Right" VerticalAlignment="Top" Margin="0,10" FontSize="18" Foreground="Blue"/>
TextBlock The demo code of
        <!-- 1.TextBlock  Set up text Content   If there is text in the label   It will be added to text After the content  2. If you want to wrap lines   Can be in Textblock Inside the double label   add LineBreak label   After that, the content will wrap  -->
        <TextBlock Text=" I am a TextBlock33" FontSize="30" FontWeight="Light" Foreground="Red">
             I am text one <LineBreak/>
             I am text two <LineBreak/>
             I am text three
        </TextBlock>
Button The demo code of
<Button Width="100" Height="30" HorizontalAlignment="Left" VerticalAlignment="Top" Content=" I'm a button " Margin="20,20,0,0" Background="Teal" BorderThickness="5,0,10,0" BorderBrush="Transparent" Foreground="White" Click="Button_Click_1" MouseMove="Button_MouseMove" >
Border The demonstration effect of

 <!-- BorderThickness The border width defaults to 0  Set a parameter directly   It represents the width around  BorderThickness  When there are four parameters   Each represents the left   above   On the right   Underside   We set the border color plus the border width   To accurately display the effect of the border   If we need to set the radian of the angle   Need to use CornerRadius attribute  -->
        <Border Width="200" Height="80" Background="LightBlue" BorderBrush="Red" BorderThickness="1,1,2,1" CornerRadius="15">

            <!--<Label HorizontalAlignment="Center" VerticalAlignment="Center" FontSize="20" Foreground="White"> I am a label1</Label>-->

            <Button Background="Transparent" FontSize="20" Foreground="White" Content=" I'm a button " Click="Button_Click" BorderBrush="Transparent">
            </Button>

            <!--<Grid> <Label FontSize="20" Foreground="White"> I am a label1</Label> <Label HorizontalAlignment="Center" VerticalAlignment="Center" FontSize="20" Foreground="White"> I am a label2</Label> </Grid>-->

        </Border>
RadioButton The demonstration effect of 
<!-- radioButton  If you need to achieve the effect of grouping  1.  Use layout containers to nest  ( Such as grid /stackPanel wait ) 2.  have access to groupName Distinguish   grouping  -->
        <RadioButton Content=" male " GroupName="sex" Margin="10,100" FontSize="20" Foreground="red" VerticalAlignment="Top" HorizontalAlignment="Left" ></RadioButton>
        <RadioButton Content=" Woman " GroupName="sex" Margin="80,100" FontSize="20" Foreground="red" VerticalAlignment="Top" HorizontalAlignment="Left" ></RadioButton>


        <RadioButton Content=" Chinese language and literature " GroupName="course" FontSize="20" Foreground="Blue" VerticalAlignment="Top" HorizontalAlignment="Left" ></RadioButton>
        <RadioButton Content=" mathematics " GroupName="course" Margin="70,0" FontSize="20" Foreground="Blue" VerticalAlignment="Top" HorizontalAlignment="Left" ></RadioButton>
        <RadioButton Content=" history " GroupName="course" Margin="140,0" FontSize="20" Foreground="Blue" VerticalAlignment="Top" HorizontalAlignment="Left" ></RadioButton>
        <RadioButton Content=" Foreign Languages " GroupName="course" Margin="210,0" FontSize="20" Foreground="Blue" VerticalAlignment="Top" HorizontalAlignment="Left" ></RadioButton>
CheckBox Demonstration effect

<Grid Name="gridMain">

        <Label VerticalAlignment="Top" Width="120" FontSize="20" Background="Orange" Foreground="White"> My course selection :</Label>

        <CheckBox Content="C Language " Margin="300,50" VerticalAlignment="Top" HorizontalAlignment="Left" Width="120" Height="30" FontSize="18" BorderBrush="blue"></CheckBox>

        <CheckBox Content=" The principle of computer organization " Margin="300,80" VerticalAlignment="Top" HorizontalAlignment="Left" Width="150" Height="30" FontSize="18" IsChecked="True"></CheckBox>

        <CheckBox Content=" computer network " Margin="300,110" VerticalAlignment="Top" HorizontalAlignment="Left" Width="120" Height="30" FontSize="18"></CheckBox>

        <Button Content=" Get my selected courses " Width="120" Height="30" Click="Button_Click" HorizontalAlignment="Left" Margin="331,182,0,0" VerticalAlignment="Top"/>

    </Grid>
private void Button_Click(object sender, RoutedEventArgs e)
{

    UIElementCollection children = gridMain.Children;
    StringBuilder sbf = new StringBuilder(" My course selection is :");
    foreach (UIElement item in children)
    {

        if(item is CheckBox && (item as CheckBox).IsChecked.Value)
        {

            sbf.Append((item as CheckBox).Content+",");
        }
    }
    MessageBox.Show(sbf.ToString());
 }
ToolTip The demo code of
   <!-- 1. Only controls inherit FrameworkElement  There are ToolTip attribute  2.  If ToolTip Labels are used alone   Need to embed elements ToolTip Within the properties  -->
        <Label HorizontalAlignment="Left" FontSize="20"> I am a label
            <Label.ToolTip>
                <ToolTip >
                    <Grid>
                        <TextBlock>1000000001.</TextBlock>
                        <TextBlock>1000000002.</TextBlock>
                        <TextBlock>1000000003.</TextBlock>
                    </Grid>
                </ToolTip>
            </Label.ToolTip>
        </Label>

        <Button Width="180" Height="50" HorizontalAlignment="Left" FontSize="20" Margin="200,10"> I am a button
            <Button.ToolTip>
                <TextBlock>Useful information goes here.</TextBlock>
            </Button.ToolTip>
        </Button>
GroupBox The demo code of

<Window x:Class="Ken.Wpf.Controls.WindowGroupBox" xmlns="http://schemas.microsoft.com/winfx/2006/xaml/presentation" xmlns:x="http://schemas.microsoft.com/winfx/2006/xaml" xmlns:d="http://schemas.microsoft.com/expression/blend/2008" xmlns:mc="http://schemas.openxmlformats.org/markup-compatibility/2006" xmlns:local="clr-namespace:Ken.Wpf.Controls" mc:Ignorable="d" Title="WindowGroupBox" Height="450" Width="800">

    <Window.Resources>
        <ControlTemplate x:Key="myGroupBox" TargetType="GroupBox">
            <Grid>
                <Grid.RowDefinitions>
                    <RowDefinition Height="40"></RowDefinition>
                    <RowDefinition Height="*"></RowDefinition>
                </Grid.RowDefinitions>

                <Border Grid.Row="0" Background="Orange">
                    <Label Foreground="Red" FontWeight="Bold" FontSize="18">
                         I'm a title
                    </Label>
                </Border>

                <Border Grid.Row="1" Background="AliceBlue">
                    <StackPanel>
                        <TabControl Name="myTabControl" TabStripPlacement="Top" Margin="0, 0, 0, 10" Height="350" >
                            <TabItem>
                                <TabItem.Header>_Job Info</TabItem.Header>
                                <StackPanel>
                                    <TextBlock>Select a job</TextBlock>
                                    <ListBox Name ="job" >
                                        <ListBoxItem IsSelected="true">Programmer</ListBoxItem>
                                        <ListBoxItem>Tester</ListBoxItem>
                                        <ListBoxItem>Writer</ListBoxItem>
                                        <ListBoxItem>Manager</ListBoxItem>
                                    </ListBox>
                                </StackPanel>
                            </TabItem>
                        </TabControl>
                    </StackPanel>
                </Border>
            </Grid>
        </ControlTemplate>
    </Window.Resources>


    <Grid>

        <Grid.RowDefinitions>
            <RowDefinition Height="*"></RowDefinition>
            <RowDefinition Height="*"> </RowDefinition>
        </Grid.RowDefinitions>

        <!-- 1. We need to pay attention to Header Use of attributes  2.groupbox The content of can be combined freely  3. We use custom templates ==》 We are in Window.Resources It uses ControlTemplate  You need to specify the key  Action template needs to be specified  -->
        <GroupBox Template="{StaticResource myGroupBox}" Grid.Row="0">
        </GroupBox>

        <GroupBox Template="{StaticResource myGroupBox}" Grid.Row="1">
        </GroupBox>

        <!--<GroupBox Header="GroupBox"/>-->

        <!--<GroupBox > <GroupBox.Header> <Label Foreground="blue"> This is groupbox The title of the </Label> </GroupBox.Header> <StackPanel> <TabControl Name="myTabControl" TabStripPlacement="Top" Margin="0, 0, 0, 10" Height="350" > <TabItem Name="PersonalInfo"> <TabItem.Header>_Personal Info</TabItem.Header> <StackPanel> <TextBlock>Employee</TextBlock> <TextBlock>Select your name</TextBlock> <ListBox Name="empName" > <ListBoxItem IsSelected="true">Esther</ListBoxItem> <ListBoxItem>George</ListBoxItem> <ListBoxItem>Alan</ListBoxItem> <ListBoxItem>Eric</ListBoxItem> </ListBox> </StackPanel> </TabItem> <TabItem> <TabItem.Header>_Job Info</TabItem.Header> <StackPanel> <TextBlock>Select a job</TextBlock> <ListBox Name ="job" > <ListBoxItem IsSelected="true">Programmer</ListBoxItem> <ListBoxItem>Tester</ListBoxItem> <ListBoxItem>Writer</ListBoxItem> <ListBoxItem>Manager</ListBoxItem> </ListBox> </StackPanel> </TabItem> <TabItem Name="Skill"> <TabItem.Header>_Skill</TabItem.Header> <StackPanel> <TextBlock> Select your strongest skill </TextBlock> <ListBox Name="skills" > <ListBoxItem IsSelected="true">C#</ListBoxItem> <ListBoxItem>Visual Basic</ListBoxItem> <ListBoxItem>.NET</ListBoxItem> <ListBoxItem>JScript</ListBoxItem> </ListBox> </StackPanel> </TabItem> <TabItem Name="Summary" > <TabItem.Header>Su_mmary</TabItem.Header> <StackPanel> <TextBlock Name="emp"/> <TextBlock Name="ejob"/> <TextBlock Name="eskill"/> </StackPanel> </TabItem> </TabControl> <Button Content="Show Summary" /> </StackPanel> </GroupBox>-->

    </Grid>
</Window>
Expander The demo code of

<!-- 1. If the content needs to be Expander Keep the same width and height   We need to set the horizontal and vertical arrangement   It needs to be set to the non stretched state  2. To make the control Expander Normal work , ExpandDirection Set to Down or Up when , We can't set its height . ExpandDirection Set to Left or Right when , We can't set its width . -->

        <Expander Header=" Folding frame " FontSize="18" Foreground="Blue" IsExpanded="True" BorderThickness="1" BorderBrush="Green" ExpandDirection="Down" VerticalAlignment="Top" HorizontalAlignment="Center" Height="100">
            <StackPanel Orientation="Vertical">
                <CheckBox FontSize="18">C#</CheckBox>
                <CheckBox FontSize="18">JAVA</CheckBox>
                <CheckBox FontSize="18">C++</CheckBox>
            </StackPanel>
        </Expander>
Frame The demo code of
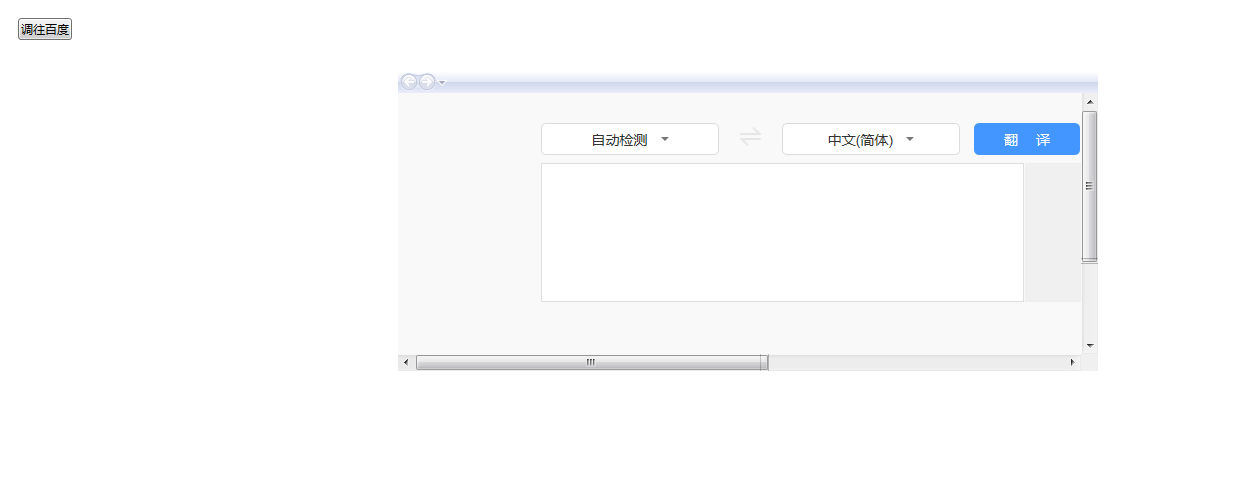
        <Button Click="Button_Click" Content=" Transfer to Baidu " HorizontalAlignment="Left" Margin="230,27,0,0" VerticalAlignment="Top"/>

        <Frame Name="myFrame" Source="https://fanyi.baidu.com/" VerticalAlignment="Top" HorizontalAlignment="Center" Width="700" Height="300" Margin="30,80" NavigationUIVisibility="Visible" LoadCompleted="myFrame_LoadCompleted"></Frame>
private void Button_Click(object sender, RoutedEventArgs e)
{

    //1. Use source
    //this.myFrame.Source = new Uri("https://www.bilibili.com/", UriKind.Absolute);

    //2. Use Navigate Jump
    // Use   object
    //MyPage my = new MyPage();
    //this.myFrame.Navigate(my);
    // Use uri
    //this.myFrame.Navigate(new Uri("https://www.bilibili.com/", UriKind.Absolute));

    //3. Use Navigate Jump   Portability parameter
    MyPage my = new MyPage();
    this.myFrame.Navigate(my," I am a parameter ");
}

private void myFrame_LoadCompleted(object sender, System.Windows.Navigation.NavigationEventArgs e)
{

    object extraData = e.ExtraData;
    Console.WriteLine(extraData);
 }
TextBox The demo code of

<TextBox Name="myTextBox" FontSize="30" VerticalAlignment="Top" HorizontalAlignment="Left" BorderBrush="Orange" SelectionBrush="Teal">
            I am a text control
        </TextBox>
        <Button Content="Button" HorizontalAlignment="Left" Margin="142,118,0,0" VerticalAlignment="Top" Height="51" Width="116" Click="Button_Click"/>
RichTextBox The demo code of
        <RichTextBox Name="richTB">
            <FlowDocument>
                <Paragraph TextIndent="20">
                     take  HTML  Paste the content into  RichTextBox  Unexpected behavior may occur in the application , because  RichTextBox  Use  RTF  Format , Instead of using it directly  HTML  Format .
 Text always wraps  .
                    <LineBreak/>
                    RichTextBox  If you don't want text wrapping , Please put  PageWidth on FlowDocument  Set to be greater than the width  RichTextBox.  however , When the page width is reached , The text will still wrap .
                </Paragraph>
                <Paragraph>
                    <!--<Label>111</Label> <CheckBox>1112</CheckBox> <GroupBox Header="GroupBox"> </GroupBox>-->
                    <Run>Paragraph 2</Run>
                </Paragraph>

                <!--BlockUIContainer  Block container   Only one child element is supported   If you need more than one label   You need to embed a layout container on the outermost side -->
                <BlockUIContainer>
                    <StackPanel>
                        <Label>Paragraph 2</Label>
                        <CheckBox>1112</CheckBox>
                    </StackPanel>
                </BlockUIContainer>

                <!-- Implement mathematical formulas  x Of 4 Power +y Of 3 Power  = 99 -->
                <Paragraph FontSize="50">
                    <Run>x</Run>
                    <InlineUIContainer >
                        <Label Margin="-10,0,0,0" FontSize="30">4</Label>
                    </InlineUIContainer>
                    <Run>+</Run>
                    <Run>y</Run>
                    <InlineUIContainer >
                        <Label Margin="-10,0,0,0" FontSize="30">3</Label>
                    </InlineUIContainer>
                    <Run>=</Run>
                    <Run>99</Run>
                </Paragraph>

            </FlowDocument>
        </RichTextBox>
ComboBox The demo code of
using Ken.Wpf.Entity;
using System;
using System.Collections.Generic;
using System.Text;
using System.Windows;
using System.Windows.Controls;
using System.Windows.Data;
using System.Windows.Documents;
using System.Windows.Input;
using System.Windows.Media;
using System.Windows.Media.Imaging;
using System.Windows.Shapes;

namespace Ken.Wpf.Controls
{

/// <summary>
/// WindowComboBox.xaml  Interaction logic of
/// </summary>
public partial class WindowComboBox : Window
{

public WindowComboBox()
{

InitializeComponent();
}

private void Window_Loaded(object sender, RoutedEventArgs e)
{

//1. Use items
/*this.comboBox1.Items.Add("C#"); this.comboBox1.Items.Add("Java"); this.comboBox1.Items.Add("Python");*/

//2. Use DataContext  Binding
List<ClassInfo> list = new List<ClassInfo>();
list.Add(new ClassInfo() {
     ClassName = " Class one, grade three ", Code = "301" });
list.Add(new ClassInfo() {
     ClassName = " Class 2, senior 3 ", Code = "302" });
list.Add(new ClassInfo() {
     ClassName = " Class three, grade three ", Code = "303" });

/*this.comboBox1.DataContext = list; this.comboBox1.DisplayMemberPath = "ClassName"; this.comboBox1.SelectedValuePath = "Code";*/


//3. Use ItemsSource  Binding
this.comboBox1.ItemsSource = list;
this.comboBox1.DisplayMemberPath = "ClassName";
this.comboBox1.SelectedValuePath = "Code";

}

private void Button_Click(object sender, RoutedEventArgs e)
{

List<ClassInfo> lists = this.comboBox1.ItemsSource as List<ClassInfo>;

lists.RemoveAt(0);
this.comboBox1.ItemsSource = null;
this.comboBox1.ItemsSource = lists;
}
}
}

------
namespace Ken.Wpf.Entity
{

class VacationSpots : ObservableCollection<string>
{

public VacationSpots()
{


Add("Spain");
Add("France");
Add("Peru");
Add("Mexico");
Add("Italy");
}
}
}

------
using System;
using System.Collections.Generic;
using System.Text;

namespace Ken.Wpf.Entity
{

public class ClassInfo
{

    public string ClassName {
     get; set; }

    public string Code {
     get; set; }

}
}
       <!--1. Use static resources -->
        <!--<StackPanel Grid.Column="0" Grid.Row="6"> <StackPanel.Resources> <src:VacationSpots x:Key="myVacations"/> </StackPanel.Resources> <ComboBox Name="comboBox1" ItemsSource="{StaticResource myVacations}" Text="My Cities" IsEditable="True" IsReadOnly="False"/> <TextBlock Text="{Binding ElementName=comboBox1, Path=SelectedItem}"/> </StackPanel>-->


        <!--2. Write in hard code -->
        <!--<ComboBox Name="comboBox1" Text="My Cities" IsEditable="True" IsReadOnly="False" Width="120" Height="30" VerticalAlignment="Top"> <ComboBoxItem> Options 1</ComboBoxItem> <ComboBoxItem> Options 2</ComboBoxItem> <ComboBoxItem> Options 3</ComboBoxItem> <Label> Options 4</Label> <CheckBox> grade </CheckBox> <CheckBox> Gender </CheckBox> </ComboBox>-->

        <!--3. Use code to write dynamically -->
        <ComboBox Name="comboBox1" Text="My Cities" IsEditable="True" ItemsSource="{Binding}" IsReadOnly="False" Width="120" Height="30" VerticalAlignment="Top">
        </ComboBox>

        <Button Click="Button_Click" Content=" Remove an item " HorizontalAlignment="Left" Margin="362,52,0,0" VerticalAlignment="Top"/>
Menu The demo code of
<Window x:Class="Ken.Wpf.Controls.WindowMenu"
        xmlns="http://schemas.microsoft.com/winfx/2006/xaml/presentation"
        xmlns:x="http://schemas.microsoft.com/winfx/2006/xaml"
        xmlns:d="http://schemas.microsoft.com/expression/blend/2008"
        xmlns:mc="http://schemas.openxmlformats.org/markup-compatibility/2006"
        xmlns:local="clr-namespace:Ken.Wpf.Controls"
        mc:Ignorable="d"
        Title="WindowMenu" Height="450" Width="800">

    <Window.Resources>

        <!--Control colors.-->
        <Color x:Key="WindowColor">#FFE8EDF9</Color>
        <Color x:Key="ContentAreaColorLight">#FFC5CBF9</Color>
        <Color x:Key="ContentAreaColorDark">#FF7381F9</Color>

        <Color x:Key="DisabledControlLightColor">#FFE8EDF9</Color>
        <Color x:Key="DisabledControlDarkColor">#FFC5CBF9</Color>
        <Color x:Key="DisabledForegroundColor">#FF888888</Color>

        <Color x:Key="SelectedBackgroundColor">#FFC5CBF9</Color>
        <Color x:Key="SelectedUnfocusedColor">#FFDDDDDD</Color>

        <Color x:Key="ControlLightColor">White</Color>
        <Color x:Key="ControlMediumColor">#FF7381F9</Color>
        <Color x:Key="ControlDarkColor">#FF211AA9</Color>

        <Color x:Key="ControlMouseOverColor">#FF3843C4</Color>
        <Color x:Key="ControlPressedColor">#FF211AA9</Color>


        <Color x:Key="GlyphColor">#FF444444</Color>
        <Color x:Key="GlyphMouseOver">sc#1, 0.004391443, 0.002428215, 0.242281124</Color>

        <!--Border colors-->
        <Color x:Key="BorderLightColor">#FFCCCCCC</Color>
        <Color x:Key="BorderMediumColor">#FF888888</Color>
        <Color x:Key="BorderDarkColor">#FF444444</Color>

        <Color x:Key="PressedBorderLightColor">#FF888888</Color>
        <Color x:Key="PressedBorderDarkColor">#FF444444</Color>

        <Color x:Key="DisabledBorderLightColor">#FFAAAAAA</Color>
        <Color x:Key="DisabledBorderDarkColor">#FF888888</Color>

        <Color x:Key="DefaultBorderBrushDarkColor">Black</Color>

        <!--Control-specific resources.-->
        <Color x:Key="HeaderTopColor">#FFC5CBF9</Color>
        <Color x:Key="DatagridCurrentCellBorderColor">Black</Color>
        <Color x:Key="SliderTrackDarkColor">#FFC5CBF9</Color>

        <Color x:Key="NavButtonFrameColor">#FF3843C4</Color>

        <LinearGradientBrush x:Key="MenuPopupBrush"
                     EndPoint="0.5,1"
                     StartPoint="0.5,0">
            <GradientStop Color="{DynamicResource ControlLightColor}"
                Offset="0" />
            <GradientStop Color="{DynamicResource ControlMediumColor}"
                Offset="0.5" />
            <GradientStop Color="{DynamicResource ControlLightColor}"
                Offset="1" />
        </LinearGradientBrush>

        <LinearGradientBrush x:Key="ProgressBarIndicatorAnimatedFill"
                     StartPoint="0,0"
                     EndPoint="1,0">
            <LinearGradientBrush.GradientStops>
                <GradientStopCollection>
                    <GradientStop Color="#000000FF"
                    Offset="0" />
                    <GradientStop Color="#600000FF"
                    Offset="0.4" />
                    <GradientStop Color="#600000FF"
                    Offset="0.6" />
                    <GradientStop Color="#000000FF"
                    Offset="1" />
                </GradientStopCollection>
            </LinearGradientBrush.GradientStops>
        </LinearGradientBrush>


        <Style x:Key="{x:Type Menu}"
       TargetType="{x:Type Menu}">
            <Setter Property="OverridesDefaultStyle"
          Value="True" />
            <Setter Property="SnapsToDevicePixels"
          Value="True" />
            <Setter Property="Template">
                <Setter.Value>
                    <ControlTemplate TargetType="{x:Type Menu}">
                        <Border BorderThickness="1">
                            <Border.BorderBrush>
                                <LinearGradientBrush StartPoint="0,0"
                                 EndPoint="0,1">
                                    <LinearGradientBrush.GradientStops>
                                        <GradientStopCollection>
                                            <GradientStop Color="{DynamicResource BorderLightColor}"
                                Offset="0.0" />
                                            <GradientStop Color="{DynamicResource BorderDarkColor}"
                                Offset="1.0" />
                                        </GradientStopCollection>
                                    </LinearGradientBrush.GradientStops>
                                </LinearGradientBrush>

                            </Border.BorderBrush>
                            <Border.Background>
                                <LinearGradientBrush EndPoint="0.5,1"
                                 StartPoint="0.5,0">
                                    <GradientStop Color="{DynamicResource ControlLightColor}"
                            Offset="0" />
                                    <GradientStop Color="Teal"
                            Offset="1" />
                                </LinearGradientBrush>
                            </Border.Background>
                            <StackPanel ClipToBounds="True"
                      Orientation="Horizontal"
                      IsItemsHost="True" />
                        </Border>
                    </ControlTemplate>
                </Setter.Value>
            </Setter>
        </Style>

        <!--1. Using routing UI Yes Command Set up -->
        <RoutedUICommand x:Key="myCmd" ></RoutedUICommand>
    </Window.Resources>

    <!--2. Use command binding  CommandBind-->
    <Window.CommandBindings>
        <CommandBinding  Command="{StaticResource myCmd}"  Executed="CommandBinding_Executed"></CommandBinding>
    </Window.CommandBindings>

    <!--3. Use input binding  InputBinding-->
    <Window.InputBindings>
        <KeyBinding Command="{StaticResource myCmd}" Gesture="Ctrl+8" ></KeyBinding>
    </Window.InputBindings>

    <Grid>
        <Menu Height="25"  VerticalAlignment="Top" >
            <MenuItem Header=" In and out warehouse management " Foreground="White" FontFamily=" Chinese Xingkai " Height="21" Command="{
    StaticResource

myCmd}"/>
            <MenuItem Header=" Leave management " Foreground="White" FontFamily=" Chinese Xingkai " Height="21"/>
            <MenuItem Header=" The attendance management " Foreground="White" FontFamily=" Chinese Xingkai " Height="21"/>
            <MenuItem Header=" Commodity management " Foreground="White" FontFamily=" Chinese Xingkai " Height="21">
                <MenuItem Header=" Unit management " Foreground="Black" FontFamily=" Chinese Xingkai " Height="21"></MenuItem>
                <MenuItem Header=" Category management " Foreground="Black" FontFamily=" Chinese Xingkai " Height="21" InputGestureText="Ctrl
+8"></MenuItem>
            </MenuItem>
        </Menu>

    </Grid>
</Window>
 private void CommandBinding_Executed(object sender, ExecutedRoutedEventArgs e)
        {

            MessageBox.Show("Command!!!");
        }
<Menu Name="menu1" VerticalAlignment="Top" Height="30" Background="Teal" ItemsSource="{Binding}">

  <Menu.ItemContainerStyle>
    <Style TargetType="{x:Type MenuItem}"> <Setter Property="Command" Value="{Binding ICommand}"></Setter> </Style>
  </Menu.ItemContainerStyle>
  <Menu.ItemTemplate>
    <HierarchicalDataTemplate DataType="{x:Type et:MenuInfo}" ItemsSource="{Binding SubMenus}">
      <TextBlock Text="{Binding MenuName}"></TextBlock>
    </HierarchicalDataTemplate>
  </Menu.ItemTemplate>
</Menu>
</Grid>
using Ken.Wpf.Commands;
using System;
using System.Collections.Generic;
using System.Text;
using System.Windows;
using System.Windows.Input;
namespace Ken.Wpf.Entity
{

    public class MenuInfo
    {


        /// <summary>
        ///  Menu name
        /// </summary>
        public string MenuName {
     get; set; }

        /// <summary>
        ///  Sub menu
        /// </summary>
        public List<MenuInfo> SubMenus {
     get; set; }


        /// <summary>
        /// Command
        /// </summary>
        public ICommand ICommand {
     get {

                return new MyCommand((o)=> {

                    MessageBox.Show(MenuName);
                });
            }
        }

        public MenuInfo(string menuName, MenuInfo parentMenu)
        {

            MenuName = menuName;
            // Mount the current menu under the parent menu
            if (parentMenu != null)
            {

                List<MenuInfo> lists = parentMenu.SubMenus ?? new List<MenuInfo>();
                lists.Add(this);
                parentMenu.SubMenus = lists;
            }
        }
    }
}

-------------------------------------------------------------------------
using System;
using System.Collections.Generic;
using System.Text;
using System.Windows.Input;

namespace Ken.Wpf.Commands
{

    /// <summary>
    ///  Custom implementation ICommand
    /// </summary>
    class MyCommand : ICommand
    {

        public event EventHandler CanExecuteChanged;


        public Action<object> ExecuteAction;


        public MyCommand(Action<object> executeAction)
        {

            ExecuteAction = executeAction;
        }

        public bool CanExecute(object parameter)
        {

            return true;
            //throw new NotImplementedException();
        }

        public void Execute(object parameter)
        {

            if (this.ExecuteAction != null)
            {

                this.ExecuteAction(parameter);
            }
        }
    }
}
ContextMenu The demo code of
        <Label VerticalAlignment="Center" HorizontalAlignment="Center" Content=" I am a Label" FontSize="30">

            <Label.ContextMenu>

                <ContextMenu Name="cm1" ItemsSource="{Binding}">

                    <ContextMenu.ItemContainerStyle>
                        <Style TargetType="{x:Type MenuItem}"> <Setter Property="Command" Value="{Binding ICommand}"></Setter> </Style>
                    </ContextMenu.ItemContainerStyle>
                    <ContextMenu.ItemTemplate>
                        <HierarchicalDataTemplate DataType="{x:Type et:MenuInfo}" ItemsSource="{Binding SubMenus}">
                            <TextBlock Text="{Binding MenuName}"></TextBlock>
                        </HierarchicalDataTemplate>
                    </ContextMenu.ItemTemplate>
                </ContextMenu>

            </Label.ContextMenu>


        </Label>
private void Window_Loaded(object sender, RoutedEventArgs e)
{

    // Set data context
    this.cm1.DataContext = MenuHelper.CreateMenus();
 }
TabControl Demo code
<TabControl>
            <TabItem Header="tab1" FontSize="30">
                <Grid>
                    <Label> I am a tab1 The content of </Label>
                    <TextBox Name="textBox1" Width="50"/>
                </Grid>
            </TabItem>
            <TabItem FontSize="30">
                <TabItem.Header>
                    <Grid>
                        <Label> tab2</Label>
                        <!--<CheckBox IsChecked="True" FontSize="30"></CheckBox>-->
                    </Grid>
                </TabItem.Header>
                <Label> I am a tab2 The content of </Label>
            </TabItem>
            <TabItem Header="tab3" FontSize="30">
                <Label> I am a tab3 The content of </Label>
            </TabItem>


        </TabControl>
ToolBar+ToolBarTray Demo code
        <!-- ToolBarTray Of Orientation The default is horizontal  -->
        <ToolBarTray Orientation="Horizontal" Margin="0,0,0,-115">
            <!-- ToolBar Properties of  Band The default is 0 BandIndex The default is also 0 Band identical   The taskbars are all in the same column   or   The same line  Band The bigger the value is.   The taskbar is farther back  BandIndex The bigger the   In the same column   or   In the same line   The farther back he is  -->
            <ToolBar VerticalAlignment="Top" FontSize="30" Band="3" BandIndex="1">
                <Label>
                    Label1
                </Label>
                <Button> Button 1</Button>
                <Separator/>
                <Button> Button 2</Button>
                <Button> Button 3</Button>
                <Separator/>
                <Button> Button 4</Button>
                <Image Source="../Images/touxiang.jpg" Width="50" Height="50"></Image>
                <!--<TextBlock>textBlock1</TextBlock>-->
            </ToolBar>


            <ToolBar VerticalAlignment="Top" FontSize="30" Band="3" BandIndex="2" >
                <Button> Button 1</Button>
                <Separator/>
                <Button> Button 2</Button>
                <Button> Button 3</Button>
            </ToolBar>
        </ToolBarTray>
ListBox Demo code
private void Window_Loaded(object sender, RoutedEventArgs e)
{

    // Analog data
    List<string> list = new List<string>();
    list.Add("1001");
    list.Add("1002");
    list.Add("1003");
    list.Add("1004");

    this.listbox1.DataContext = list;
        }
     <!--  Using dynamic binding   Render ListBoxItem -->
        <ListBox Name="listbox1" FontSize="30" SelectionMode="Extended" ItemsSource="{Binding}">
            <ListBox.ItemTemplate>
                <DataTemplate >
                    <TextBlock Text="{Binding}"></TextBlock>
                </DataTemplate>
            </ListBox.ItemTemplate>
        </ListBox>
DataGrid Demo code
<DataGrid FontSize="30" Name="grid1" ItemsSource="{Binding}" AutoGenerateColumns="False" CanUserAddRows="False" GridLinesVisibility="Vertical" >
  <DataGrid.Columns>
    <DataGridTextColumn Header=" User name " Binding="{Binding Name}"></DataGridTextColumn>
    <DataGridTextColumn Header=" Age " Binding="{Binding Age}"></DataGridTextColumn>
    <!--<DataGridCheckBoxColumn Header=" Check the column "></DataGridCheckBoxColumn>-->
    <DataGridComboBoxColumn x:Name="depts" Header=" department " SelectedValueBinding="{Binding DeptId}">

    </DataGridComboBoxColumn>

    <!-- Custom template columns -->
    <DataGridTemplateColumn>
      <!-- Custom column headers -->
      <DataGridTemplateColumn.Header>
        <TextBlock> list 4</TextBlock>
      </DataGridTemplateColumn.Header>
      <!-- Custom cells -->
      <DataGridTemplateColumn.CellTemplate>
        <DataTemplate>
          <TextBlock Text="{Binding Name}"></TextBlock>
        </DataTemplate>
      </DataGridTemplateColumn.CellTemplate>
    </DataGridTemplateColumn>
  </DataGrid.Columns>

        </DataGrid>
TreeView Demo code
private void Window_Loaded(object sender, RoutedEventArgs e)
{

    // Set up treeView1 Data context for
    this.treeView1.DataContext = MenuHelper.CreateMenus();

        }
        <!-- Hard code   Write dead   Trees -->
        <!--<TreeView FontSize="30" > <TreeViewItem Header=" department " IsExpanded="True"> <TreeViewItem Header=" The sales department " > <TreeViewItem Header=" sales 1 Ministry "> </TreeViewItem> <TreeViewItem Header=" sales 2 Ministry "> </TreeViewItem> </TreeViewItem> <TreeViewItem Header=" Finance Department "> </TreeViewItem> <TreeViewItem Header=" Technology Department "> </TreeViewItem> <TreeViewItem Header=" The personnel department "> </TreeViewItem> </TreeViewItem> </TreeView>-->


        <TreeView FontSize="30" Name="treeView1" ItemsSource="{Binding}" >
            <!--<TreeView.ItemContainerStyle> <Style TargetType="{x:Type MenuItem}"> <Setter Property="Command" Value="{Binding ICommand}"></Setter> </Style> </TreeView.ItemContainerStyle>-->
            <TreeView.ItemTemplate>
                <HierarchicalDataTemplate DataType="{x:Type et:MenuInfo}" ItemsSource="{Binding SubMenus}">
                    <StackPanel Orientation="Horizontal">
                        <Image Source="../Images/touxiang.jpg" Width="50" Height="50"></Image>
                        <TextBlock Text="{Binding MenuName}"></TextBlock>
                    </StackPanel>
                </HierarchicalDataTemplate>
            </TreeView.ItemTemplate>

        </TreeView>
Grid Demo code
 <Grid ShowGridLines="True">

        <!-- Custom columns -->
        <Grid.ColumnDefinitions>
            <ColumnDefinition Width="200"></ColumnDefinition>
            <ColumnDefinition Width="500"></ColumnDefinition>
            <ColumnDefinition></ColumnDefinition>
        </Grid.ColumnDefinitions>

        <!-- Custom lines -->
        <Grid.RowDefinitions>
            <RowDefinition Height="100"></RowDefinition>
            <RowDefinition Height="200"></RowDefinition>
            <RowDefinition></RowDefinition>
            <RowDefinition></RowDefinition>
        </Grid.RowDefinitions>


        <TextBlock Grid.Row="1" Grid.Column="0"> I am a TextBlock</TextBlock>


        <TabControl Grid.Row="1" Grid.Column="1">
            <TabItem Header="tab1"></TabItem>
            <TabItem Header="tab2"></TabItem>
            <TabItem Header="tab3"></TabItem>

        </TabControl>

    </Grid>
StackPanel Demo code
<StackPanel Orientation="Horizontal" Opacity="0.5">
  <Label Width="180" Height="30" Content=" I am a label Control " VerticalAlignment="Top" Margin="0,10" FontSize="18" Foreground="Blue"/>
  <Label Width="180" Height="30" Content=" I am a label Control " VerticalAlignment="Top" Margin="0,10" FontSize="18" Foreground="Blue"/>

  <TextBlock> I am a TextBlock</TextBlock>

  <TabControl Grid.Row="1" Grid.Column="1">
    <TabItem Header="tab1"></TabItem>
    <TabItem Header="tab2"></TabItem>
    <TabItem Header="tab3"></TabItem>

  </TabControl>
        </StackPanel>
DockPanel Demo code
        <DockPanel Background="Beige" LastChildFill="True">

            <!--<DockPanel DockPanel.Dock="Left" Background="Red" Width="50"></DockPanel> <DockPanel DockPanel.Dock="Left" Background="Red" Width="50"></DockPanel> <DockPanel DockPanel.Dock="Left" Background="Red" Width="50"></DockPanel> <DockPanel DockPanel.Dock="Left" Background="Green" Width="200"></DockPanel>-->

            <StackPanel DockPanel.Dock="Left" Background="Red" Width="50"></StackPanel>
            <StackPanel DockPanel.Dock="Top" Background="Black" Height="100"></StackPanel>
            <StackPanel DockPanel.Dock="Bottom" Background="Green" Height="100"></StackPanel>
            <StackPanel DockPanel.Dock="Right" Background="White" Width="100"></StackPanel>

            <DockPanel DockPanel.Dock="Right" Background="Purple" LastChildFill="False" >
                <!--<DockPanel DockPanel.Dock="Right" Background="Teal" Width="30"> </DockPanel>-->
            </DockPanel>
        </DockPanel>
WrapPanel Demo code
 <!-- WrapPanel Focus on mastering  1. It is to control ( Beyond the width or height ) Line break , It is not true that the contents of the control are wrapped  2.Orientation  The default is horizontal  -->
        <WrapPanel Width="700" Orientation="Vertical">
            <!--<Label FontSize="20"> Position the child elements from left to right </Label> <Label FontSize="20">, Switch the content to the next line at the edge of the containing box .</Label>-->
            <StackPanel Width="300" Height="100" Background="Teal"></StackPanel>
            <StackPanel Width="300" Height="100" Background="Teal" Orientation="Vertical">
                <Label FontSize="20"> Position the child elements from left to right </Label>
                <Label FontSize="20">, Switch the content to the next line at the edge of the containing box .</Label>
            </StackPanel>
            <StackPanel Width="300" Height="100" Background="Red">

            </StackPanel>

        </WrapPanel>
Canvas Demo code

<Canvas Width="500" Height="500" >

            <StackPanel Width="100" Height="100" Background="Red" Canvas.Top="50" Canvas.Left="200"></StackPanel>
            <StackPanel Width="100" Height="100" Background="Green" Canvas.Top="250" Canvas.Left="200"></StackPanel>
            <StackPanel Width="100" Height="100" Background="Yellow" Canvas.Top="150" Canvas.Left="95"></StackPanel>
            <WrapPanel Width="100" Height="100" Background="Black" Canvas.Top="150" Canvas.Left="305"></WrapPanel>

            <WrapPanel Width="100" Height="100" Background="Purple" Canvas.Bottom="80" Canvas.Right="80"></WrapPanel>
        </Canvas>
Calendar Demo code
<Calendar SelectionMode="MultipleRange" DisplayDate="2022-01-01" SelectedDate="2022-01-01" DisplayDateStart="2022-01-01" DisplayDateEnd="2022-03-01">

        </Calendar>
Image Demo code
 <!-- Source Writing  1. Relative paths   for example :../Images/avatar.png 【 Images are embedded in resources or generated into content   You can get 】 2.pack://application:,,, ( This represents the path to get the application )【 Images are embedded in resources or generated into content   You can get 】 3.pack://siteoforigin:,,, ( This represents the path under the site )【 Pictures are generated into content   You can get 】 -->
        <!--<Image Source="../Images/avatar.png" Stretch="Uniform"/>-->
        <!--<Image Source="pack://application:,,,/Images/avatar.png" Stretch="Uniform"/>-->
        <!--<Image Source="pack://siteoforigin:,,,/Images/avatar.png" Stretch="Uniform"/>-->


        <!-- 2. Implement a specific text background ( picture ) -->

        <TextBlock Background="Orange" Width="300" Height="80" FontSize="60pt" FontFamily=" Chinese Xingkai " TextAlignment="Center" VerticalAlignment="Center">

            <TextBlock.Foreground>
                <ImageBrush ImageSource="../Images/avatar.png" TileMode="FlipX" Viewport="0,0,30,30" ViewportUnits="Absolute">

                </ImageBrush>
            </TextBlock.Foreground>
            Text
        </TextBlock>
ProgressBar Demo code
        <!--<ProgressBar Name="pro" Foreground="Blue" Background="AliceBlue" Width="300" Minimum="10" Maximum="100" IsIndeterminate="False" Orientation="Vertical" Margin="250,182,250,83" />-->

        <ProgressBar Width="300" Height="50" Name="progressBar1">
            <!--  Trigger used  (Triggers)  Event trigger (EventTrigger)  Routing events are used ( Bound the load event of the control )  Animation effects are used (DoubleAnimation) -->
            <ProgressBar.Triggers>
                <EventTrigger RoutedEvent="ProgressBar.Loaded">
                    <BeginStoryboard>
                        <Storyboard>
                            <DoubleAnimation Storyboard.TargetName="progressBar1" Storyboard.TargetProperty="Value" From="0" To="100" Duration="1:1:5" />
                        </Storyboard>
                    </BeginStoryboard>
                </EventTrigger>
            </ProgressBar.Triggers>
        </ProgressBar>
Rectangle The demo code of
<Rectangle Stroke="Green" HorizontalAlignment ="Left" VerticalAlignment="Center" StrokeDashArray="2" RadiusX="200" RadiusY="200" StrokeThickness="20" Width="400" Height="400" Margin="20,0">

<Rectangle.Fill>
  <!-- 1.VisualBrush  Use visual brushes  -->
  <!--<VisualBrush> <VisualBrush.Visual> <StackPanel> <TextBlock FontSize="12" HorizontalAlignment="Center"> picture  </TextBlock> <Image Source="../Images/avatar.png" ></Image> </StackPanel> </VisualBrush.Visual> </VisualBrush>-->
  <!-- 2.DrawingBrush  Picture brush  -->
  <DrawingBrush>
    <DrawingBrush.Drawing>
      <!--Rect You have to set   Otherwise, the picture will not be displayed -->
      <ImageDrawing ImageSource="../Images/avatar.png" Rect="0,0,200,200"></ImageDrawing>
    </DrawingBrush.Drawing>
  </DrawingBrush>
</Rectangle.Fill>

</Rectangle>
other
WPF It also includes other programming constructs that enhance properties and events : Dependency properties and Routing events .
Dependency examples :
<DockPanel>
  <Button Background="{DynamicResource MyBrush}" Content="I am gold" Width="200px" Height=" 30px" />

  <DockPanel.Resources>
    <SolidColorBrush x:Key="MyBrush" Color="Gold" />
  </DockPanel.Resources>
</DockPanel>
Routing events :
( Routing refers to the route that network packets are sent to the destination address )
     <StackPanel>
            <StackPanel.Resources>
                <Style TargetType="{x:Type Button}"> <EventSetter Event="Click" Handler="SetColor"/> </Style>
            </StackPanel.Resources>
            <Button>Click me</Button>
            <Button Name="ThisButton" Click="HandleThis">
                Raise event, handle it, use handled=true handler to get it anyway.
            </Button>
        </StackPanel>
private void SetColor(object sender, RoutedEventArgs e)
{

    MessageBox.Show(" Click the button :"+(e.OriginalSource is Button));
}

private void HandleThis(object sender, RoutedEventArgs e)
{

    MessageBox.Show(" Click the button :");
}
WPF Code hiding and XAML
<Page
  xmlns="http://schemas.microsoft.com/winfx/2006/xaml/presentation"
  xmlns:x="http://schemas.microsoft.com/winfx/2006/xaml"
  x:Class="MyNamespace.MyCanvasCodeInline"
>
  <Button Name="button1" Click="Clicked">Click Me!</Button>
  <x:Code><![CDATA[
    void Clicked(object sender, RoutedEventArgs e)
    {

        button1.Content = "Hello World";
    }
  ]]></x:Code>
</Page>
Binding tag extension
Defer attribute values to data bound values , This creates an intermediate expression object and interprets the data context applied to the element and its binding .
Binding expression usage
<object property="{Binding}" .../>

<object property="{Binding bindProp1=value1[, bindPropN=valueN]*}" ... />
<object property="{Binding path}" .../>
<object property="{Binding path[, bindPropN=valueN]*}" .../>
Syntax description
In these grammars , and []* It's not text . They are part of the representation , Used to indicate that zero or more... Can be used bindPropvalue=, Yes , And they are the same as the previous bindPropvalue= There is a separator between pairs .
You can use the attribute settings of the object element instead " Binding properties that can be set using the binding extension " Section Binding attribute . however , This is not True markup extension usage Binding, It just sets CLR General properties of class properties XAML Binding Handle . let me put it another way ,<Binding_bindProp1value1bindPropNvalueN_=“”[=“”]*/>Binding Is the equivalent syntax for attributes of object element usage , Not expressions Binding usage .
- Mode: value Is a constant in an enumeration BindingMode name . for example ,{Binding Mode=OneWay}.
- Path: A string , The path used to describe a data object or a generic object model . The format provides several different conventions , Used to traverse object models that are not adequately described in this topic . see also PropertyPath XAML grammar .
- RelativeSource: And and Mutually exclusive ElementNameSource; Each of these binding attributes represents a specific binding method . see also Data binding Overview . Need nesting Of RelativeSource MarkupExtension Use to specify a value .
- Source: Mutual exclusion and RelativeSource and ElementName; Each of these binding attributes represents a specific binding method . see also Data binding Overview . Nested extensions are required , It usually refers to the object data source in the key resource dictionary StaticResource Mark extension .
- StringFormat: A string , Describes the string format conventions for binding data . This is a relatively advanced binding concept ; see also Reference page for StringFormat.
- XPath: A string , describe XML Data sources XMLDOM The path of . see also Use XMLDataProvider and XPath Query bound to XML data .
Other tag extensions
| attribute | effect |
|---|---|
| StaticResource | By finding a reference to a defined resource , For any XAML Property property provides a value . |
| DynamicResource | By putting any XAML Property the value of a property is deferred to a reference to a defined resource , Provide a value for this attribute . |
| RelativeSource | Specify the properties of the binding source RelativeSource , In order to be in Binding tag extension Use in , Or in setting RelativeSource stay XAML Attributes of the elements created in Binding When using . |
| TemplateBinding | Connect property values in a control template , Make it the value of another property on the templated control . |
| ThemeDictionary | Provides a method for custom control creators or applications that integrate third-party controls , Used to load a topic specific resource dictionary to use when styling controls . |
| ColorConvertedBitmap | Provide a way , Used to specify the bitmap source without embedded configuration file . Color context / The configuration file is created by URI Appoint , And image source URI identical . |
Data binding and custom routing :
Official documents :https://docs.microsoft.com/zh-cn/dotnet/desktop/wpf/data/?view=netdesktop-6.0
Create binding
Some of the concepts discussed in the previous section can be restated as : Use Binding Object to establish binding , And each binding usually has four components : Bind target 、 Target properties 、 Bind the source and the path to the source value to use .
The binding source is bound to the activity of the element DataContext. If the element is not explicitly defined DataContext, Will automatically inherit .
Consider the following example , The binding source object is a named MyData Class , In the class ** Ken.Wpf.Entity** In the namespace . For demonstration purposes ,MyData Has the name ColorName String properties of , Its value is set to “Red”. therefore , This example generates a button with a red background .
<Window x:Class="Ken.Wpf.MainWindow" xmlns="http://schemas.microsoft.com/winfx/2006/xaml/presentation" xmlns:x="http://schemas.microsoft.com/winfx/2006/xaml" xmlns:d="http://schemas.microsoft.com/expression/blend/2008" xmlns:mc="http://schemas.openxmlformats.org/markup-compatibility/2006" xmlns:local="clr-namespace:Ken.Wpf" xmlns:c="clr-namespace:Ken.Wpf.Entity" mc:Ignorable="d" Title="MainWindow" Height="450" Width="800">

    <Grid >
        <Grid.Resources>
            <c:MyData x:Key="myDataSource"/>
        </Grid.Resources>
        <Grid.DataContext>
            <Binding Source="{StaticResource myDataSource}"/>
        </Grid.DataContext>
        <Button Background="{Binding Path=ColorName}" Width="150" Height="30">
            I am bound to be RED!
        </Button>
    </Grid>
</Window>
Create a custom route
The following example is in the custom control CustomButton In the library class . The derived CustomButton since Of class Button:
- Use Method RoutedEvent register ConditionalClick be known as RegisterRoutedEvent Of , And designate Bubble during registration Strategy .
- Will register RoutedEvent The instance returned by the call is assigned to an instance named Static read-only field of ConditionalClickEvent.
- Definition CLR add to And delete Event accessor .
- Add custom logic , To click and CustomButton A custom route event is raised when an external condition is applied . Although the sample code is rewritten from ConditionalClick Virtual method of OnClick A routing event is raised in , But you can trigger events in any way you choose .
public class CustomButton : Button
{
    // Register a custom routed event using the Bubble routing strategy.
    public static readonly RoutedEvent ConditionalClickEvent = EventManager.RegisterRoutedEvent(
        name: "ConditionalClick",
        routingStrategy: RoutingStrategy.Bubble,
        handlerType: typeof(RoutedEventHandler),
        ownerType: typeof(CustomButton));

    // Provide CLR accessors for assigning an event handler.
    public event RoutedEventHandler ConditionalClick
    {
        add { AddHandler(ConditionalClickEvent, value); }
        remove { RemoveHandler(ConditionalClickEvent, value); }
    }

    void RaiseCustomRoutedEvent()
    {
        // Create a RoutedEventArgs instance.
        RoutedEventArgs routedEventArgs = new(routedEvent: ConditionalClickEvent);

        // Raise the event, which will bubble up through the element tree.
        RaiseEvent(routedEventArgs);
    }

    // For demo purposes, we use the Click event as a trigger.
    protected override void OnClick()
    {
        // Some condition combined with the Click event will trigger the ConditionalClick event.
        if (DateTime.Now > new DateTime())
            RaiseCustomRoutedEvent();

        // Call the base class OnClick() method so Click event subscribers are notified.
        base.OnClick();
    }
}
This example includes a separate WPF Applications , The application uses XAML CustomButtonStackPanel Mark will Add an instance of to ,Handler_ConditionalClickConditionalClick And will Method is assigned to and Elements StackPanel1 Events CustomButton The handler .
<Window x:Class="CodeSample.MainWindow" xmlns="http://schemas.microsoft.com/winfx/2006/xaml/presentation" xmlns:x="http://schemas.microsoft.com/winfx/2006/xaml" xmlns:custom="clr-namespace:WpfControl;assembly=WpfControlLibrary" Title="How to create a custom routed event" Height="100" Width="300">

    <StackPanel Name="StackPanel1" custom:CustomButton.ConditionalClick="Handler_ConditionalClick">
        <custom:CustomButton Name="customButton" ConditionalClick="Handler_ConditionalClick" Content="Click to trigger a custom routed event" Background="LightGray">
        </custom:CustomButton>
    </StackPanel>
</Window>
In code hiding ,WPF Application defined events Handler_ConditionalClick Handler method . Event handler methods can only be implemented in code behind .
// The ConditionalClick event handler.
private void Handler_ConditionalClick(object sender, RoutedEventArgs e)
{

    string senderName = ((FrameworkElement)sender).Name;
    string sourceName = ((FrameworkElement)e.Source).Name;

    Debug.WriteLine($"Routed event handler attached to {
      senderName}, " +
                    $"triggered by the ConditionalClick routed event raised on {
      sourceName}.");
}

// Debug output when CustomButton is clicked:
// Routed event handler attached to CustomButton,
// triggered by the ConditionalClick routed event raised on CustomButton.
// Routed event handler attached to StackPanel1,
// triggered by the ConditionalClick routed event raised on CustomButton.
single click CustomButton when :
- route ConditionalClick The incident happened in Upraise CustomButton.
- take Handler_ConditionalClick Trigger attach to CustomButton The event handler for .
- route ConditionalClick Event traverses the element tree up to StackPanel1.
- take Handler_ConditionalClick Trigger attach to StackPanel1 The event handler for .
- route ConditionalClick Event continues to move up the element tree , May trigger attachment to ConditionalClick Other event handlers that traverse the elements .
event Handler_ConditionalClick The handler gets the following information about the event that triggered it :
- The sender object , It is the element that the event handler attaches to . take sender First of all CustomButton Run the handler again , second StackPanel1 Run times .
- object RoutedEventArgs.Source , It is the element that originally caused the event . In this example , Throughout Source by CustomButton.
remarks
Routing events and CLR The main difference between events is that routing events traverses the element tree , Find handler , and CLR Events do not traverse the element tree , Handlers can only be attached to the source object that raises the event . therefore , Routing events sender It can be any traversal element in the element tree .
You can create tunnel events like bubble events , Only you will set the routing policy to... In the event registration call Tunnel. For more information about tunnel Events , see also WPF Input event .
边栏推荐
- Practice of dynamic load balancing based on open source tars
- 巧妙构思-铁死亡调节因子分型预后发6+
- Detailed explanation of the execution order of the expression and loop body in the for loop
- A good habit that makes your programming ability soar
- Embedded must learn! Detailed explanation of hardware resource interface - based on arm am335x development board (Part 2)
- Listed JD Logistics: breaking through again
- [highlights] summary of award-winning activities of Tencent cloud documents
- About Adobe Photoshop adjusting selection
- Chenglixin research group of Shenzhen People's hospital proposed a new method of multi group data in the diagnosis and prognosis analysis of hepatocellular carcinoma megps
- I'm in Shenzhen. Where can I open an account? Is it safe to open an account online now?
猜你喜欢

Opencv learning notes - Discrete Fourier transform

使用开源工具 k8tz 优雅设置 Kubernetes Pod 时区
Deep parsing and implementation of redis pub/sub publish subscribe mode message queue

巴比特 | 元宇宙每日必读:618成绩已然揭晓,在这份还算满意的答卷背后,数字藏品做出了多少贡献?...

Opencv learning notes - loading and saving images

钉钉、飞书、企业微信:迥异的商业门道

Opencv learning notes -- Separation of color channels and multi-channel mixing

从《梦华录》的争议性,谈谈数字版权作品的价值泡沫
Cloud native database: the outlet of the database, you can also take off

文本转语音功能上线,可以体验专业播音员的服务,诚邀试用


随机推荐
Kubernetes practical technique: setting kernel parameters for pod
Single gene pan cancer + simple experiment can be published 7 points+
Cryptography series: collision defense and collision attack
Pinduoduo press the user accelerator key
从《梦华录》的争议性,谈谈数字版权作品的价值泡沫
Opencv learning notes - loading and saving images
Do you really know "open source"? Please check [nanny level] open source Encyclopedia
[day ui] alert component learning
Is it safe to open an account under the conditions of new bonds
Continuous testing | making testing more free: practicing automated execution of use cases in coding
How to purchase new bonds is it safe to open an account
QT -- the qtabwidget supports dragging tabbar items
Clickhouse uses distributed join of pose series
Based on am335x development board arm cortex-a8 -- acontis EtherCAT master station development case
Popular science of data annotation: ten common image annotation methods
Deep learning ~11+ a new perspective on disease-related miRNA research
Five minutes to develop your own code generator
Group planning - General Review
广发证券靠谱吗?开证券账户安全吗?
Istio FAQ: istio init crash