当前位置:网站首页>Hololens 2 development 101: create the first hololens 2 Application
Hololens 2 development 101: create the first hololens 2 Application
2022-07-24 06:13:00 【A small EZ】
notes : Source of this tutorial Microsoft official documents
https://docs.microsoft.com/zh-cn/windows/mixed-reality/mrlearning-base
https://docs.microsoft.com/zh-cn/windows/mixed-reality/mrlearning-base-ch1
There are refinements and changes
1. Overview and objectives
This tutorial is for :HoloLens 2
System essentials
• Use and install correctly Tools Configured WINDOWS 10 The computer
• Windows 10 SDK 10.0.18362.0 Or later
• Some basic C# Programming capabilities .
• Enable Developer model Of HoloLens 2 equipment .
2. Initialize the project and the first application
In this tutorial , You will learn about the hybrid reality toolkit (MRTK) Some functions that must be provided , start-up HoloLens 2 The first application of , And deploy it to the device .
The goal is
• by HoloLens Development goes on Unity Set up .
• Import resources and set the scene .
• Spatial grid 、 Visualization of hand grids and frame rate counters .
explain
Create a new Unity project
- start-up Unity.
- choice “New” .
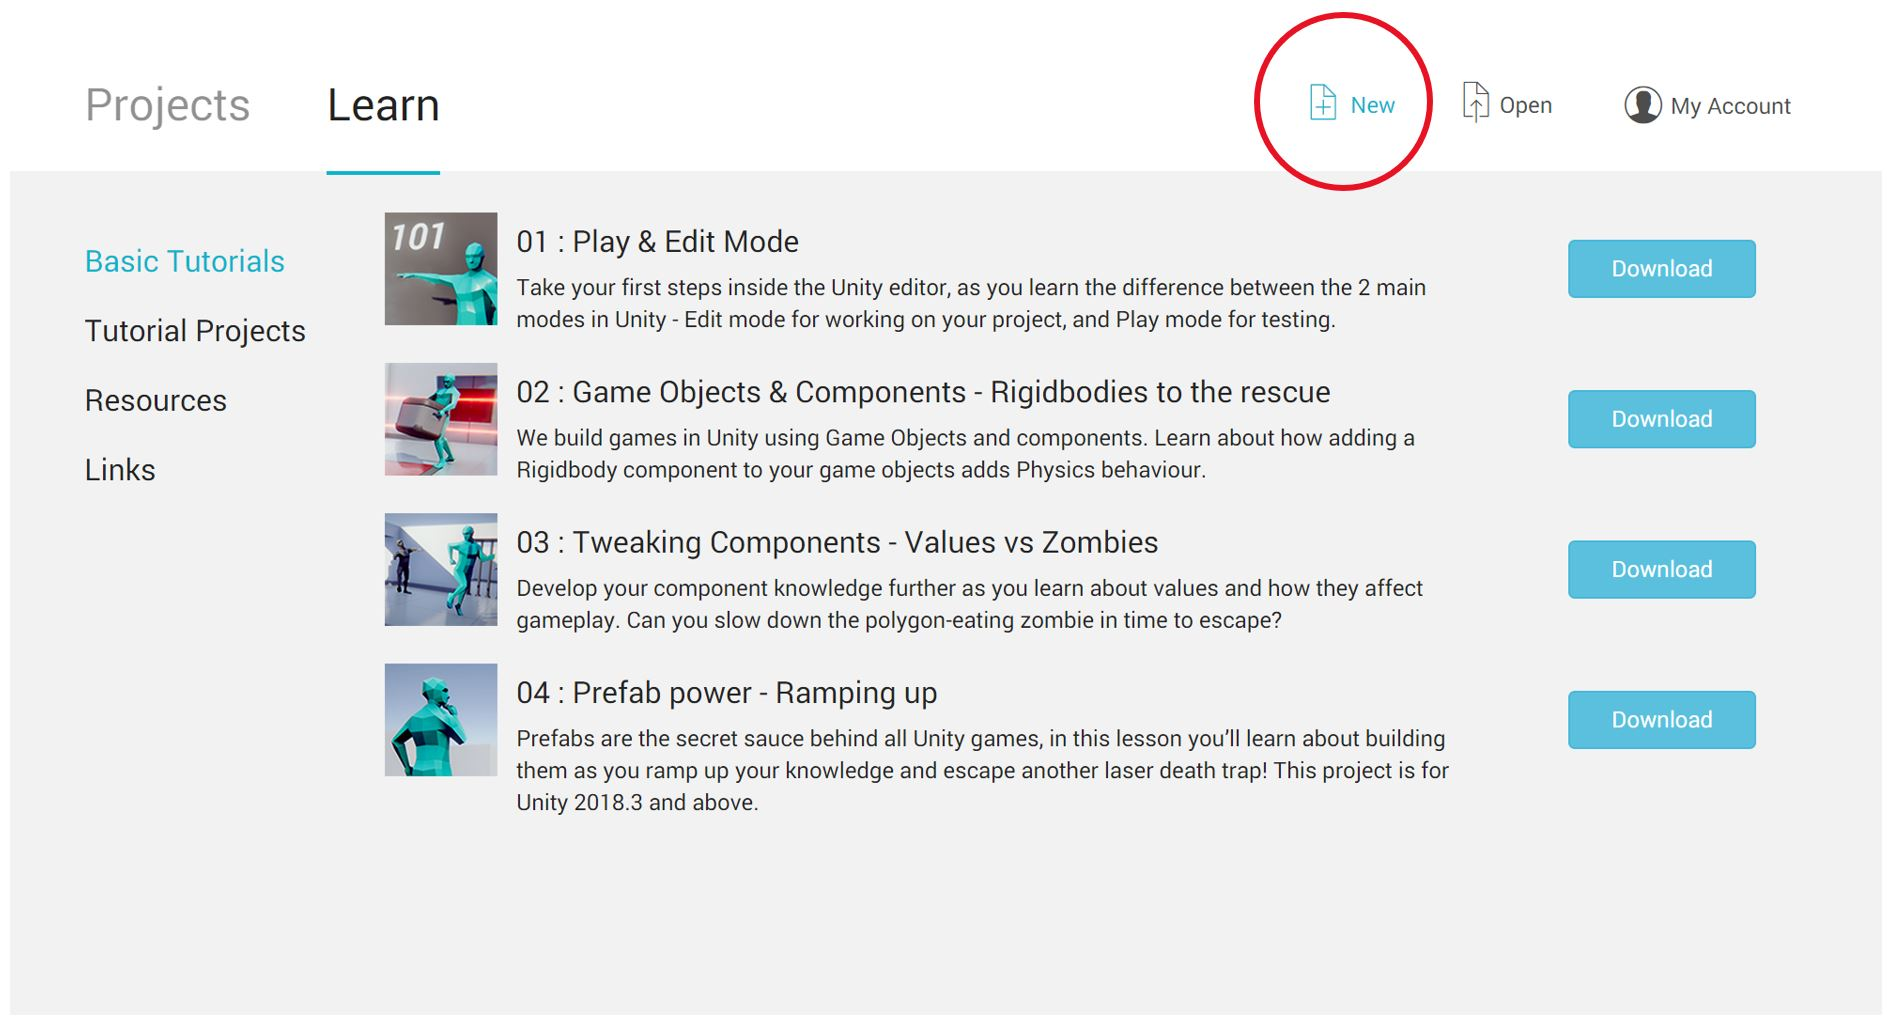
- Enter the project name ( for example “MixedRealityBase”).

- Enter the location to save the project .

- Please make sure that the project is set to “3D” .

- single click “Create Project” .

Configure for Windows Mixed Reality Of Unity project
- go to “File > Build Settings”, open “Build Settings” window .

- By choice "Universal Windows Platform" Switch to general Windows platform . single click “Switch Platform” Button switch platform . stay HoloLens 2 Applications running on need to be generic Windows platform (UWP) compatible .

- By clicking " Build" Window “Player Settings” Enable virtual reality , And then in “Inspector” In the panel “XR Settings” Next enable “Virtual Reality Supported” Check box , As shown in the figure below . Please note that , You may need to “Build Settings” Drag the window out , To see Inspector panel . “Virtual Reality Supported” The check box also applies to mixed reality and augmented reality head displays , Because it refers to enabling stereoscopic effects ( Each eye presents a different image ).

- In the same Inspector The palette , Make sure that the “Publishing Settings” Next enable “Capabilities” In section “Spatial Perception” Check box . Spatial awareness enables us to work on hybrid reality devices ( Such as HoloLens 2) Visually display the spatial mapping grid . Publishing settings are located at “Inspector” In the panel “XR Settings” and “Other Settings” In the middle of the .
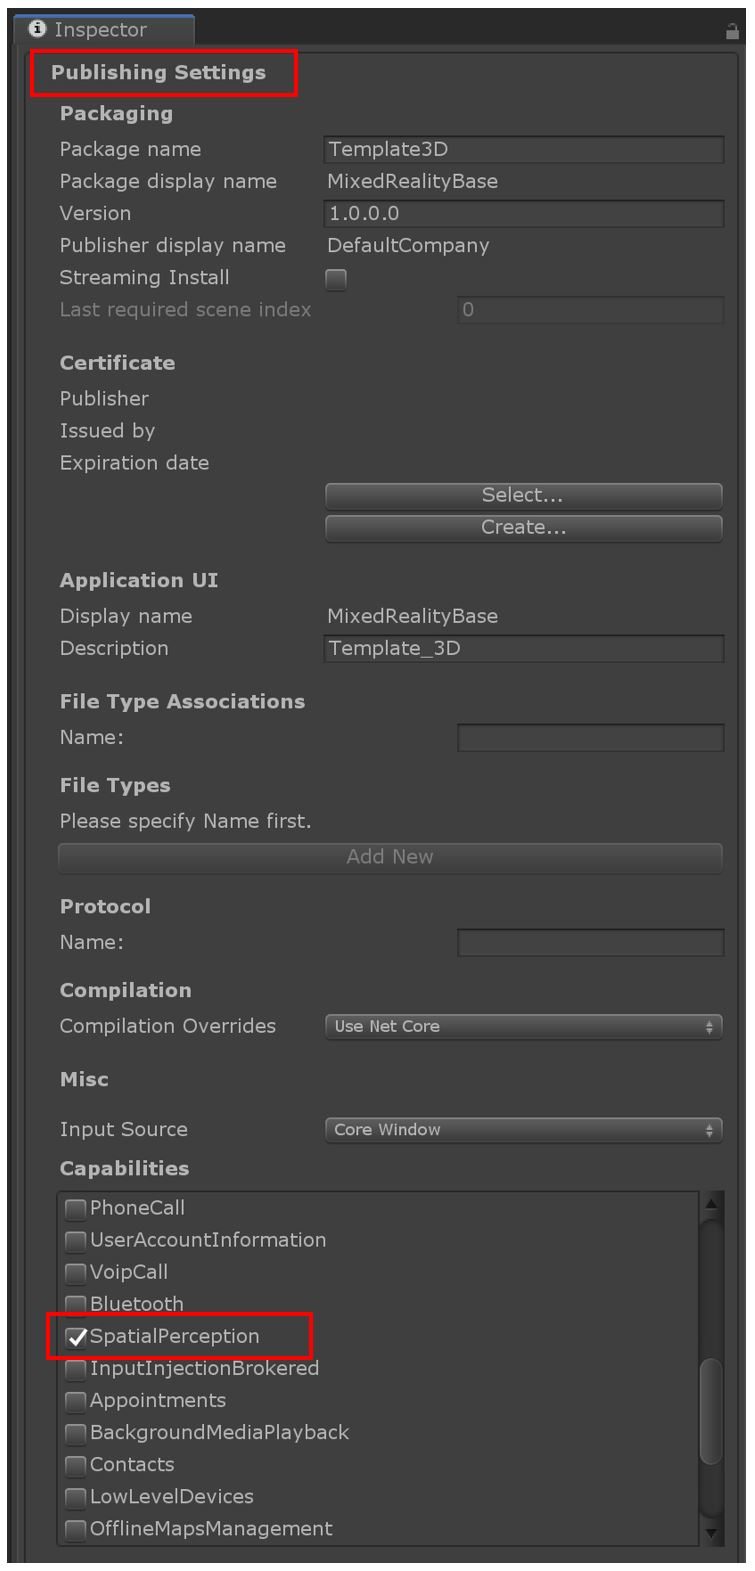
Be careful : Although this tutorial does not use , But you may want to enable others Including the microphone ( For voice commands ) as well as InternetClient( For connecting to services that require a network connection ) Common features of .
Import the mixed reality toolkit (MRTK)
- download MRTK Unity package, And save it to a folder on your computer .
- By clicking ”Assets”>“Import”>“Custom Package” Import the mixed reality toolkit . Find the downloaded hybrid reality toolkit and open it to start the import process . The import process takes a few minutes .


- In the next pop-up window , single click “Import” To start importing the hybrid reality toolkit . Make sure all items are selected , As shown in the figure . If you see a pop-up dialog , It is required to apply the default settings of the hybrid reality toolkit , Please click on the “ application ”.


Configure the hybrid reality toolkit
By selecting “Mixed Reality Toolkit” > “Configure” To configure the MRTK. If you don't see this menu item after importing the hybrid reality toolkit , Please restart. Unity.

[ Be careful ]: You may see a pop-up dialog box , Requirements for The hybrid reality toolkit selects a profile . If it is , Please select “ determine ”, Then choose the name “DefaultMixedRealityToolkitConfigurationProfile” Configuration file for .Your scene will be MRTK There are many new items and modifications in . single click “File” > “Save As”, Save the scene under another name , And assign a name to the scene , for example BaseScene. By saving the scene to the “Assets” In the folder “Scenes” Folder , Keep the scene in order .


Building applications on devicesIf you close “Build Settings” window , Please go to “ file > Build Settings”, Reopen “Build Settings” window .

single click “Add Open Scenes” Button , Make sure the scene you want to try is “Build” In the scene in the list .
Press ”Build” Button to start the generation process .

Create a new folder for your application and name it . In the following illustration , Created a containing application named “App” Folder . single click “Select Folder”, Start generating to the newly created folder . After the generation , It can be turned off Unity Medium “Build Settings” window .

[ Be careful ]: If the build fails , Try building or restarting again Unity And generate again . If you see an error , Such as " error :CS0246 = Type or namespace name not found “XX” ( Is there a lack of using Instruction or assembly reference ?). If so , You may need to install Windows 10 SDK (10.0.18362.0)After the build is complete , Open the newly created folder containing the newly generated application file . double-click “MixedRealityBase” Solution or corresponding name ( If you use an alternate name for the project ) In the Visual Studio Open the solution file in .
Be careful : If you follow the naming in the previous steps , Make sure you open the newly created folder ( namely App Folder ), Because there are people with the same name inside and outside the folder .sln file , This will not be confused by the name .
Be careful : If Visual Studio You are required to install new components , Please take a moment to ensure that “ Installation tools ” Install all prerequisites according to the instructions in the pagetake HoloLens 2 Connect to your PC. Although these instructions assume that you want to use HoloLens 2 Equipment deployment test , But you can also choose to deploy to hololens 2 Simulator , Or choose to create an application package for side loading
Before deploying to the device , Please make sure the device is in developer mode . If this is your first deployment to HoloLens 2, be Visual Studio You may be asked to HoloLens 2 And PIN pairing . If you need to enable Developer mode or with Visual Studio pairing , Please follow these instructions .
By choice “ Release ” Configuration and ARM Architecture , take Visual Studio Configured to generate to HoloLens 2.

The last step is to select “ debugging ” > “ Start execution ( Don't debugging )” To generate devices . If you choose “ Start without debugging ”, It will cause the application to start immediately after successful generation , But not in Visual Studio Debugging information is displayed in . This also means that you can HoloLens 2 Disconnect while running the application on USB Connect , Without stopping the application . You have a choice “Build” > Deploy the solution to the device , Without the application starting automatically .

Congratulations on
Now? , You have deployed the first HoloLens 2 Applications . When browsing , You should see a spatial grid , It contains information that has been provided by HoloLens 2 All surfaces detected . Besides , You should see indicators on your hands and fingers for hand tracking , And a frame rate counter for tracking application performance . These are just some of the basic functions that are readily available in the hybrid reality toolkit . In the following tutorial , You start adding more content and interactivity to the scene , So that you can fully explore HoloLens 2 Features and hybrid reality toolkit .
边栏推荐
- day5-jvm
- Dameng database_ Logical backup
- Installation of tensorflow and pytorch frames and CUDA pit records
- Qt新建工程简介
- systemctl + journalctl
- ue4 瞄准偏移
- Jupyter notebook select CONDA environment
- Demo of UDP communication applied to various environments
- UE4 replacement system 3. Final results
- HoloLens2开发:使用MRTK并且模拟眼动追踪
猜你喜欢

UE4 reload system 2. Scene capture of reload system

Qt新手入门级 计算器加、减、乘、除、应用

UE4 replacement system 3. Final results

Headlong platform operation
![[FatFs] migrate FatFs manually and transfer SRAM virtual USB flash disk](/img/fb/5f3d17f1f3d6e4979ece5126e2925e.png)
[FatFs] migrate FatFs manually and transfer SRAM virtual USB flash disk

JUC并发编程基础(6)--Lock锁

Use QT to connect to MySQL and create table numbers, write data, and delete data
HoloLens 2 开发101:创建首个HoloLens 2应用程序

HoloLens 2开发:使用MRTK并在Unity中模拟手势输入

day6-jvm
随机推荐
Headlong platform operation
Write the list to txt and directly remove the comma in the middle
day6-jvm
Detailed explanation of KMP code distribution
JDBC初级学习 ------(师承尚硅谷)
day-7 jvm完结
Demo of UDP communication applied to various environments
data normalization
day4-jvm
使用Qt连接MySql并创建表号、写入数据、删除数据
JUC concurrent programming foundation (9) -- thread pool
简单却好用:使用Keras 2实现基于LSTM的多维时间序列预测
什么是单调栈
使用Keras实现CNN+BiLSTM+Attention的多维(多变量)时间序列预测
Foundation of JUC concurrent programming (6) -- lock lock
Oserror: [winerror 127] the specified program cannot be found. Error loading “caffe2_detectron_ops.dll“ or one of its dependencies
EXCEL 生成mysql语句批量操作
HoloLens 2 中文开发文档 MRTK v2
day3-jvm+排序总结
Unity 3D帧率统计脚本