当前位置:网站首页>Project practice - document scanning OCR recognition
Project practice - document scanning OCR recognition
2022-07-24 07:47:00 【lllliliha】
One 、 Complete project code
import numpy as np
import argparse
import cv2
# Set parameters
ap =argparse.ArgumentParser()
ap.add_argument("-i","--image",required =True,help="Path to the image to be scanned")
args = vars(ap.parse_args())
def order_points(pts):
# There are four coordinate points
rect = np.zeros((4,2),dtype= "float32")
# Find the corresponding coordinates in order 0123 Namely Top left , The upper right , The lower right , The lower left
# Calculate top left , The lower right
s = pts.sum(axis=1)
rect[0] = pts[np.argmin(s)]
rect[2] = pts[np.argmax(s)]
# Calculate top right . The lower left
diff = np.diff(pts,axis=1)
rect[1] = pts[np.argmin(diff)]
rect[3] = pts[np.argmax(diff)]
return rect
def four_point_transform(image,pts):
# Get the input coordinate point
rect = order_points(pts)
(tl,tr,br,bl)=rect
# Calculate the input w and h value Under the root x square +y square
widthA = np.sqrt(((br[0] - bl[0]) ** 2) + ((br[1]-bl[1]) ** 2))
widthB = np.sqrt(((tr[0] - tl[0]) ** 2) + ((tr[1] - tl[1]) ** 2))
maxWidth = max(int(widthA),int(widthB))
heightA = np.sqrt(((tr[0] - br[0]) ** 2) + ((tr[1] - br[1]) ** 2))
heightB = np.sqrt(((tl[0] - bl[0]) ** 2) + ((tl[1] - bl[1]) ** 2))
maxHeight = max(int(heightA), int(heightB))
# Corresponding coordinate position after transformation
dst = np.array([[0, 0], [maxWidth - 1, 0], [maxWidth - 1, maxHeight - 1],
[0, maxHeight - 1]], dtype="float32") #3x3 Matrix
# Calculate the transformation matrix
M =cv2.getPerspectiveTransform(rect,dst)
warped =cv2.warpPerspective(image, M ,(maxWidth,maxHeight))
# Returns the transformed result
return warped
def resize(image, width=None,height=None,inter=cv2.INTER_AREA):
dim =None
(h, w)=image.shape[:2]
if width is None and height is None:
return image
if width is None:
r = height / float(h)
dim = (int(w * r), height)
else:
r = width / float(w) # The proportion
dim = (width, int(h * r))
resized = cv2.resize(image, dim, interpolation=inter)
return resized
# Read input
image = cv2.imread('E:/anaconda3/picture/receipt.jpg')
# The coordinates change the same
ratio = image.shape[0] / 500.0
orig = image.copy()
image = resize(orig, height =500)
# Preprocessing
gray = cv2.cvtColor(image, cv2.COLOR_BGR2GRAY) # grayscale
gray = cv2.GaussianBlur(gray, (5,5),0) # Gauss filtering , Used to remove some noise points
edged = cv2.Canny(gray, 75, 200) # Edge detection , In order to extract the contour of the back
# Display preprocessing results
print("STEP 1: edge detection ")
cv2.imshow("Image", image)
cv2.imshow("Edged", edged)
cv2.waitKey(0)
cv2.destroyAllWindows()
# Contour detection
cnts = cv2.findContours(edged.copy(), cv2.RETR_LIST, cv2.CHAIN_APPROX_SIMPLE)[1]
cnts = sorted(cnts, key = cv2.contourArea, reverse = True)[:5]
# Traverse the outline
for c in cnts:
# Calculate the contour approximation
peri = cv2.arcLength(c, True) # Contour length
# C Represents the set of input points
# epsilon Represents the maximum distance from the original contour to the approximate contour , It's an accuracy parameter
# True It means closed
approx = cv2.approxPolyDP(c, 0.02 * peri, True)
# 4 Take it out at one point
if len(approx) == 4: # Get an approximation 4 A little bit
screenCnt = approx # Approximate results
break # Take it out
# Display the results
print("STEP 2: Get profile ")
cv2.drawContours(image, [screenCnt], -1, (0, 255, 0), 2) # Draw the outline
cv2.imshow("Outline", image)
cv2.waitKey(0)
cv2.destroyAllWindows()
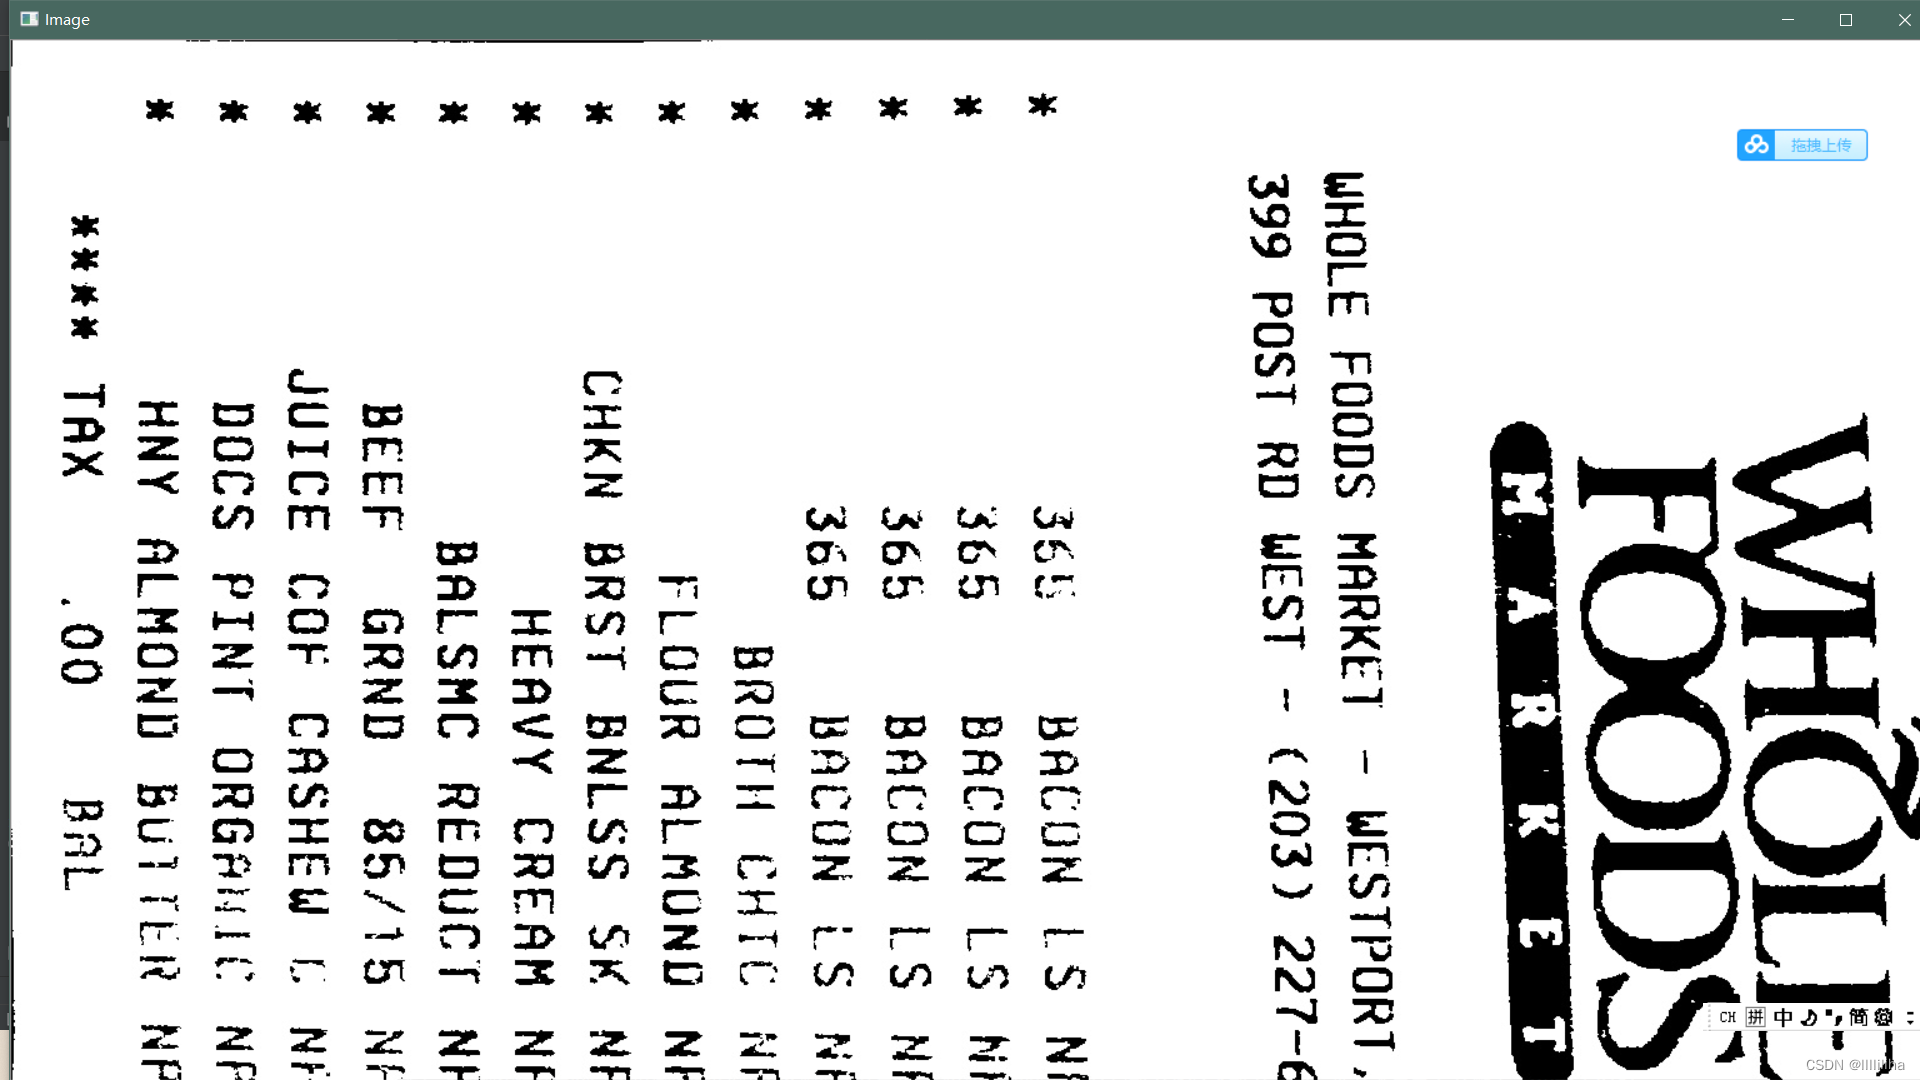
# Perspective transformation
warped = four_point_transform(orig, screenCnt.reshape(4, 2) * ratio)
# Binary processing
warped = cv2.cvtColor(warped, cv2.COLOR_BGR2GRAY)
ref = cv2.threshold(warped, 100, 255, cv2.THRESH_BINARY)[1]
cv2.imwrite('scan.jpg', ref)
# Display the results
print("STEP 3: Transformation ")
cv2.imshow("Original", resize(orig, height=650))
cv2.imshow("Scanned", resize(ref, height=650))
cv2.waitKey(0)Two 、 Specific operation
1、 First import the toolkit , Set parameters ( Set picture reading path )
import numpy as np
import argparse
import cv2

# Set parameters
ap =argparse.ArgumentParser()
ap.add_argument("-i","--image",required =True,help="Path to the image to be scanned")
args = vars(ap.parse_args())
2、 Read input , After image reading , Calculate its four coordinate points , To do edge detection, it is necessary to have the same change in coordinates . then , Then preprocess the pictures ( Go to grayscale 、 Gauss filtering - In order to filter out some noise points 、 edge detection )
# Read input
image = cv2.imread('E:/anaconda3/picture/receipt.jpg')
# The coordinates change the same
ratio = image.shape[0] / 500.0
orig = image.copy()

image = resize(orig, height =500)

# Preprocessing
gray = cv2.cvtColor(image, cv2.COLOR_BGR2GRAY) # grayscale
gray = cv2.GaussianBlur(gray, (5,5),0)   # Gauss filtering , Used to remove some noise points
edged = cv2.Canny(gray, 75, 200)    # Edge detection , In order to extract the contour of the back

# Display preprocessing results
print("STEP 1:  edge detection ")
cv2.imshow("Image", image)
cv2.imshow("Edged", edged)
cv2.waitKey(0)
cv2.destroyAllWindows()
Output results :


After edge detection , Carry out specific contour detection
3、 Contour detection
cnts = cv2.findContours(edged.copy(), cv2.RETR_LIST, cv2.CHAIN_APPROX_SIMPLE)[1]  #
cnts = sorted(cnts, key = cv2.contourArea, reverse = True)[:5]
Will detect all the contours on this picture , But what we need is the outermost , So in order to calculate his external things , So sort the top five largest outlines , Then traverse each contour :
for c in cnts:
    #  Calculate the contour approximation
    peri = cv2.arcLength(c, True)  # Contour length
    # C Represents the set of input points
    # epsilon Represents the maximum distance from the original contour to the approximate contour , It's an accuracy parameter
    # True It means closed
    approx = cv2.approxPolyDP(c, 0.02 * peri, True)  # The contour points are 【 The approximate 】(c Is every outline /0.02 * peri Namely epsilon/)

    # 4 Take it out at one point
    if len(approx) == 4:  # Get an approximation  4 A little bit
        screenCnt = approx   # Approximate results
        break  # Take it out
Output results :
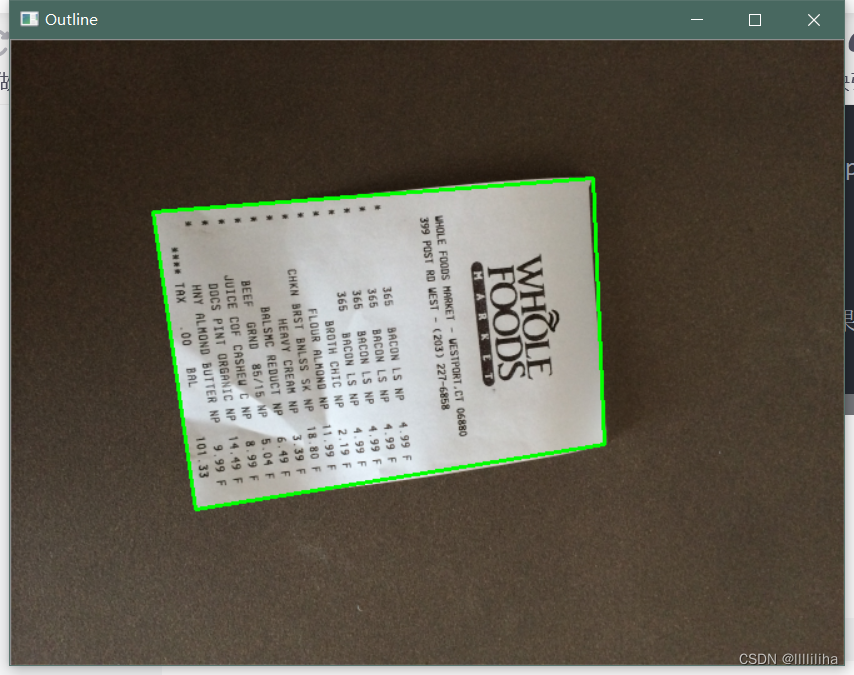

thus , The text in the picture highlights , To get the specific text content in the picture, you need to install tesseract_ocr
3、 ... and 、tesseract_OCR Installation and configuration
1、 Website of installation package :https://digi.bib.uni-mannheim.de/tesseract/
Select the latest version to download , Set up the installation path ( I am a E:\opencv)
2、 Configure environment variables : attribute > Advanced settings > environment variable > In the upper and lower boxes path Add it all in E:\opencv The path of Just OK
3、WIN+R Input cmd Post input tesseract -v To test , Get the version number and you will succeed
4、tesseract XXX.png Get the results Enter a picture
5、tesseract XXX.png result Get the text result recognized by the picture This means that tesseract Installation successful
6、 On the command bar tesseract In the directory of pip install pytesseract, install pytesseract
7、 stay anaconda3> lib> site-packges> pytesseract.py >tesseract_cmd It is amended as follows Absolute path that will do
The absolute path is tesseract Specific installation path .
Come here tesseract You can run to recognize the image text content :
from PIL import Image
import pytesseract
import cv2
import os

preprocess = 'blur' #thresh

image = cv2.imread('scan.jpg')
gray = cv2.cvtColor(image, cv2.COLOR_BGR2GRAY)

if preprocess == "thresh":
    gray = cv2.threshold(gray, 0, 255,cv2.THRESH_BINARY | cv2.THRESH_OTSU)[1]

if preprocess == "blur":
    gray = cv2.medianBlur(gray, 3)

filename = "{}.png".format(os.getpid())
cv2.imwrite(filename, gray)

text = pytesseract.image_to_string(Image.open(filename))
print(text)
os.remove(filename)

cv2.imshow("Image", image)
cv2.imshow("Output", gray)
cv2.waitKey(0)
Will get " The words on the supermarket piece :"
Output :

边栏推荐
- Requests crawler multi page crawling to KFC restaurant location
- Digital twin demonstration project -- Talking about simple pendulum (3) solid model exploration
- 简易网闸-内网服务器安全获取外网数据
- Binary search common questions
- HCIP第十天笔记
- Eight part essay on software testing
- C language advanced part III. string functions and memory operation functions
- Typescript double question mark operator
- stdafx. H introduction and function
- Error when using PIP: pip is configured with locations that requires tls/ssl
猜你喜欢

从零开始C语言精讲篇3:函数

Influxdb unauthorized access & CouchDB permission bypass

Selenium basic knowledge automatically login Baidu online disk

C language advanced part II Pointer
Hcip 13th day notes

游戏三子棋

简易网闸-内网服务器安全获取外网数据
Selenium basic knowledge automatic search

Problems encountered in inserting large quantities of data into the database in the project
![[hiflow] Tencent cloud hiflow scene connector realizes intelligent campus information management](/img/a9/7cdab9264902b1e2947a43463f6b32.png)
[hiflow] Tencent cloud hiflow scene connector realizes intelligent campus information management
随机推荐
Debug No3 multi texture overlay
C language advanced part VII. Program compilation and preprocessing
Mitre att & CK ultra detailed learning notes-01 (background, terms, cases)
Have you seen the interview questions of VR major? Trust me, it's absolutely useful
C language advanced part III. string functions and memory operation functions
Appium doctor command error pit - resolved
OpenGL camera and periodic review
Feature Selective Anchor-Free Module for Single-Shot Object Detection
Vertex buffer and shader (the cherno + leranopongl) notes
【Pytorch】Dataset_ DataLoader
Using bidirectional linked list to realize stack (c)
XSS漏洞学习
2021-06-03 database query - sorting
MySQL update uses case when to update the value of another field according to the value of one field
Mutual implementation of stack and queue (c)
Flinksql UDF custom data source
C语言文件操作
Movie recommendation system
Induction, generalization, deduction
MySQL 啥时候用表锁,啥时候用行锁?