当前位置:网站首页>Openstack actual installation and deployment tutorial, openstack installation tutorial
Openstack actual installation and deployment tutorial, openstack installation tutorial
2022-06-24 19:37:00 【Wild dragon】
OpenStack Installation and deployment
One 、 Basic preparation
Deployment environment :CentOS 7 64
1、 Shut down the local iptables Firewall and set the boot not to start automatically
# systemctl stop firewalld.service# systemctl disable firewalld.service- 1.
2、 Shut down the local selinux A firewall
# vim /etc/sysconfig/selinux SELINUX=disabled# setenforce 0- 1.
3、 Set host computer name
# hostnamectl set-hostname controller- 1.
4、 Local host name and ip Parsing
# vim /etc/hosts192.168.0.104 controller- 1.
5、 install ntp Time calibration tool
# yum -y install ntp# ntpdate asia.pool.ntp.org- 1.
6、 Install third party yum Source
# yum -y install yum-plugin-priorities# yum -y install http://dl.fedoraproject.org/pub/epel/7/x86_64/e/epel-release-7-2.noarch.rpm # yum -y install http://rdo.fedorapeople.org/openstack-juno/rdo-release-juno.rpm- 1.
7、 Upgrade the system software package and restart the system
# yum upgrade# reboot- 1.
Two 、 Installation configuration mariadb database
1、 install mariadb database
# yum -y install mariadb mariadb-server MySQL-python- 1.
2、 To configure mariadb database
# cp /etc/my.cnf /etc/my.cnf.bak# rpm -ql mariadb# vim /etc/my.cnf.d/server.cnf[mysqld]bind-address = 0.0.0.0
default-storage-engine = innodb
innodb_file_per_table
collation-server = utf8_general_ci
init-connect = 'SET NAMES utf8'character-set-server = utf8- 1.
- 2.
- 3.
- 4.
- 5.
3、 start-up mariadb database
# systemctl enable mariadb.service# systemctl start mariadb.service- 1.
3、 ... and 、 Install the Message Queuing service
1、 install rabbit Required packages
# yum -y install rabbitmq-server- 1.
2、 start-up rabbit service
# systemctl enable rabbitmq-server.service# systemctl start rabbitmq-server.service- 1.
3、 Set up rabbit Service password
# rabbitmqctl change_password guest rabbit- 1.
Four 、 install keyston User authentication component
1、 establish keystone Database and authorized users
mysql -u root -p
CREATE DATABASE keystone;GRANT ALL PRIVILEGES ON keystone.* TO 'keystone'@'localhost' IDENTIFIED BY 'keystone';GRANT ALL PRIVILEGES ON keystone.* TO 'keystone'@'%' IDENTIFIED BY 'keystone';- 1.
- 2.
2、 install keystone The component package
# yum -y install openstack-utils openstack-keystone python-keystoneclient- 1.
3、 To configure keystone file
# cp /etc/keystone/keystone.conf /etc/keystone/keystone.conf.bak# vim /etc/keystone/keystone.conf [DEFAULT]verbose = True[database]connection = mysql://keystone:[email protected]/keystone[token]provider = keystone.token.providers.uuid.Provider
driver = keystone.token.persistence.backends.sql.Token- 1.
- 2.
4、 Create a certificate and secret key file
# keystone-manage pki_setup --keystone-user keystone --keystone-group keystone# chown -R keystone:keystone /var/log/keystone# chown -R keystone:keystone /etc/keystone/ssl# chmod -R o-rwx /etc/keystone/ssl- 1.
5、 Sync keystone To mariadb database
# su -s /bin/sh -c "keystone-manage db_sync" keystone- 1.
6、 start-up keystone Service and start-up
# systemctl enable openstack-keystone.service# systemctl start openstack-keystone.service- 1.
7、 Clear expired tokens
By default , The identity service stores expired tokens in the database without limit . The accumulation of expired tokens greatly increases the size of the database , It may reduce the performance of the service , Especially in the environment with limited resources . We suggest you use cron Configure a recurring task , When clearing expired tokens
# (crontab -l -u keystone 2>&1 | grep -q token_flush) || \
echo '@hourly /usr/bin/keystone-manage token_flush >/var/log/keystone/keystone-tokenflush.log 2>&1' \ >> /var/spool/cron/keystone- 1.
- 2.
----------------------------Create tenants,user,and roles---------------------------------
1、 To configure admin Of token
# export OS_SERVICE_TOKEN=$(openssl rand -hex 10)# export OS_SERVICE_ENDPOINT=http://controller:35357/v2.0# echo $OS_SERVICE_TOKEN > ~/ks_admin_token# openstack-config --set /etc/keystone/keystone.conf DEFAULT admin_token $OS_SERVICE_TOKEN# service openstack-keystone restart- 1.
2、 establish tenant、user and role
a.Create the admin tenant、user、role# keystone tenant-create --name admin --description "Admin Tenant"# keystone user-create --name admin --pass admin --email admi[email protected]# keystone role-create --name adminb.Add the admin tenant and user to the admin role:# keystone user-role-add --tenant admin --user admin --role adminc.By default, the dashboard limits access to users with the _member_ role.# keystone role-create --name _member_d.Add the admin tenant and user to the _member_ role:# keystone user-role-add --tenant admin --user admin --role _member_- 1.
3、 Create a normal demo Projects and users
a.Create the demo tenant:# keystone tenant-create --name demo --description "Demo Tenant"b.Create the demo user:# keystone user-create --name demo --pass demo --email [email protected] the demo tenant and user to the _member_ role:# keystone user-role-add --tenant demo --user demo --role _member_- 1.
4、 Create a service project
# keystone tenant-create --name service --description "Service Tenant"- 1.
------------------------Create the service entity and API endpoint------------------------
1、Create the service entity and API endpoint | Create the service entity for the Identity service:
# keystone service-create --name keystone --type identity --description "OpenStack Identity"- 1.
2、Create the API endpoint for the Identity service:
# keystone endpoint-create \--service-id $(keystone service-list | awk '/ identity / {print $2}') \
--publicurl http://controller:5000/v2.0 \
--internalurl http://controller:5000/v2.0 \
--adminurl http://controller:35357/v2.0 \
--region regionOne- 1.
- 2.
- 3.
- 4.
- 5.
3、 see keystone Authentication information
[[email protected] ~]# keystone user-list+----------------------------------+-------+---------+-------------------------+|                id                |  name | enabled |          email          |+----------------------------------+-------+---------+-------------------------+| 7053cfacc4b047dcabe82f6be0e5dc77 | admin |   True  | [email protected] || eea569106329465996e9e09a666838bd |  demo |   True  |  [email protected] |+----------------------------------+-------+---------+-------------------------+[[email protected] ~]# keystone tenant-list+----------------------------------+---------+---------+|                id                |   name  | enabled |+----------------------------------+---------+---------+| 307fd76766eb4b02a28779f4e88717ce |  admin  |   True  || f054bd56851b4a318a19233a13e13d31 |   demo  |   True  || d865c3b49f6f4bf7b2a0b93e0110e546 | service |   True  |+----------------------------------+---------+---------+[[email protected] ~]# keystone service-list+----------------------------------+----------+----------+--------------------+|                id                |   name   |   type   |    description     |+----------------------------------+----------+----------+--------------------+| 9754f7bdf78c4000875f1aa5f3291b19 | keystone | identity | OpenStack Identity |+----------------------------------+----------+----------+--------------------+[[email protected] ~]# keystone endpoint-list+----------------------------------+-----------+-----------------------------+-----------------------------+------------------------------+----------------------------------+	|                id                |   region  |          publicurl          |         internalurl         |           adminurl           |            service_id            |
	+----------------------------------+-----------+-----------------------------+-----------------------------+------------------------------+----------------------------------+	| 6831d6708fe4469fa653b9b5adf801d9 | regionOne | http://controller:5000/v2.0 | http://controller:5000/v2.0 | http://controller:35357/v2.0 | 9754f7bdf78c4000875f1aa5f3291b19 |
+----------------------------------+-----------+-----------------------------+-----------------------------+------------------------------+----------------------------------+- 1.
- 2.
- 3.
4、 Cancel the temporarily set environment variables
# unset OS_SERVICE_TOKEN # unset OS_SERVICE_ENDPOINT- 1.
5、 Use keystone User authentication
# keystone --os-tenant-name admin --os-username admin --os-password admin --os-auth-url http://controller:35357/v2.0 token-get# keystone --os-tenant-name admin --os-username admin --os-password admin --os-auth-url http://controller:35357/v2.0 tenant-list# keystone --os-tenant-name admin --os-username admin --os-password admin --os-auth-url http://controller:35357/v2.0 user-list# keystone --os-tenant-name admin --os-username admin --os-password admin --os-auth-url http://controller:35357/v2.0 role-list- 1.
6、 Use ordinary users demo Certification testing
# keystone --os-tenant-name demo --os-username demo --os-password demo --os-auth-url http://controller:35357/v2.0 token-get# keystone --os-tenant-name demo --os-username demo --os-password demo --os-auth-url http://controller:35357/v2.0 user-listYou are not authorized to perform the requested action: admin_required (HTTP 403)- 1.
7、 client cli Command line scripts
# vim ~/admin-openrc.sh export OS_TENANT_NAME=adminexport OS_USERNAME=adminexport OS_PASSWORD=adminexport OS_AUTH_URL=http://controller:35357/v2.0- 1.
# vim ~/demo-openrc.shexport OS_TENANT_NAME=demoexport OS_USERNAME=demoexport OS_PASSWORD=demoexport OS_AUTH_URL=http://controller:5000/v2.0- 1.
# source admin-openrc.sh- 1.
8、 If the test cancels the environment variable , adopt keystone Still able to pass the certification keystone The configuration was successful
Four 、 install glance Components
1、 establish keystone Database and authorized users
mysql -u root -p
CREATE DATABASE glance;GRANT ALL PRIVILEGES ON glance.* TO 'glance'@'localhost' IDENTIFIED BY 'glance';GRANT ALL PRIVILEGES ON glance.* TO 'glance'@'%' IDENTIFIED BY 'glance';- 1.
- 2.
2、 establish glance Users and join admin In the group
# keystone user-create --name glance --pass glance# keystone user-role-add --user glance --tenant service --role admin- 1.
3、 establish glance service
# keystone service-create --name glance --type image --description "OpenStack Image Service"- 1.
4、 establish Identity Service access for rul
# keystone endpoint-create \--service-id $(keystone service-list | awk '/ image / {print $2}') \
--publicurl http://controller:9292 \
--internalurl http://controller:9292 \
--adminurl http://controller:9292 \
--region regionOne- 1.
- 2.
- 3.
- 4.
- 5.
5、 Installation configuration glance package
# yum -y install openstack-glance python-glanceclient- 1.
6、 modify glance The configuration file
# cp /etc/glance/glance-api.conf /etc/glance/glance-api.conf.bak# vim /etc/glance/glance-api.conf[DEFAULT] verbose = True[database]connection = mysql://glance:[email protected]/glance[keystone_authtoken]auth_uri = http://controller:5000/v2.0
identity_uri = http://controller:35357
admin_tenant_name = serviceadmin_user = glance
admin_password = glance[paste_deploy]flavor = keystone[glance_store]default_store = filefilesystem_store_datadir = /var/lib/glance/images/- 1.
- 2.
- 3.
- 4.
# cp /etc/glance/glance-registry.conf /etc/glance/glance-registry.conf.bak# vim /etc/glance/glance-registry.conf[DEFAULT]verbose = True[database]connection = mysql://glance:[email protected]/glance[keystone_authtoken]auth_uri = http://controller:5000/v2.0
identity_uri = http://controller:35357
admin_tenant_name = serviceadmin_user = glance
admin_password = glance

[paste_deploy]flavor = keystone- 1.
- 2.
- 3.
- 4.
- 5.
- 6.
7、 Sync glance To mariadb database
# su -s /bin/sh -c "glance-manage db_sync" glance- 1.
8、 Startup and self startup
# systemctl enable openstack-glance-api.service openstack-glance-registry.service# systemctl start openstack-glance-api.service openstack-glance-registry.service- 1.
9、 Download and upload image Mirror image
# mkdir /tmp/images# cd /tmp/images# wget http://cdn.download.cirros-cloud.net/0.3.3/cirros-0.3.3-x86_64-disk.img# glance image-create --name "cirros-0.3.3-x86_64" --file cirros-0.3.3-x86_64-disk.img --disk-format qcow2 --container-format bare --is-public True --progress# glance image-list# mv /tmp/images /opt- 1.
5、 ... and 、 Add a calculation node
1、 establish nova Database and authorized users
mysql -u root -p
CREATE DATABASE nova;GRANT ALL PRIVILEGES ON nova.* TO 'nova'@'localhost' IDENTIFIED BY 'nova';GRANT ALL PRIVILEGES ON nova.* TO 'nova'@'%' IDENTIFIED BY 'nova';- 1.
- 2.
2、 establish Nova Users of , Add to admin Group 、service service
# keystone user-create --name nova --pass nova# keystone user-role-add --user nova --tenant service --role admin# keystone service-create --name nova --type compute --description "OpenStack Compute"- 1.
3、 Create access to compute nodes url
# keystone endpoint-create \--service-id $(keystone service-list | awk '/ compute / {print $2}') \
--publicurl http://controller:8774/v2/%\(tenant_id\)s \
--internalurl http://controller:8774/v2/%\(tenant_id\)s \
--adminurl http://controller:8774/v2/%\(tenant_id\)s \
--region regionOne- 1.
- 2.
- 3.
- 4.
- 5.
4、 install Nova package
# yum -y install openstack-nova-api openstack-nova-cert openstack-nova-conductor openstack-nova-console openstack-nova-novncproxy openstack-nova-scheduler python-novaclient# yum -y install openstack-nova-compute sysfsutils- 1.
5、 modify nova The configuration file
# cp /etc/nova/nova.conf /etc/nova/nova.conf.bak# vim /etc/nova/nova.conf[DEFAULT]my_ip = controller
vncserver_listen = controller
vncserver_proxyclient_address = controller
verbose = True
rpc_backend = rabbit
rabbit_host = controller
rabbit_password = rabbit
auth_strategy = keystone
vnc_enabled = True
vncserver_listen = 0.0.0.0
vncserver_proxyclient_address = controller
novncproxy_base_url = http://controller:6080/vnc_auto.html[database]connection = mysql://nova:[email protected]/nova[keystone_authtoken]auth_uri = http://controller:5000/v2.0
identity_uri = http://controller:35357
admin_tenant_name = serviceadmin_user = nova
admin_password = nova[glance]host = controller[libvirt]virt_type = qemu- 1.
- 2.
- 3.
- 4.
- 5.
- 6.
- 7.
- 8.
- 9.
- 10.
- 11.
- 12.
- 13.
- 14.
- 15.
6、 Sync nova To moriadb database
# su -s /bin/sh -c "nova-manage db sync" nova- 1.
7、 Start many services and start up automatically
# systemctl enable openstack-nova-api.service openstack-nova-cert.service \
  openstack-nova-consoleauth.service openstack-nova-scheduler.service \
  openstack-nova-conductor.service openstack-nova-novncproxy.service# systemctl start openstack-nova-api.service openstack-nova-cert.service \
  openstack-nova-consoleauth.service openstack-nova-scheduler.service \
  openstack-nova-conductor.service openstack-nova-novncproxy.service
# systemctl enable libvirtd.service openstack-nova-compute.service# systemctl start libvirtd.service# systemctl start openstack-nova-compute.service# nova service-list# nova image-list- 1.
- 2.
- 3.
- 4.
- 5.
- 6.
6、 ... and 、 Add a network node
1、 establish neutron Database and authorized users
mysql -u root -p
CREATE DATABASE neutron;GRANT ALL PRIVILEGES ON neutron.* TO 'neutron'@'localhost' IDENTIFIED BY 'neutron';GRANT ALL PRIVILEGES ON neutron.* TO 'neutron'@'%' IDENTIFIED BY 'neutron';- 1.
- 2.
2、 establish neutron user , Add to admin In the group , And create neutron service
# keystone user-create --name neutron --pass neutron# keystone user-role-add --user neutron --tenant service --role admin# keystone service-create --name neutron --type network --description "OpenStack Networking"- 1.
3、 establish neutron Of endponit visit url
# keystone endpoint-create \--service-id $(keystone service-list | awk '/ image / {print $2}') \
--publicurl http://controller:5672 \
--internalurl http://controller:5672 \
--adminurl http://controller:5672 \
--region regionOne- 1.
- 2.
- 3.
- 4.
- 5.
4、 install neutron package
# yum -y install openstack-neutron openstack-neutron-ml2 python-neutronclient which- 1.
5、 modify neutron The configuration file
# cp /etc/neutron/neutron.conf /etc/neutron/neutron.conf.bak# vim /etc/neutron/neutron.conf [DEFAULT] rpc_backend = rabbit
rabbit_host = controller
rabbit_password = rabbit
auth_strategy = keystone
core_plugin = ml2
service_plugins = router
allow_overlapping_ips = True
notify_nova_on_port_status_changes = True
notify_nova_on_port_data_changes = True
nova_url = http://controller:8774/v2
nova_admin_auth_url = http://controller:35357/v2.0
nova_region_name = regionOne
nova_admin_username = nova
nova_admin_tenant_id = SERVICE_TENANT_ID
nova_admin_password = nova
verbose = True[database]connection = mysql://neutron:[email protected]/neutron[keystone_authtoken]auth_uri = http://controller:5000/v2.0
identity_uri = http://controller:35357
admin_tenant_name = serviceadmin_user = neutron
admin_password = neutron- 1.
- 2.
- 3.
- 4.
- 5.
- 6.
- 7.
- 8.
- 9.
- 10.
- 11.
- 12.
- 13.
- 14.
- 15.
- 16.
- 17.
- 18.
- 19.
6、 test
# keystone tenant-get service- 1.
# cp /etc/neutron/plugins/ml2/ml2_conf.ini /etc/neutron/plugins/ml2/ml2_conf.ini.bak# vim /etc/neutron/plugins/ml2/ml2_conf.ini[ml2]type_drivers = flat,gre
tenant_network_types = gre
mechanism_drivers = openvswitch[ml2_type_gre] tunnel_id_ranges = 1:1000[securitygroup] enable_security_group = True
enable_ipset = True
firewall_driver = neutron.agent.linux.iptables_firewall.OVSHybridIptablesFirewallDriver- 1.
- 2.
- 3.
- 4.
- 5.
# vim /etc/nova/nova.conf [DEFAULT]network_api_class = nova.network.neutronv2.api.API
security_group_api = neutron
linuxnet_interface_driver = nova.network.linux_net.LinuxOVSInterfaceDriver
firewall_driver = nova.virt.firewall.NoopFirewallDriver[neutron]url = http://controller:9696
auth_strategy = keystone
admin_auth_url = http://controller:35357/v2.0
admin_tenant_name = serviceadmin_username = neutron
admin_password = neutron- 1.
- 2.
- 3.
- 4.
- 5.
- 6.
- 7.
- 8.
# ln -s /etc/neutron/plugins/ml2/ml2_conf.ini /etc/neutron/plugin.ini- 1.
7、 Sync neutron To mariadb database
# su -s /bin/sh -c "neutron-db-manage --config-file /etc/neutron/neutron.conf --config-file /etc/neutron/plugins/ml2/ml2_conf.ini upgrade juno" neutron- 1.
8、 Restart compute service
# systemctl restart openstack-nova-api.service openstack-nova-scheduler.service openstack-nova-conductor.service- 1.
9、 Boot up service
# systemctl enable neutron-server.service# systemctl start neutron-server.service- 1.
10、 see neutron-server process
# neutron ext-list- 1.
11、 Check out the information
# tail -f /var/log/neutron/server.log- 1.
12、 Configure kernel network parameters
# cp /etc/sysctl.conf /etc/sysctl.conf.bak# vim /etc/sysctl.conf net.ipv4.ip_forward=1
net.ipv4.conf.all.rp_filter=0
net.ipv4.conf.default.rp_filter=0# sysctl -p- 1.
- 2.
- 3.
13、 Install the network components package
# yum -y install openstack-neutron openstack-neutron-ml2 openstack-neutron-openvswitch- 1.
14、 Configure common network components
# vim /etc/neutron/plugins/ml2/ml2_conf.ini[ml2_type_flat] flat_networks = external
[ovs] local_ip = INSTANCE_TUNNELS_INTERFACE_IP_ADDRESS
enable_tunneling = True
bridge_mappings = external:br-ex

[agent]tunnel_types = gre- 1.
- 2.
- 3.
- 4.
- 5.
- 6.
# cp /etc/neutron/l3_agent.ini /etc/neutron/l3_agent.ini.bak# vim /etc/neutron/l3_agent.ini[DEFAULT] interface_driver = neutron.agent.linux.interface.OVSInterfaceDriver
use_namespaces = True
external_network_bridge = br-ex
verbose = True- 1.
- 2.
- 3.
- 4.
# cp /etc/neutron/dhcp_agent.ini /etc/neutron/dhcp_agent.ini.bak# vim /etc/neutron/dhcp_agent.ini [DEFAULT]interface_driver = neutron.agent.linux.interface.OVSInterfaceDriver
dhcp_driver = neutron.agent.linux.dhcp.Dnsmasq
use_namespaces = True
verbose = True
dnsmasq_config_file = /etc/neutron/dnsmasq-neutron.conf- 1.
- 2.
- 3.
- 4.
- 5.
# cp /etc/neutron/metadata_agent.ini /etc/neutron/metadata_agent.ini.bak# vim /etc/neutron/metadata_agent.ini[DEFAULT] auth_url = http://controller:5000/v2.0
auth_region = regionOne
admin_tenant_name = serviceadmin_user = neutron
admin_password = neutron
nova_metadata_ip = controller
metadata_proxy_shared_secret = METADATA_SECRET
verbose = True- 1.
- 2.
- 3.
- 4.
- 5.
- 6.
- 7.
# vim /etc/nova/nova.conf [neutron] service_metadata_proxy = True
metadata_proxy_shared_secret = METADATA_SECRET- 1.
- 2.
15、 Restart on the control node API service
# systemctl restart openstack-nova-api.service- 1.
7、 ... and 、 Installation configuration dashboard
1、 install dashboard And the required and dependent packages
# yum install openstack-dashboard httpd mod_wsgi memcached python-memcached- 1.
2、 modify dashboard The configuration file
# cp /etc/openstack-dashboard/local_settings /etc/openstack-dashboard/local_settings.bak# vim /etc/openstack-dashboard/local_settingsOPENSTACK_HOST = "controller"ALLOWED_HOSTS = ['*']CACHES = {
	'default': {
'BACKEND': 'django.core.cache.backends.memcached.MemcachedCache', 'LOCATION': '127.0.0.1:11211', }}TIME_ZONE = "TIME_ZONE"- 1.
- 2.
- 3.
3、 function web Service connection OpenStack service
# setsebool -P httpd_can_network_connect on- 1.
4、 Due to packaging defects , The dashboard does not load correctly CSS. Run the following command to solve this problem :
# chown -R apache:apache /usr/share/openstack-dashboard/static- 1.
5、 start-up Web Server and session storage service and configuration startup when the system starts :
# systemctl enable httpd.service memcached.service# systemctl start httpd.service memcached.service- 1.
8、 ... and 、 Access test
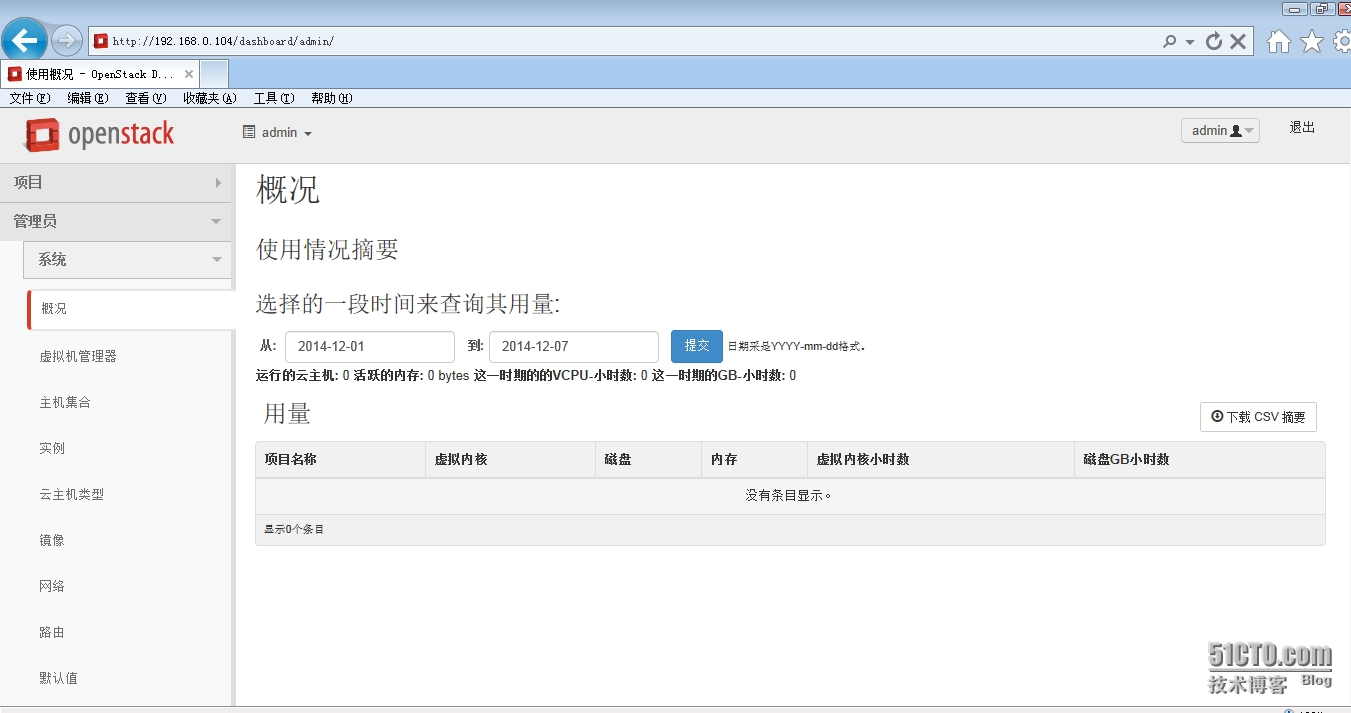
1、 be based on HTTP Conduct interview tests :

边栏推荐
- Internet of things? Come and see Arduino on the cloud
- Bat learning notes
- System design idea of time traceability
- starring V6平台开发接出点流程
- Kubernetes集群部署
- Buddha bless you that there will never be a bug
- 一次 MySQL 误操作导致的事故,高可用都不顶不住!
- 实时渲染:实时、离线、云渲染、混合渲染的区别
- Unity移动端游戏性能优化简谱之 以引擎模块为划分的CPU耗时调优
- Digital twin industry case: Digital Smart port
猜你喜欢

Freeswitch uses origin to dialplan

60 个神级 VS Code 插件!!

Kubernetes cluster deployment

制造业项目MDM主数据项目实施心得

Necessary fault handling system for enterprise network administrator

Geoscience remote sensing data collection online

技术实现 | Apache Doris 冷热数据存储(一)

Example analysis of corrplot related heat map beautification in R language

Full link service tracking implementation scheme

Power supply noise analysis
随机推荐
Saltstack state state file configuration instance
Volcano成Spark默认batch调度器
To open the registry
php OSS文件讀取和寫入文件,workerman生成臨時文件並輸出瀏覽器下載
Digital twin industry case: Digital Smart port
The script implements the automated deployment of raid0
Does version 2.2.0 support dynamic addition of MySQL synchronization tables
Docker installing MySQL
佛祖保佑 永无BUG
starring V6平台开发接出点流程
[go Language brossage] go from 0 to Getting started 4: Advanced use of slice, Primary Review and Map Getting started Learning
Necessary fault handling system for enterprise network administrator
Some small requirements for SQL Engine for domestic database manufacturers
Understanding openstack network
R for Data Science (notes) -- data transformation (used by filter)
通过SCCM SQL生成计算机上一次登录用户账户报告
Tkde2022: Dialogue recommendation system based on knowledge enhanced sampling
The cdc+mysql connector joins the date and time field from the dimension table by +8:00. Could you tell me which one is hosted by Alibaba cloud
怎么使用R包ggtreeExtra绘制进化树
小滴课堂海量数据处理商用短链平台大课