当前位置:网站首页>Internet of things? Come and see Arduino on the cloud
Internet of things? Come and see Arduino on the cloud
2022-06-24 19:21:00 【Cutting away the slight cold】

Here is HelloGitHub Introduction of open source hardware development platform Arduino Series of tutorials for .
- Chapter one :Arduino Introduction and development environment construction
- Second articles : Make temperature and humidity display
Last article , We explained how to install Arduino support library 、DHT 11 Temperature and humidity sensors and OLED Use of screen , And use Arduino A small temperature and humidity display is made .
In this particular, we pay attention to All things connected Era , Let's Arduino Temperature and humidity “ On the cloud ” play , There is a scientific name called the Internet of things .
The Internet of things (IoT) Is a network of physical objects , These physical objects are embedded with sensors 、 Software and other technologies , So that it can establish connections with other devices and systems and exchange data through the Internet .
Do you feel a little taller in an instant , But don't worry about the knowledge in this issue , Because the profound I will not !
Today we're going to talk about : How to put the temperature and humidity equipment made in the last phase into the cloud , Through the Internet of things platform Real time data upload and Remote control equipment . The implementation will Arduino The temperature and humidity data measured by the equipment are uploaded to the Internet of things platform , Then the receiving platform sends instructions to the control equipment LED Light switch .
Have you started to sharpen your fists ? Now let's start “ On the cloud ”!
One 、 Realize networking function
1.1 Module introduction
First , If you want to Arduino Servers connected to the Internet of things platform , It is necessary to enable the device to connect to the network first ( Like at home WiFi), Here we need to use ESP-01(s) modular , To achieve this function .
Its usage is similar to that of the components described above , Just use VCC(3.3v)、GND、TX、RX Four lines , And Arduino communicate . What I use here is ESP-01+ Adapter plate , The adapter board realizes 5v->3.3v And Rx and Tx Leading out of the interface , Convenient for subsequent use .

majority ESP-01(s) The module leaves the factory , It's all built in AT Command firmware , When in use, you only need to send to the module AT Command to connect to the network 、 Data transmission and other operations .
About what is AT Instructions , Simply speaking, it is a kind of equipment room Communication message specification , More specific definitions and application scenarios can be understood by readers themselves .
1.2 Module USES
ESP-01 The module wiring mode is as follows :
- GND -> GND
- VCC -> 3.3v( Separate modules ) 5.5v( With adapter plate )
- Tx -> Rx
- Rx -> TX
Use of AT The instructions are as follows :
- AT+RST: Reset module
- AT+CWMODE=1: Switch mode
- AT+CWQAP: To break off WiFi Connect
- AT+CWJAP="WiFi name "," password ": Connect WiFi
- AT+CIPSTART="TCP","IP", port : Connect to server
- AT+CIPMODE=1: Switch to TCP Passthrough mode
- AT+CIPSEND: Start sending data
1.3 Code
Arduino Connect WiFi Code for :
#include <arduino.h>boolean at_exec(char *data, char *keyword, unsigned long time_out){ Serial.println(data); Serial.flush(); delay(100); // Waiting response unsigned long start = millis(); while (Serial.available() < strlen(keyword)) { if (millis() - start > time_out) return false; } if (Serial.find(keyword)) return true; else return false; while (Serial.available()) Serial.read(); // Clear the serial buffer }void setup(){ Serial.begin(115200); while (!at_exec("AT+RST", "OK", 1000)); while (!at_exec("AT+CWMODE=1", "OK", 1000)); while (!at_exec("AT+CWQAP", "OK", 1000)); while (!at_exec("AT+CWJAP=\"HelloGithub\",\"PassWord\"", "WIFI CONNECTED", 2000)); while (!at_exec("AT+CIPSTART=\"TCP\",\"183.230.40.40\",1811", "CONNECT", 1000)); while (!at_exec("AT+CIPMODE=1", "OK", 500)); while (!at_exec("AT+CIPSEND", "OK", 500)); //Serial.println("* product ID# Authentication information # Script name *"); // How to obtain this information is discussed below }Be careful :
- Disconnect before downloading Arduino and ESP-01 The connection of , Otherwise, the download may fail
- perform
AT+CIPSENDafter , The module will no longer respond AT Instructions , If you need to modify the configuration, you must power off and restart the module - Remember to change
AT+CWJAPParameters of , Corresponding WiFi User name and password
After burning , The connection module restarts Arduino. In the router management interface “ Connected device ” page , See our WiFi equipment , That means success !

Two 、 Internet of things platform
Here we are using OneNet Internet of things platform , It is the Internet of things created by China Mobile PaaS Open platform , Through this platform, you can easily ( free ) Implement the device ” On the cloud “.

below , It will cover the process from registration to cloud on device , All cloud configuration steps required .
2.1 register
open OneNet Official website , Click on the “ register ” Registered account .

2.2 New product
After completing the login account registration , Click on the “ Console ” Go to the control page .
Click after entering “ All products and services ”->“ Multi protocol access ”:

stay “ Multi protocol access interface ” choice TCP transparent transmission -> Add product :

Fill in the relevant information in the pop-up sidebar ,“ Product industry ” and “ Category ” Just fill it in , Finally, click “ determine ” Complete new product .

2.3 Add equipment
Find the product I just created. Mine is “HelloGitHub”, Then click... In the left column “ The equipment list ”, Click on the new page “ Add equipment ”, After filling in the relevant information, click “ add to ”, Complete the operation of adding equipment .

2.4 Write data parsing script
Next , We configure the cloud data parsing script , Don't write it yourself and download it directly Official script You can use it if you change it locally .

In the extracted and downloaded folder , find sample.lua In the file device_timer_init function ( The first 303 That's ok ), Change to the following :
function device_timer_init(dev) -- Send the light switch command regularly -- dev:timeout(0) dev:add(10,"open","open") dev:add(12,"close","close")end find device_data_analyze function ( At the end of the file ), Change to the following :
function device_data_analyze(dev) local t={} local a=0 local s = dev:size() -- We define One time transmission ten byte , Respectively temperature humidity -- add_val(t,"Temperature",a,dev:bytes(1,5)) add_val(t,"Humidity",a,dev:bytes(6,5)) dev:response() dev:send("received") return s,to_json(t)endIf you are interested in using scripts , You can view code comments and access documents on the official website , There will be no more explanation here .
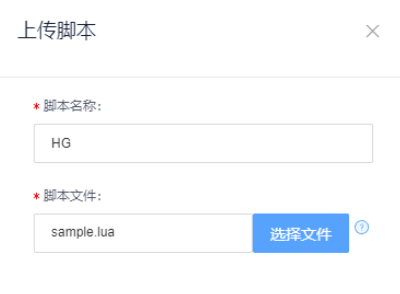
2.5 Upload script
After saving the file , Go back to the just opened “ The equipment list ” Click on “ Upload parsing script ”.

thus , Cloud configuration is complete .
2.6 Connect to the Internet of things platform
modify 1.3 Code for , take “ How to obtain this information is discussed below ” Change this line of code to :
Serial.println("* product ID#ILoveHelloGitHub#HG*"); After configuring the cloud , To obtain the product ID、 Authentication information 、 Script name Equal parameter , Replace to the corresponding position .(* product ID# Authentication information # Script name *)
Last , Re - burn the code and restart ESP-01 modular . Wait a moment , Refresh in the cloud “ The equipment list ” page , See our equipment , Prove that the device is successfully connected to the Internet of things platform .

3、 ... and 、Arduino On the cloud
Go through the front matting , We “ On the cloud ” The most exciting part of our journey is coming . Upload the temperature and humidity data of the environment where the device is located to the cloud !
3.1 Code
Since it is uploading temperature and humidity data , You need us Last issue Speak of the DHT11 modular ( Temperature and humidity sensor ), Then combine the code of connecting the network in this issue , It can be finished in minutes .
But to make the project more interesting , I added an additional parsing IOT platform to send commands , Remote control switch LED Function of .
The code snippet is as follows :
void setup(){ // Change to your own cloud parameters Serial.println("* product ID#ILoveHelloGitHub#HG*");}// According to the received from the serial port character string Execute the corresponding instruction bool command_parse(String command){ ... if (command == "open") { digitalWrite(LED_BUILTIN, HIGH); } else if (command == "close") { digitalWrite(LED_BUILTIN, LOW); }}Complete code :https://github.com/HelloGitHub-Team/Article/blob/master/contents/Other/Arduino/3/code.cpp
Last , Modify... In the complete code WiFi Name and password , as well as product ID after , Re - burn the code .
3.2 Upload temperature and humidity data
Just a moment later , View the Internet of things platform “ Equipment information ”, If you see Arduino Uploaded indoor temperature and humidity information , It proves that our code runs successfully .

3.3 Remote control
The following is a demonstration of how to use the Internet of things platform , Switch of remote control lamp .
Open the Internet of things platform , Click on “ Device interface ” Of “ Give orders ”, Select... On the pop-up form “ character string ” Options , Input “open” or “close” Instructions .

Come here , The remote control is completed Arduino built-in LED Light on / Closing effect !

success ! And the flower
Four 、 summary
This article , combination Arduino、 sensor 、WiFi as well as OneNet Internet of things platform , By doing and talking , It describes the whole process of a device from networking to cloud . Although it is an entry-level tutorial , But this knowledge can already help you accomplish , Such as smart switches 、 Practical and interesting projects such as automatic feeders .
Do not underestimate every small progress , Every step is worth a thousand miles .
If the wave of mobile Internet has passed , Will there be any in the next wave The Internet of things And the shadow of ? Anyway, I don't think it's too much for me , What do you think of that ? Welcome to comment on it .
thus , Whole Arduino Series of tutorials , It's over here . The end ! Sprinkle the flowers again
hope ,HelloGitHub Of Arduino Series of tutorials , It can arouse your interest in the Internet of things , After all, interest is the best teacher .
These are the contents of this issue , Here is HelloGitHub Share GitHub The interesting 、 Entry-level open source projects .
Thank you for reading , If you think the content is good , Do remember to like 、 Leaving a message. 、 Share , See you next time !
边栏推荐
- Volcano成Spark默认batch调度器
- 60 个神级 VS Code 插件!!
- Tkde2022: Dialogue recommendation system based on knowledge enhanced sampling
- API管理之利剑 -- Eolink
- Starring develops httpjson access point + Database
- 智能合约安全审计入门篇 —— delegatecall (2)
- Understanding openstack network
- three. Basic framework created by JS
- ArrayList源码解析
- Building MVC system based on three-tier structure
猜你喜欢


随机推荐
mysql binlog 数据源配置文档麻烦分享一下
FROM_ GLC introduction and data download tutorial
【Leetcode】旋转系列(数组、矩阵、链表、函数、字符串)
Ask a question. Adbhi supports the retention of 100 databases with the latest IDs. Is this an operation like this
Does version 2.2.0 support dynamic addition of MySQL synchronization tables
Value passing and reference passing of value types and reference types in CSharp
Application scenarios of channel of go question bank · 11
thinkphp6中怎么使用jwt认证
subject may not be empty [subject-empty]
建立自己的网站(8)
R语言corrplot相关热图美化实例分析
想问下 pgsql cdc 账号同一个 多个 task 会有影响吗,我现在3个task 只有一个 有
时间溯源的系统设计思路
How to use JWT authentication in thinkphp6
cdc+mysql connector从维表中join的日期时间字段会被+8:00,请问阿里云托管的
What do I mean when I link Mysql to report this error?
使用阿里云RDS for SQL Server性能洞察优化数据库负载-初识性能洞察
Air pollution gas satellite data download tutorial
论文解读(SR-GNN)《Shift-Robust GNNs: Overcoming the Limitations of Localized Graph Training Data》
This is not safe