当前位置:网站首页>23. opencv - image mosaic project
23. opencv - image mosaic project
2022-06-24 10:35:00 【 child】
The basic concept of feature detection
Application scenarios :
1. Image search , Such as searching for pictures , Extract the main feature points in the picture to search
2. jigsaw puzzle
3. Image mosaic , Join two related diagrams together

Jigsaw puzzle method :
1. Find features
2. Unique feature point , traceable , Can compare
3. The flat part is difficult to find its position in the original picture
4. The edges are easier to find than flat , But we can't determine the specific location at once
5. The corner can be found in the original drawing at once
What are features ?
Image features refer to meaningful image areas , It's unique 、 Easy to identify , Like corners , Spots and high density areas
Corner point
The most important feature is the corner
The pixel corresponding to the maximum value of the gray gradient 、 The intersection of two lines 、 Extreme points ( The maximum value of the first derivative , But the second derivative is 0)
Harris Corner point ( Common methods )

Case one : For this window , It can move in any direction , If it moves in any direction within this window , The pixels in the window do not change , This is a flat picture , In other words, there are no corners in this picture .
The second case : If the detection window moves on an edge , Although this edge is different from the surrounding pixels , But because it moves up and down , So the central pixel will not change , There will be no change on the line or on the left or right , When the detection window moves left and right, the pixels change , Is an edge .
The third case : The detection window is in a focus
- Smooth areas : No matter where you move , The measurement coefficient remains unchanged
- At the edge : When the vertical edge moves , The measurement coefficient changes dramatically
- At the intersection , No matter which direction you move , The measurement coefficients change dramatically
Harris Corner detection API
notes : Corner detection shall be a gray-scale image
cornerHarris(img, dst, blockSize, ksize, k)
dst Output results ( When focus is detected , The output matrix )
blockSize Detect the size of the window , The larger the window is set , The higher the sensitivity
ksize Sobel( Sobel ) Convolution kernel , Convolute horizontally or vertically , Convolution kernel is generally set to 3
k Weight factor , Empirical value , Usually take 0.02~0.04 Between
import cv2
from matplotlib.pyplot import gray
import numpy as np

blockSize = 2
ksize = 3
k = 0.04

img = cv2.imread("E:\\chess.png")

#  Graying
gray = cv2.cvtColor(img, cv2.COLOR_BGR2GRAY)

# Harris Corner detection
dst = cv2.cornerHarris(gray, blockSize, ksize, k)

#  Corner display , take dst To determine the maximum value of , All that are greater than the threshold are displayed
img[dst > 0.01*dst.max()] = [0,0,255]   #  Red shows

cv2.imshow('harris',img)
cv2.waitKey(0)
shi—Tomasi Corner detection
shi—Tomasi yes Harris Improvement of corner detection .Harris The stability and K of , and K It's an experience , It's hard to set the best value .


By default false Don't use Harris Corner detection , If you use Harris Corner detection (true), You need to set K, The default is 0.04
In practical use , Before filling 4 Just one parameter
import cv2
from cv2 import cornerSubPix
from matplotlib.pyplot import gray
import numpy as np

# tomasi
maxCorners = 1000
qualityLevel = 0.01
minDistance = 10  #  The greater the distance , The fewer corners detected

img = cv2.imread("E:\\chess.png")

#  Graying
gray = cv2.cvtColor(img, cv2.COLOR_BGR2GRAY)

corners = cv2.goodFeaturesToTrack(gray, maxCorners, qualityLevel, minDistance)
corners = np.int0(corners)  #  Convert floating point to integer

# shi_Tomasi  Draw corners
for i in corners:
    x,y = i.ravel()  # Convert to a one-dimensional array
    cv2.circle(img, (x,y), 3, (0,0,255),-1)

cv2.imshow('shi_Tomasi',img)
cv2.waitKey(0)
shi—Tomasi Corner detection is a more common corner detection method .
SIFT Key point detection
Scale-Invariant Feature Transform(SIFI) Scale independent corner detection , It's also OPENCV An important method to obtain corner points in .
sift The reason for this :
Harris Corners have the property of rotation invariance , But after zooming , The original corner may not be a corner
sift advantage : The original detection is angle , After zooming in, it is still a corner
 harris testing : The original detection is angle , But when you zoom in , The detected becomes an edge , Not a corner .
Use SIFT Steps for
- establish SIFT object
- To test , Get keys kp = sift.detect(img, ...)
- Draw key points , drawKeypoints(gray, kp, img)
import cv2
from cv2 import cornerSubPix
from matplotlib.pyplot import gray
import numpy as np

img = cv2.imread("E:\\chess.png")

#  Graying
gray = cv2.cvtColor(img, cv2.COLOR_BGR2GRAY)

#  establish sift object
sift = cv2.SIFT_create()
kp = sift.detect(gray, None) #  The second parameter is mask Area

#  Draw corners , The third parameter is to plot on that graph
cv2.drawKeypoints(gray, kp, img)

cv2.imshow('img',img)
cv2.waitKey(0)
SIFI Error reporting processing of the algorithm
take sift = cv2.xfeatures2d.SIFT_create()
Change it to sift = cv2.SIFT_create() that will do

SIFT Computational descriptors
Key points and descriptors
- Key points : Location , Size and direction
- Key point descriptors : A set of vector values of the pixels around the key that contribute to it are recorded , It is not subject to affine transformation 、 Effects of light transformation, etc
Computational descriptors
kp, des = sift.compute(img, kp) Its function is to carry out feature matching
 In practical use , Commonly used this API Calculate
kp, des = sift.detectAndCompute(gray, None)
print(des)   # Print descriptor
Descriptors are mainly used in feature matching
SURF feature detection
Speeded-Up Robust Features(SURF) : Accelerated robust feature detection
SIFT The biggest advantage : When testing , Feature point detection is particularly accurate , The descriptor is also described in great detail
SURF The advantages of :SIFT The biggest problem is the slow speed , So there is SURF, When performing a series of image detection , Processing speed is very slow ,SURF Retain the SIFT The advantages of
Use SURF Steps for

import cv2
import numpy as np

img = cv2.imread("E:\\chess.png")

#  Graying
gray = cv2.cvtColor(img, cv2.COLOR_BGR2GRAY)

#  establish surf object
surf = cv2.xfeatures2d.SURF_create()    #surf testing

#  Use surf To test
kp, des = surf.detectAndCompute(gray, None)
# print(des)   # Print descriptor

#  Draw corners , The third parameter is to plot on that graph
cv2.drawKeypoints(gray, kp, img)

cv2.imshow('img',img)
cv2.waitKey(0)
solve SIFT and SURF Methods of reporting errors due to patent reasons
- Uninstall the higher version of python, install python3.6
- Copy the following two commands to the control side for installation :
- pip install opencv-python==3.4.2.16
pip install opencv-contrib-python==3.4.2.16
Go through the above steps , The problem of program error reporting can be solved
ORB feature detection
Oriented FAST and Rotated BRIEF The combination of feature point detection and descriptor calculation

Some data needs to be discarded , To increase speed , The detection accuracy has decreased , This method is used when a large amount of data is detected .
notes :ORB No copyright issues , It's open source.
FAST It can achieve real-time detection of feature points , Without direction
BRIEF It describes the detected feature points , It speeds up the establishment of feature descriptors , At the same time, it also greatly reduces the time of feature matching
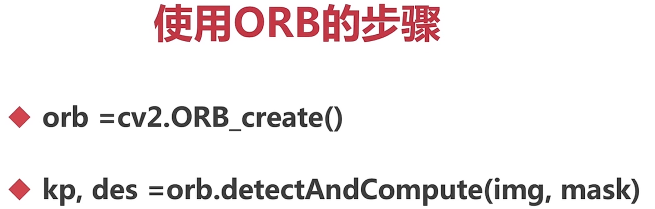
#  establish orb object
orb = cv2.ORB_create()
kp, des = orb.detectAndCompute(gray, None)
Summary
SIFT The calculation accuracy is the highest , But it's slower
SURF The accuracy is slightly lower than SIFT, But the speed block
ORB It can be detected in real time , Faster , But the accuracy is not as good as the first two
Violent characteristics match
After the learning of feature point detection in the above sections , Next, learn the feature point matching of the two pictures
Feature matching method :
BF(Brute- Force) Violence feature matching method , adopt enumeration The way to achieve
FLANN The fastest neighborhood feature matching method
Violence feature matching principle
It USES Each feature in the first group The narrator of , Match all feature descriptors in the second group , Calculate the difference between them , Then the closest match is returned
OPENCV Feature matching steps
- Create matchers BFMatcher(normType, crossCheck) The first parameter is the matching type , The second parameter is cross check
- Feature matching bf.match(des1,des2) The descriptor of the first picture is matched with the second picture
- Draw match points cv2.drawMatches(img1,kp1,img2,kp2,...)


import cv2
import numpy as np

img1 = cv2.imread('E:\\opencv_photo\\opencv_search.png')
img2 = cv2.imread('E:\\opencv_photo\\opencv_orig.png')

#  Graying
gray1 = cv2.cvtColor(img1, cv2.COLOR_BGR2GRAY)
gray2 = cv2.cvtColor(img2, cv2.COLOR_BGR2GRAY)

#  establish surf object
surf = cv2.xfeatures2d.SURF_create()
#  Calculate feature points and descriptors
kp1, des1 = surf.detectAndCompute(gray1, None)
kp2, des2 = surf.detectAndCompute(gray2, None)

#  Create matchers
bf = cv2.BFMatcher(cv2.NORM_L1)
#  Feature matching
match = bf.match(des1, des2)

img3 = cv2.drawMatches(img1, kp1, img2, kp2, match, None)

cv2.imshow('img3',img3)
cv2.waitKey(0)
FLANN Feature matching


When choosing SIFT and SURF when , choice KDTREE, if ORB choice LSH
Empirical value , commonly KDTREE Set to 5


# FLANN Feature matching
import cv2
import numpy as np

img1 = cv2.imread('E:\\opencv_photo\\opencv_search.png')
img2 = cv2.imread('E:\\opencv_photo\\opencv_orig.png')
#  Graying
gray1 = cv2.cvtColor(img1, cv2.COLOR_BGR2GRAY)
gray2 = cv2.cvtColor(img2, cv2.COLOR_BGR2GRAY)
#  establish surf object
surf = cv2.xfeatures2d.SURF_create()
#  Calculate feature points and descriptors
kp1, des1 = surf.detectAndCompute(gray1, None)
kp2, des2 = surf.detectAndCompute(gray2, None)

#  Create matchers
index_params = dict(algorithm = 1, trees = 5)
search_params = dict(checks = 50)
flann = cv2.FlannBasedMatcher(index_params, search_params)

# Match the descriptors
matchs = flann.knnMatch(des1, des2, k=2)

#  Filter , Optimize all matching points
good = []
for i, (m,n) in enumerate(matchs):
    if m.distance < 0.7 * n.distance:
        good.append(m)

ret = cv2.drawMatchesKnn(img1, kp1, img2, kp2, [good], None)

cv2.imshow('result',ret)
cv2.waitKey() 
The result is similar to the violent match , But faster , The accuracy of violent matching is a little higher
Image search
Two techniques are used : Feature matching + Homography matrix

Homography matrix action : Get a matrix , This matrix and the image A Carry out operations , You can get images 2 The location of
Images 2 The original position can be obtained through calculation
 Turn the picture to regular

Cutout , Mapping
step :
First, match the feature points , Calculate the homography matrix , Compute perspective transformation
#  Image search
import cv2
import numpy as np

img1 = cv2.imread('E:\\opencv_photo\\opencv_search.png')
img2 = cv2.imread('E:\\opencv_photo\\opencv_orig.png')
#  Graying
gray1 = cv2.cvtColor(img1, cv2.COLOR_BGR2GRAY)
gray2 = cv2.cvtColor(img2, cv2.COLOR_BGR2GRAY)
#  establish surf object
surf = cv2.xfeatures2d.SURF_create()
#  Calculate feature points and descriptors
kp1, des1 = surf.detectAndCompute(gray1, None)
kp2, des2 = surf.detectAndCompute(gray2, None)

#  Create matchers
index_params = dict(algorithm = 1, trees = 5)
search_params = dict(checks = 50)
flann = cv2.FlannBasedMatcher(index_params, search_params)

# Match the descriptors
matchs = flann.knnMatch(des1, des2, k=2)

#  Filter , Optimize all matching points
good = []
for i, (m,n) in enumerate(matchs):
    if m.distance < 0.7 * n.distance:
        good.append(m)

# ret = cv2.drawMatchesKnn(img1, kp1, img2, kp2, [good], None)

#  The match point must be greater than or equal to 4
if len(good) >= 4:
#  Find homography matrix
    srcpts = np.float32([kp1[m.queryIdx].pt for m in good]).reshape(-1,1,2)
    # Re transform the array , There are countless lines , Every line has 1 Elements , Each element consists of 2 Child elements make up
    dstpts = np.float32([kp2[m.trainIdx].pt for m in good]).reshape(-1,1,2)

    H,_ = cv2.findHomography(srcpts, dstpts, cv2.RANSAC, 5.0)
    #  The third parameter is to filter the matching points , Random sampling to obtain rules , The last parameter is the threshold
    #  The first return value is homography matrix , The second parameter is its mask , There is no need to show , So use _ Instead of

    #  Perspective transformation
    h,w = img1.shape[:2]
    pts = np.float32([[0,0],[0,h-1], [w-1, h-1], [w-1, 0]]).reshape(-1,1,2)      #  Four corners , top left corner , The lower left corner , The lower right corner , Upper right corner
    dst = cv2.perspectiveTransform(pts, H)

    #  Frame with polygons
    cv2.polylines(img2, [np.int32(dst)], True,(0,255,255))
else:
    print('the number of good is less than 4.')
    exit()
#  The plot
ret = cv2.drawMatchesKnn(img1, kp1, img2, kp2, [good], None)
cv2.imshow('result',ret)
cv2.waitKey()
边栏推荐
- SSM integration
- Quick completion guide for mechanical arm (I): development overview of mechanical arm
- Uniapp develops wechat official account, and the drop-down box selects the first one in the list by default
- pycharm快捷键大全
- 用扫描的方法分发书稿校样
- 百度网盘下载一直请求中问题解决
- Sort out interface performance optimization skills and kill slow code
- numpy. logical_ and()
- 【IEEE】自然语言处理与信息检索国际会议(ECNLPIR 2022)
- JMeter interface test tool foundation - use badboy to record JMeter script
猜你喜欢


随机推荐
Common methods of thread scheduling
Flink checkpoint and savepoint
【IEEE】自然语言处理与信息检索国际会议(ECNLPIR 2022)
2022年能源与环境工程国际研讨会(CoEEE 2022)
【数据分析数据源】全国各省市行政区坐标(包含边界坐标点和中心坐标点)
线程池的执行流程
How can I solve the problem that the swiper animation animation fails when switching between left and right rotations of the swiper?
[data analysis data source] coordinates of provinces, cities and administrative regions across the country (including boundary coordinate points and central coordinate points)
6. package management business development
Web project deployment
Safety and food security for teachers and students of the trapped Yingxi middle school
Role of message queuing
Charles packet capturing tool tutorial
Leetcode - 498: traversée diagonale
Pycharm shortcut keys
pycharm快捷键大全
SSM整合
Record the range of data that MySQL update will lock
3.员工的增删改查
4.分类管理业务开发