当前位置:网站首页>Installation and operation of libuv
Installation and operation of libuv
2022-06-24 12:15:00 【ufgnix0802】
Libuv Installation and operation of
Libuv Link to the official website of :http://libuv.org/
GitHub Download link :https://github.com/libuv/libuv
CMake Download link :https://cmake.org/download/
The following demo uses VS2022
Download and install
Because the demonstration platform is Windows platform , That is to say CMake Compiled into visual studio Project to compile and run .
After downloading Libuv The directory structure of the framework is as follows :

Then , Use CMake Generate visual studio project .( open CMake) as follows :


The following information can be installed by default .

There is no need to uncheck the following , stay BUILD_TESTING and LIBUV_BUILD_TESTS There are the most basic modules in , For learning ( That is, if you have mastered Libuv frame , May cancel BUILD_TESTING and LIBUV_BUILD_TESTS Checked by ). Finally, click... Again Configure, Then click Generate. as follows :

Final , You can click on the Open Project Open the project ( But we need to pay attention : If the computer has more than vs2022, There are other versions , May be opened in another version , It is better to find it directly build In the file directory sln file , Use the right mouse button vs2022 open )

Run using
Use vs2022 Open the interface as follows :

Next is the key to project configuration , Please read and pay attention to .( The content is from the practice of bloggers , For reference only )
function uv_run_tests_a project ( Generate lib file )
TIPS: You can also try to run directly here uv_a Project generation uv_a.lib file ( Generated lib Same file ).
Right click to run uv_run_tests_a project , as follows :


The following results appear , Indicates successful operation .

Where to open the file , We will find that there is more than exe file , And by what we need lib file , as follows :

Next, create an empty project under the current solution , as follows :


First , Create a new one .c file , as follows :


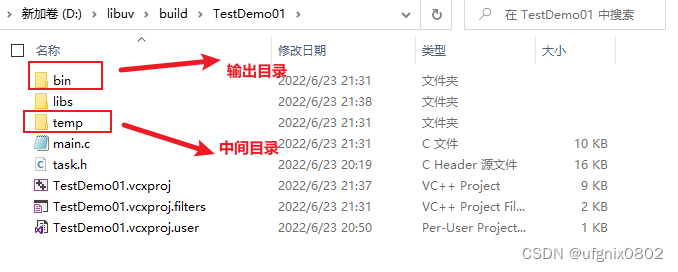
And then right-click TestDemo01 project , The properties are configured with the following information :

TIPS: How to configure the output directory and intermediate directory of the project , Please refer to the following links , I'm just going to elaborate here :https://ufgnix0802.blog.csdn.net/article/details/121366990
The output directory :$(SolutionDir)\$(ProjectName)\bin/$(Platform)\$(Configuration)
Intermediate Directory :$(SolutionDir)\$(ProjectName)\temp/$(Platform)\$(Configuration)
Then , Configure the following information :

TIPS:D:\libuv\include The included libraries must be imported , Of course, the same configuration principle as the output directory and the intermediate directory can also be used for the path ( Bloggers do not demonstrate here ).
There are also items that need to be configured , as follows :


The contents to be added are :
iphlpapi.lib
userenv.lib
psapi.lib
ws2_32.lib
libs\uv_a.lib

TIPS: Note after confirmation , Be sure to click apply , Same as above .
among , Last item libs\uv_a.lib, We need to use it until we run uv_run_tests_a Generated by the project lib file , Generate a... Under the current project libs Folder , Put the following file .


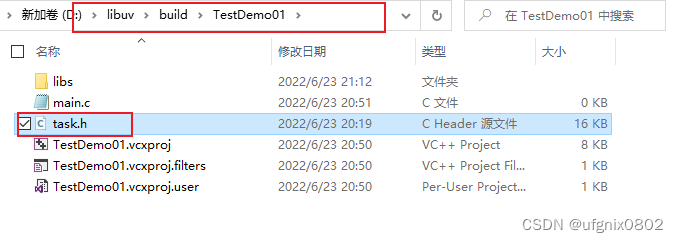
Finally, we need to introduce task.h Header file into the current project , as follows ( The document can be obtained from libuv/test Look in the directory ):

Copy to TestDemo01 In the project , as follows ( And will task.h Added to the TestDemo01 project ):

Running practice
take libuv/test In the catalog echo-server.c Copy the contents of the file to main.c in , as follows :


Last in main.c In the definition of main function , The contents are as follows :
int main()
{

    run_helper_tcp4_echo_server();// Call mode one , Call macro function
    // Call mode 2 , Copy the macro function code directly
    /* loop = uv_default_loop(); if (tcp4_echo_start(TEST_PORT)) return 1; notify_parent_process(); uv_run(loop, UV_RUN_DEFAULT); */
    return 0;
}
Set the project to start project , The operation results are as follows :

The generated file information is as follows :
Here's how to use sokit The effect of the client terminal simulated by the tool :

边栏推荐
- Audio knowledge (III) -- MFCCs code implementation
- Chenglixin research group of Shenzhen People's hospital proposed a new method of multi group data in the diagnosis and prognosis analysis of hepatocellular carcinoma megps
- @Requestbody annotation
- How stupid of me to hire a bunch of programmers who can only "Google"!
- d的10个0符
- 为什么虚拟机ping的通主机,主机ping不通虚拟机
- Adobe Photoshop using the box selection tool for selection tutorial
- GLOG从入门到入门
- How to apply for new bonds is it safe to open an account
- [the lottery in May has ended, and the list of winners has been announced] special session of techo youth university open course database
猜你喜欢

《opencv学习笔记》-- 离散傅里叶变换

Ten thousand campus developers play AI in a fancy way. It's enough to see this picture!
![[live review] battle code pioneer phase 7: how third-party application developers contribute to open source](/img/fa/e52bd8a1a404a759ef6ba88e8da0f0.png)
[live review] battle code pioneer phase 7: how third-party application developers contribute to open source

FreeRTOS overview and experience

《梦华录》要大结局了,看超前点映不如先来学学它!

链接器 --- Linker

《opencv学习笔记》-- 图像的载入和保存

PHP短信通知+语音播报自动双呼

GLOG从入门到入门
PHP SMS notification + voice broadcast automatic double call
随机推荐
How to open a new bond? Is it safe to open an account
Realization of alarm clock with AHK
2021-06-03: Boolean operation. Given a Boolean expression and an expected cloth
【数字IC/FPGA】Booth乘法器
[cloud based co creation] interpretation of harmonyos application and service ecology
5W1H talk about open source - what is open source?
Clickhouse deployment and basic usage 1
数据标注科普:十种常见的图像标注方法
"Meng Hua Lu" is about to have a grand finale. It's better to learn it first than to look ahead!
ArrayList#subList这四个坑,一不小心就中招
LS-DYNA新手入门经验
哪个商业保险养老险好?2022年商业养老保险产品排名
Ten thousand campus developers play AI in a fancy way. It's enough to see this picture!
《opencv学习笔记》-- 分离颜色通道、多通道混合
Libuv的安装及运行使用
How to apply for new bonds is it safe to open an account
巧妙构思-铁死亡调节因子分型预后发6+
Speculation London gold short-term stable money making skills? Where is it safe to fry London gold?
Linker --- linker
Embedded must learn! Detailed explanation of hardware resource interface - based on arm am335x development board (Part 2)