当前位置:网站首页>《nlp入门+实战:第二章:pytorch的入门使用 》
《nlp入门+实战:第二章:pytorch的入门使用 》
2022-07-24 10:25:00 【ZNineSun】
文章目录
上一篇: 《nlp入门+实战:第一章:深度学习和神经网络》
本章代码链接: https://gitee.com/ninesuntec/nlp-entry-practice/blob/master/code/2.pytorch.py
1.pytorch的介绍
Pytorch是一款facebook发布的深度学习框架,由其易用性,友好性。深受广大用户青睐。
2.pytorch的版本

详情请参考pytorch官网:https://pytorch.org/get-started/locally/
上面有详细的安装步骤,当然,你也可以基于anaconda的环境去安装pytorch的环境
当然,你的电脑如果没有gpu的话,前期的简单计算依赖于cpu也完全没问题,安装命令如下:
3.pytorch的入门使用
3.1 张量Tensor
张量是一个统称,其中包含很多类型:
- 0阶张量:标量、常数,0-D Tensor
- 1阶张量:向量,1-D Tensor
- 2阶张量:矩阵,2-D Tensor
- 3阶张量
- 5…
- N阶张量
有了numpy,序列,数组等等,为啥还需要张量呢,在我们pytorch框架中,它只认识张量,,所以我们需要将数据转为张量类型,pytorch才能去解析。
3.2 在Pytorch中创建张量
在学习本小节之前,请确保自己已经安装好了pytorch以及numpy
我是通过anaconda安装的,不会的可以自行百度一下,教程很多。
1.使用python中的列表或者序列创建张量
import torch
import numpy as np
t1=torch.tensor([[1, -1], [1, -1]])
print(t1)
本文只在第一代码段中显示了torch和numpy的导入,后面的默认都是加了的,请大家自行补上。同时本文不没有给出运行结果的截图,旨在确保大家自己手动敲一遍代码,否则就是囫囵吞枣,收获不大的。
2.使用Numpy中的数组创建张量
t2 = torch.tensor(np.array([[1, 2, 3], [4, 5, 6]]))
print(t2)
3.使用torch中的api创建tensor
t3_0 = torch.empty(3, 4)  # 创建3行4列的空tensor,会用无用数据去填充
t3_1 = torch.ones([3, 4])  # 创建3行4列全为1的tensor
t3_2 = torch.zeros([3, 4])  # 创建3行4列全为0的tensor
t3_3 = torch.rand([3, 4])  # 创建3行4列随机值的tensor,随机区间为(0,1)
t3_4 = torch.randint(low=0, high=10, size=[3, 4])  # 创建3行4列随机整数的tensor,随机区间为(low,high)
t3_5 = torch.randn([3, 4])  # 创建3行4列随机数的tensor,随机值的均值为0,方差为1
3.3 Pytorch中的tensor常用方法
1.获取tensor中的数据(当tensor中只有一个元素可用):tensor.item()
t4 = torch.tensor(np.arange(1))
print(t4)
print(t4.item())

2.转化为numpy数组
t5_1 = torch.randint(low=0, high=10, size=[3, 4])
t5_2=t5_1.numpy()
print(t5_1)
print(t5_2)

3.获取形状:tensor.size()
t6 = torch.randint(low=0, high=10, size=[3, 4])
print(t6)
print(t6.size())

4.形状改变:tensor.view((3,4))。类似numpy中的reshape,是一种浅拷贝,仅仅是形状发生改变
t7 = torch.randint(low=0, high=10, size=[3, 4])
print(t7)
print(t7.view(2, 6))
注意,无论怎么转换都要保证最终的乘积不变,如3* 4=2*6
5.获取维数:tensor.dim()
t8 = torch.randint(low=0, high=10, size=[3, 4])
print(t8)
print(t8.dim())

6.获取最大值:tensor.max()
t9 = torch.randint(low=0, high=10, size=[3, 4])
print(t9)
print(t9.max())

7.转置:tensor.t()
t10 = torch.randint(low=0, high=10, size=[3, 4])
print(t10)
print(t10.t())

8.获取tensor第m行n列的值:tensor[m,n]
t11 = torch.randint(low=0, high=10, size=[3, 4])
print(t11)
print(t11[1, 2])  # 获取第二行第3列的值

9.赋值:tensor[m,n]=x,将第m行n列的值赋值为x
t12 = torch.randint(low=0, high=10, size=[3, 4])
print(t12)
t12[1,2]=1000
print(t12)

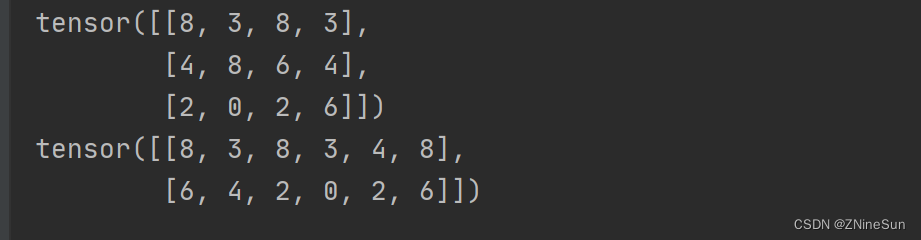
10.交换矩阵的两个维度:torch.transpose(x, 0, 1)
t13 = torch.randn(2, 3);  # 2行3列
print(t13)
t13=torch.transpose(t13, 0, 1)
print(t13)  # 将t13变为3行2列


如果我们遇到这种类型的数据,里面的[1,2,3]分别代表是什么意思呢?
意思是该张量是个三维张量,其中
- 1:里面只有一块数据
- 2,3:代表每一块数据都是一个2行3列的数据
3.4 tensor的数据类型
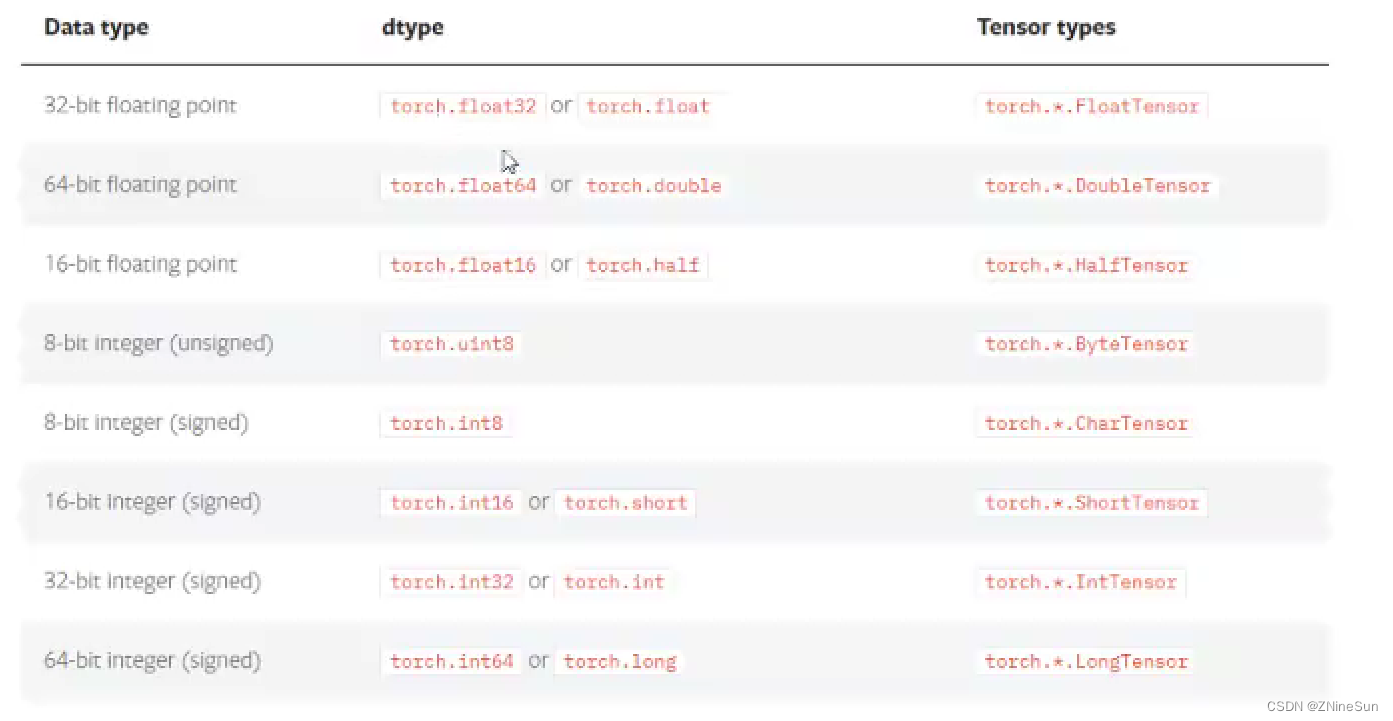
1.获取tensor的数据类型:x.dtype
t15 = torch.randn([3, 4])
print(t15.dtype)

2.在创建张量时,也可通过dtype来指定数据类型
t16 = torch.randn([3, 4],dtype=torch.double)
print(t16.dtype)

当然我们也可通过FloatTensor、LongTensor等来创建我们需要的制定数据类型
t17 = torch.LongTensor([1, 2])
print(t17)

3.5 tensor的其他操作
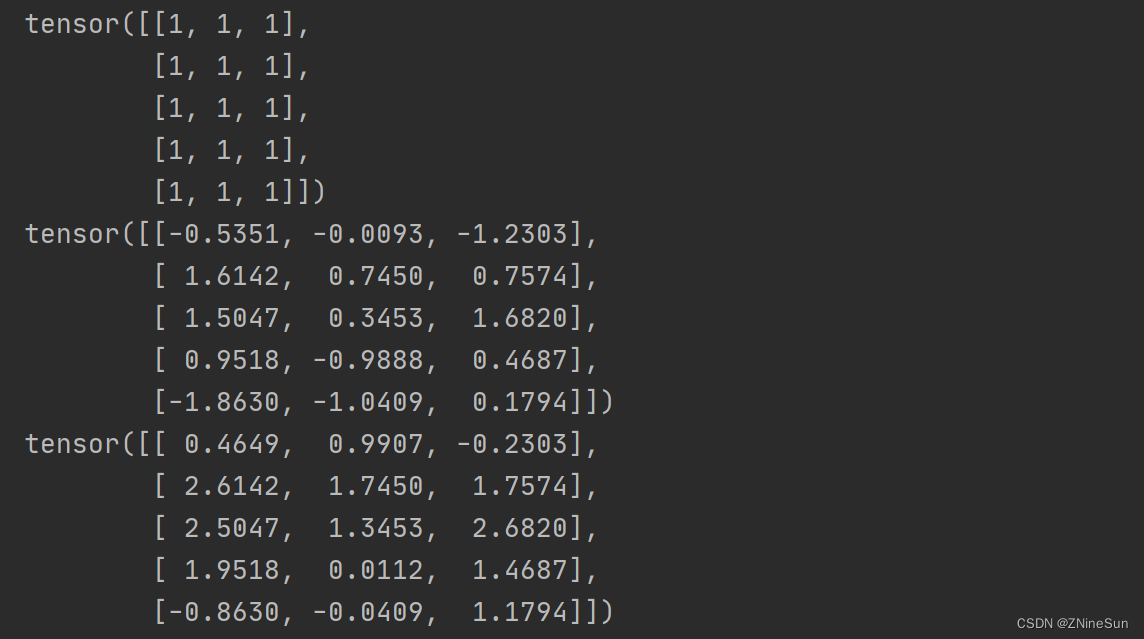
1.tensor与tensor的相加
t18 = t17.new_ones(5, 3, dtype=torch.float)
t18_1 = torch.randn(5, 3)
print(t18)
print(t18_1)
print(t18 + t18_1)
print(torch.add(t18, t18_1))
print(t18.add(t18_1))
t18.add_(t18_1)  # 带下划线的方法会对t18进行就地修改
print(t18)

2.tensor和数字操作
t19 = torch.randn(3, 3)
print("t19:", t19)
print("t19+10=", t19 + 10)

3.CUDA中的tensor
CUDA (Compute Unified Device Architecture),是NVIDIA推出的运算平台。
CUDATM是一种由NVIDIA推出的通用并行计算架构,该架构使GPU能够解决复杂的计算问题。
torch.cuda这个模块增加了对CUDA tensor的支持,能够在cpu和gpu上使用相同的方法操作tensor
通过.to方法能够把一个tensor转移到另外一个设备(比如从CPU转到GPU)
if torch.cuda.is_available():
    device = torch.device("cuda")  # cuda device对象
    y = torch.ones_like(t19, device=device)  # 创建一个cuda的tensor
    x = t19.to(device)  # 使用方法把t19转化为cuda的tensor
    z = x + y
    print(z)
    print(z.to("cpu", torch.double))  # .to方法也能够同时设置类型
else:
    print("您的设备不支持gpu运算")
边栏推荐
- 2022, our small goal
- [STM32 learning] (11) STM32 Mifare_ Use of one (S50) m1s50 (read, write, key modification, control bit interpretation)
- MySQL - lock
- The best time to buy and sell stocks (leetcode-121)
- Add a love power logo to your website
- Home raiding II (leetcode-213)
- Android uses JDBC to connect to a remote database
- Analysis of Kube proxy IPVS mode
- 常量指针、指针常量
- 给你的网站加一个爱发电角标
猜你喜欢

Constant pointer, pointer constant

NIO知识点
![[STM32 learning] (6) use of serial port 1 (usart1)](/img/b1/430d3501a99e46958c066f7fd7eee9.png)
[STM32 learning] (6) use of serial port 1 (usart1)
Image processing: rgb565 to rgb888

Analysis of distributed lock redistribution principle
![[STM32 learning] (7) use of serial port 2 (usart2)](/img/e8/7a01cb2753f448d745e0d8712b3ebc.png)
[STM32 learning] (7) use of serial port 2 (usart2)

Figure model 2-2022-5-13

Ffmpeg splash screen solution (modify the source code and discard incomplete frames)
图像处理:RGB565转RGB888
分布式锁-Redission 原理分析
随机推荐
js函数调用下载文件链接
[STM32 learning] (16) STM32 realizes LCD1602 display (74HC595 drive) - 4-bit bus
高精尖中心论文入选国际顶会ACL 2022,进一步拓展长安链隐私计算能力
Uniapp calendar component
MySQL 数据库 JDBC编程
757. Set the intersection size to at least 2: greedy application question
The best time to buy and sell stocks Ⅲ (leetcode-123)
PostgreSQL rounding
[STM32 learning] (13) STM32 realizes ultrasonic ranging (hc-sr04)
Erlang learning 01
What does resource pooling and resource pooling mean?
The paper of gaojingjian center was selected into the ACL 2022 of the international summit to further expand the privacy computing capacity of Chang'an chain
zoj-Swordfish-2022-5-6
Android uses JDBC to connect to a remote database
The optimal time to buy and sell stocks includes the freezing period (leetcode-309)
Kotlin Advanced Grammar
【LeeCode】获取2个字符串的最长公共子串
zoj1137+作业1--2022年5月28日
[STM32 learning] (5) press the key to control the flow light (interrupt Implementation)
Ribbon's loadbalancerclient, zoneawareloadbalancer and zoneavoidancerule are three musketeers by default