当前位置:网站首页>Download, configuration and installation of MySQL
Download, configuration and installation of MySQL
2022-06-28 00:52:00 【Nara Senyu】
Catalog
download mysql Official website address
2. Configuration initialization file my.ini
4. install mysql5.7.23 Decompression version
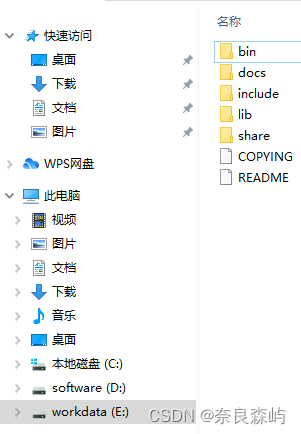
4.1 Click this computer... In the folder :
4.4 Configure environment variables :
4.4.1: Click Add , As shown in the figure :
4.4.1 Find... In the picture path
5. The next step is to open the command prompt as an administrator
5.1 After entering bin Enter the installation command later
5.2 Then re-enter the installation command
7. solve mysql Unable to connect remotely :
Thank you for reading , If it helps you , Please give me some praise
download mysql Official website address
MySQL :: Download MySQL Installer

2. Configuration initialization file my.ini
In your file directory , As shown in the figure :

That is, create a file in the root directory txt file , Name is “my”( Customize ), The file suffix is ini
Then copy the following code and put it in the file ( The newly unzipped file does not my.ini file , You need to create your own )
In addition to the installation directory and data storage directory, the following code needs to be modified , The rest need not be modified
details —— Be sure to pay attention to the address : this datadir You should add a following to the path of ”/data“, And it has to be ”\“ Change it to ”/“ Symbol

[mysqld]
#  Set up 3306 port
port=3306
#  Set up mysql Installation directory    ---------- Is your file path -------------
basedir=E:\mysql\mysql
#  Set up mysql Database data storage directory   --------- Is your file path data The folder is created by itself
datadir=E:\mysql\mysql\data
#  Maximum connections allowed
max_connections=200
#  Number of connection failures allowed .
max_connect_errors=10
#  The character set used by the server defaults to utf8mb4
character-set-server=utf8mb4
#  The default storage engine that will be used when creating a new table
default-storage-engine=INNODB
#  By default “mysql_native_password” Plug in authentication
#mysql_native_password
default_authentication_plugin=mysql_native_password
[mysql]
#  Set up mysql Client default character set
default-character-set=utf8mb4
[client]
#  Set up mysql The default port when the client connects to the server
port=3306
default-character-set=utf8mb4
3. After creation ini After the document , Open and change the path , Path is the root directory path mentioned in the second point , here
Pay attention to the : Path unification “/” Symbol , You'd better check it

4. install mysql5.7.23 Decompression version
4.1 Click this computer... In the folder :
4.2 Find the advanced system settings or enter the advanced system settings , Then click on the environment variable
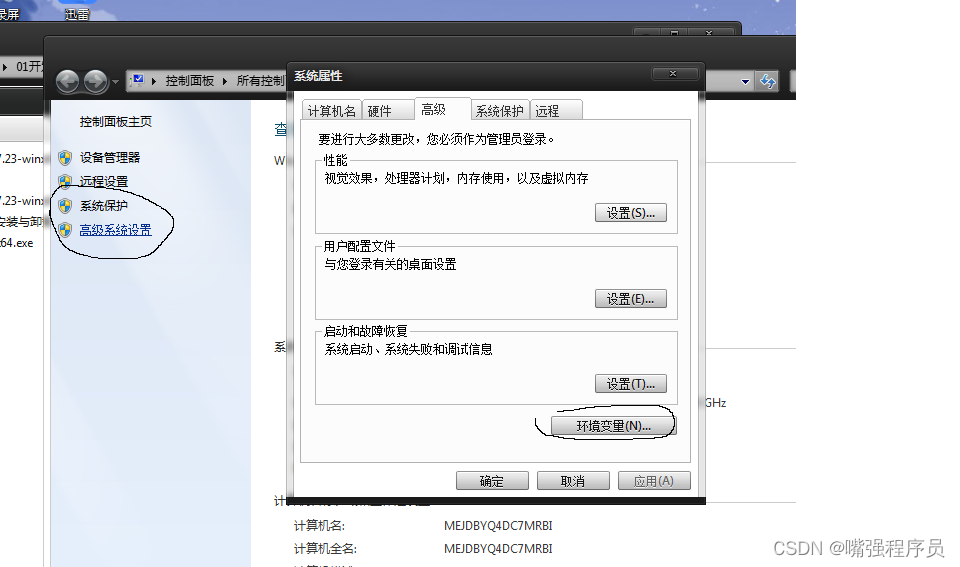
4.3 Configure environment variables -- Note that ” System environment variable “, That's the one below

4.4 Configure environment variables :
4.4.1: Click Add , As shown in the figure :


 Variable name :
MYSQL_HOME
 A variable's value : That is, the root directory path
D:\soft\mysql-5.7.23-winx64
4.4.1 Find... In the picture path

Then click Edit , Enter the following interface , Then click New

Then copy the following code to the blue area
%MYSQL_HOME%\bin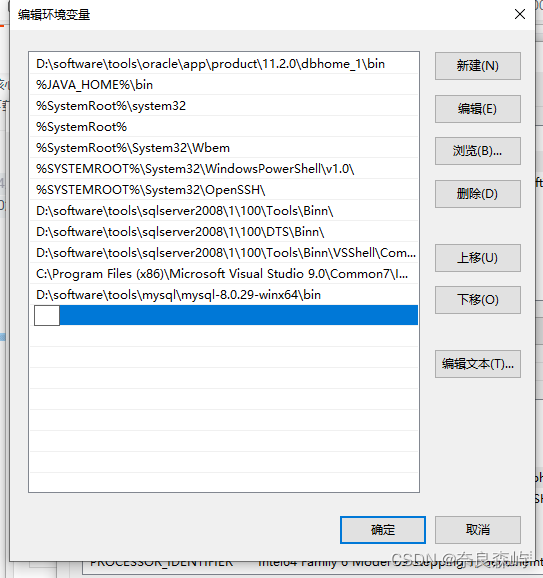
5. The next step is to use Administrator status Open Command Prompt
Need to go to bin Catalog ( At the root , There are pictures on it ): When inputting, you can press Tab Complete the input

5.1 After entering bin Enter the installation command later
mysqld -install The following code will be displayed , It means success

If it doesn't work , Display with dll The error message at the end of the file is , Your PC is missing this file , Then you need to download a software , Here, Xiaobian provides two software : When downloading, make sure it is the official website !!!!! The address is below , Tutorials, too , Just install it
![]()


5.2 Then re-enter the installation command
mysqld -install 5.3 Enter the initialization code insecure This thing is During initialization, this parameter sets the default password to null , Can not add
mysqld --initialize-insecure --user=mysqlAccording to just my.ini File to initialize , Then it will produce a data Folder , All the above said why we should add /data Why , also ”/“ This symbol

5.4 Input Start the service Code
net start mysql
5.5. Input Set password code The password is self-made
mysqladmin -u root -p password New password Enter password: Old password
Directly enter , Because initialization directly puts mysql The password for is set to null
The next two are settings password And re-enter the password

5.6. Check whether the connection test is successful
mysql -uroot -p ( The code is empty ) enter then Enter the password you set 
5.7 Display database
show databases;
Display table
show tables;6. uninstall mysql
1 Out of Service net stop mysql
2. Delete service sc delete mysql But the service is only disabled , Services still exist
3. Remove the service mysqld remove Need to go to bin Catalog , Could not find in the service mysql Yes
4. Delete registry information
1)HKEY_LOCAL_MACHINE\SYSTEM\ControlSet001\Services\Eventlog\Application\MySQL2)HKEY_LOCAL_MACHINE\SYSTEM\ControlSet002\Services\Eventlog\Application\MySQL
3)HKEY_LOCAL_MACHINE\SYSTEM\CurrentControlSet\Services\Eventlog\Application\MySQL
5. Delete mysql Installation directory
Open the registry win Add R Input
regeditOpen the service
services.msc
Be careful 1: Protected shutdown , In particular, self-protection should be turned off , Otherwise, you can't uninstallBe careful 2: Permission problems
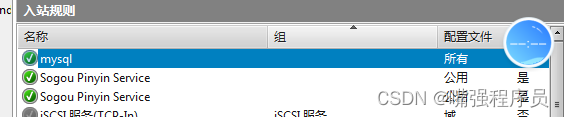
7. solve mysql Unable to connect remotely :
1. stay mysql Enter... On the server mysql The command line
2. Execute the following statement : ( Note that the password needs to be modified according to your own configuration )% The percent sign means that the database can be operated remotely
mysql> grant all privileges on *.* to [email protected]'%' identified by '123456';It's refreshing
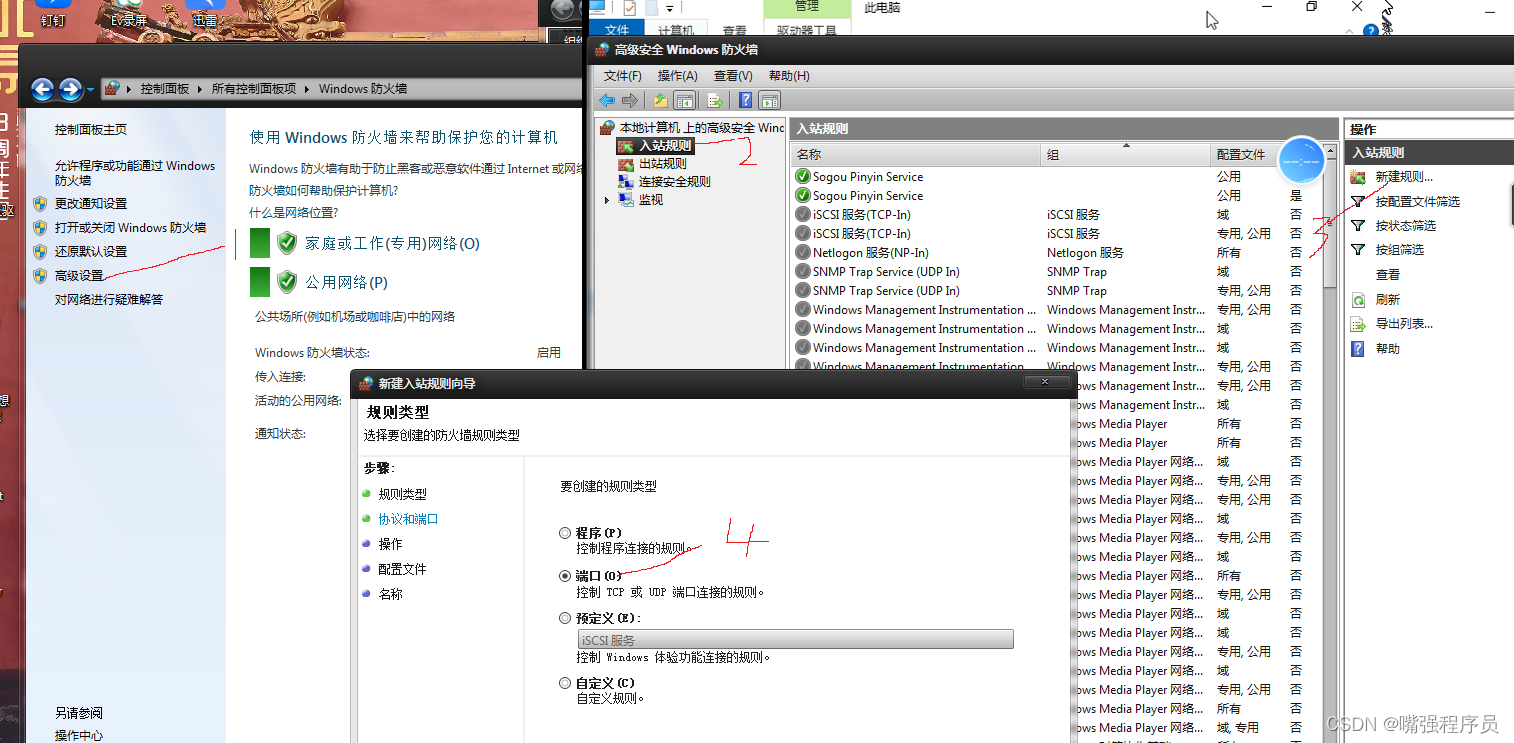
mysql> flush privileges;3. You need to add a firewall that needs to remotely control your computer mysql The port number can be passed directly, otherwise the firewall will block access
Select port Direct electricity next step
tcp agreement Port number 3306 This is mysql Default port number And then click next
Go straight to the next step
next step
Give me a name You can get up at will
A rule will be automatically added after the configuration number
Then you can go through ip Address to access the database on the computer where you configure the remote and set the rules
NAVIcat perhaps SQLyog Download tool Can be connected to a variety of databases Decompress it and you can use it directly
however SQLyog The tool needs to register the registration code, as shown in the figure below : Any one
Authoring tool download
Navicat Premium 12.0.11_x64.zip - Blue clouds
Click Connect to select the database Then enter the password to connect If you need to connect to a remote service ip Change the address
The default port number is ”3306“, The password is just before cmd Set it yourself in , You can connect the super test to check
Whether it can be successful or not , Before connecting, you need to start the service
The name is self-made :


The connected display on the right indicates successful connection !!!

Another tool is , The procedure for registering and then connecting is the same
Thank you for reading , If it helps you , Please give me some praise
边栏推荐
- Code neatness -- function
- Cloud native O & M article plan
- 云厂商为什么都在冲这个KPI?
- Alchemy (8): parallel development and release
- Latest MySQL advanced SQL statement Encyclopedia
- Arduino UNO通过电容的直接检测实现简易触摸开关
- 快速掌握grep命令及正则表达式
- MATLAB basic function length function
- [黑苹果系列] M910x完美黑苹果系统安装教程 – 2 制作系统U盘-USB Creation
- SCU|通过深度强化学习进行微型游泳机器人的步态切换和目标导航
猜你喜欢

JVM的内存模型简介

吴恩达《机器学习》课程总结(14)_降维

LabVIEW continuous sampling and limited sampling mode

炼金术(7): 何以解忧,唯有重构

Character interception triplets of data warehouse: substrb, substr, substring

去哪儿网(Qunar) DevOps 实践分享
最新MySQL高级SQL语句大全

翻译(5): 技术债务墻:一种让技术债务可见并可协商的方法

Modern programming languages: zig

吴恩达《机器学习》课程总结(11)_支持向量机

随机推荐
Cloud native O & M article plan
1696D. Permutation graph thinking
【无标题】
哪个证券炒股开户佣金是最便宜,最安全的
Sword finger offer 61 Shunzi in playing cards
一个人可以到几家证券公司开户?开户安全吗
Character interception triplets of data warehouse: substrb, substr, substring
Is the securities registration account safe? Is there any risk?
What is a better and safer app for securities companies to buy stocks
供应链高效管理供应商
Ceiling scheme 1
GFS 分布式文件系统概述与部署
IIC communication protocol for single chip microcomputer
Squid proxy server (Web cache layer for cache acceleration)
Validaterequest= "false" is a "suggestion collection" for what
快速掌握grep命令及正则表达式
Alchemy (8): parallel development and release
Startup and shutdown of Oracle Database
mysql数据库旅游管理系统_JSP+MySQL基于ssm的旅游管理系统[通俗易懂]
炼金术(6): 可迭代的模型和用例