当前位置:网站首页>下拉刷新及上拉加载更多的ListView
下拉刷新及上拉加载更多的ListView
2022-06-22 17:54:00 【刘忆初】
PullToRefreshListView
- 自定义ListView
- 带简洁的下拉刷新及上拉加载更多功能
实现过程
继承已有控件(ListView)实现自定义控件,下拉刷新三个状态效果如下:


给ListView添加头部和脚部
- 头部布局
<?xml version="1.0" encoding="utf-8"?>
<LinearLayout xmlns:android="http://schemas.android.com/apk/res/android"
    android:layout_width="match_parent"
    android:layout_height="60dp"
    android:gravity="center"
    android:orientation="horizontal">

    <ImageView
        android:id="@+id/iv_arrow"
        android:layout_width="20dp"
        android:layout_height="45dp"
        android:layout_marginRight="20dp"
        android:src="@drawable/common_listview_headview_red_arrow" />

    <ImageView
        android:id="@+id/iv_loading"
        android:layout_width="50dp"
        android:layout_height="50dp"
        android:src="@drawable/action_progress_image"
        android:visibility="gone" />

    <LinearLayout
        android:layout_width="wrap_content"
        android:layout_height="45dp"
        android:gravity="center"
        android:orientation="vertical">

        <TextView
            android:id="@+id/tv_title"
            android:layout_width="wrap_content"
            android:layout_height="25dp"
            android:text="下拉刷新"
            android:textSize="18sp" />

        <TextView
            android:id="@+id/tv_time"
            android:layout_width="wrap_content"
            android:layout_height="20dp"
            android:text="最后刷新时间:mm:hh:ss" />
    </LinearLayout>
</LinearLayout>
- 脚部布局
<?xml version="1.0" encoding="utf-8"?>
<LinearLayout xmlns:android="http://schemas.android.com/apk/res/android"
    android:layout_width="match_parent"
    android:layout_height="wrap_content"
    android:gravity="center"
    android:orientation="horizontal">

    <ProgressBar
        android:id="@+id/progressBar"
        android:layout_width="wrap_content"
        android:layout_height="wrap_content" />

    <TextView
        android:layout_width="wrap_content"
        android:layout_height="wrap_content"
        android:text="玩命加载中..." />
</LinearLayout>
- 下面贴出PullToRefreshListView完整代码,如下:
public class PullToRefreshListView extends ListView implements AbsListView.OnScrollListener { private View header; private int headerMeasuredHeight; private TextView tvTitle; private TextView tvTime; private ImageView ivArrow; private ImageView ivLoading; private RotateAnimation pullAnimaton; private RotateAnimation releaseAnimation; private RotateAnimation loadingAnimation; private onPullToRefreshListener onPullToRefreshListener; private View footer; private int footerMeasureHeight; public void setOnPullToRefreshListener(cn.com.bsoft.pulltorefreshlistview.view.onPullToRefreshListener onPullToRefreshListener) { this.onPullToRefreshListener = onPullToRefreshListener; } public PullToRefreshListView(Context context) { this(context, null); } public PullToRefreshListView(Context context, AttributeSet attrs) { this(context, attrs, 0); } public PullToRefreshListView(Context context, AttributeSet attrs, int defStyleAttr) { super(context, attrs, defStyleAttr); //给ListView添加头 initHeader(); initFooter(); } private void initFooter() { footer = View.inflate(getContext(), R.layout.footer_view, null); footer.measure(0, 0); footerMeasureHeight = footer.getMeasuredHeight(); footer.setPadding(0, -footerMeasureHeight, 0, 0); addFooterView(footer); setOnScrollListener(this); } private void initHeader() { header = View.inflate(getContext(), R.layout.header_view, null); header.measure(0, 0);//还运行在构造函数,此时不能直接获取header的高度,所以要调用测量,再获取header高度 headerMeasuredHeight = header.getMeasuredHeight(); header.setPadding(0, -headerMeasuredHeight, 0, 0); addHeaderView(header); tvTitle = ((TextView) header.findViewById(R.id.tv_title)); tvTime = ((TextView) header.findViewById(R.id.tv_time)); ivArrow = ((ImageView) header.findViewById(R.id.iv_arrow)); ivLoading = ((ImageView) header.findViewById(R.id.iv_loading)); //释放刷新动画 releaseAnimation = new RotateAnimation(0, 180, Animation.RELATIVE_TO_SELF, 0.5f, Animation.RELATIVE_TO_SELF, 0.5f); releaseAnimation.setDuration(300); releaseAnimation.setFillAfter(true);//动画完成后停在那 //下拉动画 pullAnimaton = new RotateAnimation(180, 0, Animation.RELATIVE_TO_SELF, 0.5f, Animation.RELATIVE_TO_SELF, 0.5f); pullAnimaton.setDuration(300); pullAnimaton.setFillAfter(true); //正在刷新动画 loadingAnimation = new RotateAnimation(0, 360, Animation.RELATIVE_TO_SELF, 0.5f, Animation.RELATIVE_TO_SELF, 0.5f); loadingAnimation.setDuration(300); loadingAnimation.setRepeatCount(Animation.INFINITE); loadingAnimation.setInterpolator(new LinearInterpolator());//设置匀速的动画插入器 loadingAnimation.setFillAfter(true); } private int downY; @Override public boolean onTouchEvent(MotionEvent ev) { switch (ev.getAction()) { case MotionEvent.ACTION_DOWN:
                downY = (int) ev.getY();
                break;
            case MotionEvent.ACTION_MOVE:
                int moveY = (int) ev.getY();
                int dy = moveY - downY;
                downY = moveY;
                int headerPaddingTop = header.getPaddingTop();
                //1.判断当前完全显示的条目是不是listview的第一个条目
                //2.判断滑动的状态.向下滑显示listview  向上滑隐藏listview
                if (state != State.REFRESHING && getFirstVisiblePosition() == 0 && (dy > 0 || headerPaddingTop > -headerMeasuredHeight)) {
                    headerPaddingTop += dy;
                    header.setPadding(0, headerPaddingTop, 0, 0);
                    if (headerPaddingTop >= 0) {
                        setState(State.RELEASE_TO_REFRESH);
                    } else {
                        setState(State.PULL_TO_REFRESH);
                    }
                    return true;
                }
                break;
            case MotionEvent.ACTION_UP:
                //还原头部
                resetHeader();
                break;
            default:
                break;
        }
        return super.onTouchEvent(ev);
    }

    private void resetHeader() {
        if (state == State.PULL_TO_REFRESH) {//抬起手时  处于下拉刷新状态
            header.setPadding(0, -headerMeasuredHeight, 0, 0);
        } else if (state == State.RELEASE_TO_REFRESH) {//抬起手时  处于释放刷新状态
            //进入正在刷新状态
            header.setPadding(0, 0, 0, 0);
            setState(State.REFRESHING);
            if (onPullToRefreshListener != null) {
                onPullToRefreshListener.onRefresh();
            }
        }
    }

    private boolean isLoading = false;
    @Override
    public void onScrollStateChanged(AbsListView view, int scrollState) {
        int count = view.getAdapter().getCount();
        if (scrollState == OnScrollListener.SCROLL_STATE_IDLE
                && getLastVisiblePosition() == count - 1
                && isLoading == false) {
            isLoading = true;
            footer.setPadding(0, 0, 0, 0);
            setSelection(count - 1);
            //加载更多数据
            if (onPullToRefreshListener==null) {
                onPullToRefreshListener.loadMore();
            }
        }
    }
    @Override
    public void onScroll(AbsListView view, int firstVisibleItem, int visibleItemCount, int totalItemCount) {
    }
    private enum State {
        RELEASE_TO_REFRESH, PULL_TO_REFRESH, REFRESHING, START
    }

    private State state = State.START;
    /**
     * 设置listview当前状态
     * @param state
     */
    private void setState(State state) {
        if (this.state != state) {
            if (state == State.RELEASE_TO_REFRESH) {//释放刷新
                tvTitle.setText("释放刷新");
                ivArrow.setAnimation(releaseAnimation);
            } else if (state == State.PULL_TO_REFRESH) {
                tvTitle.setText("下拉刷新");
                ivArrow.setAnimation(pullAnimaton);
            } else if (state == State.REFRESHING) {
                tvTitle.setText("正在刷新");
                ivArrow.setVisibility(View.GONE);
                ivArrow.clearAnimation();
                ivLoading.setVisibility(View.VISIBLE);
                ivLoading.setAnimation(loadingAnimation);
                java.text.SimpleDateFormat dateFormat = new java.text.SimpleDateFormat("hh:mm:ss");
                String date = dateFormat.format(new Date());
                tvTime.setText(date);
            }
            this.state = state;
        }
    }
    //刷新完成
    public void completeRefresh() {
        ivLoading.clearAnimation();
        ivLoading.setVisibility(View.GONE);
        ivArrow.setVisibility(View.VISIBLE);
        setState(State.PULL_TO_REFRESH);
        header.setPadding(0, -headerMeasuredHeight, 0, 0);
    }
    //加载完成
    public void completeLoadMore(){
        isLoading=false;
        footer.setPadding(0,-footerMeasureHeight,0,0);
    }
}- 接口实现:onPullToRefreshListener
public interface onPullToRefreshListener {
    public void onRefresh();
    public void loadMore();
}
使用方法
- 1.布局中直接引用PullToRefreshListView即可
<?xml version="1.0" encoding="utf-8"?>
<RelativeLayout xmlns:android="http://schemas.android.com/apk/res/android"
    xmlns:tools="http://schemas.android.com/tools"
    android:id="@+id/activity_main"
    android:layout_width="match_parent"
    android:layout_height="match_parent"
    tools:context="cn.com.bsoft.pulltorefreshlistview.activity.MainActivity">

    <cn.com.bsoft.pulltorefreshlistview.view.PullToRefreshListView
        android:layout_width="match_parent"
        android:layout_height="match_parent"
        android:id="@+id/ptr_listview" />
</RelativeLayout>
- 2.在界面中找到控件传入接口即可:setOnPullToRefreshListener
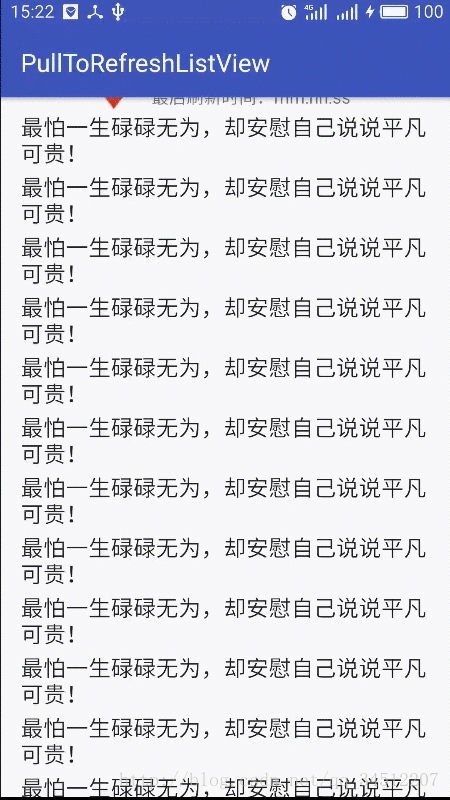
public class MainActivity extends AppCompatActivity { private PullToRefreshListView pullToRefreshListView; private ArrayAdapter<String> adapter; private List<String> dataList; @Override protected void onCreate(Bundle savedInstanceState) { super.onCreate(savedInstanceState); setContentView(R.layout.activity_main); pullToRefreshListView = ((PullToRefreshListView) findViewById(R.id.ptr_listview)); List<String> datas = getDatas(); adapter = new ArrayAdapter<>(this, android.R.layout.simple_list_item_1, datas); pullToRefreshListView.setAdapter(adapter); //设置回调监听 pullToRefreshListView.setOnPullToRefreshListener(new onPullToRefreshListener() { //下拉刷新的回调 @Override public void onRefresh() { //模拟获取数据 new Thread(new Runnable() { @Override public void run() { try { Thread.sleep(2000); } catch (InterruptedException e) { e.printStackTrace(); } final String addData = "弱水三千只取一瓢"; //刷新适配器在主线程 runOnUiThread(new Runnable() { @Override public void run() { dataList.add(0, addData); adapter.notifyDataSetChanged(); //数据获取完之后调用completeRefresh()方法 pullToRefreshListView.completeRefresh(); } }); } }).start(); } //上拉加载更多的回调 @Override public void loadMore() { //模拟获取数据 new Thread(new Runnable() { @Override public void run() { try { Thread.sleep(2000); } catch (InterruptedException e) { e.printStackTrace(); } final String addData = "一点寒芒先到 随后枪出如龙"; runOnUiThread(new Runnable() { @Override public void run() { dataList.add(0, addData); adapter.notifyDataSetChanged(); //数据获取完之后调用completeLoadMore()方法 pullToRefreshListView.completeLoadMore(); } }); } }).start(); } }); } public List<String> getDatas() { dataList = new ArrayList<>(); for (int i = 0; i < 20; i++) { dataList.add("最怕一生碌碌无为,却安慰自己说说平凡可贵!"); } return dataList; } }GIF效果
结束语
- 第一次玩GIF图,花了半小时还没处理好,上拉加载更多的数据还没出来就结束了。
- 另外也是第一次使用Markdown编辑器,还不熟练。
- 以上就是非常简洁的下拉刷新及上拉加载更多的ListView。
- 不敢跟各种大神的自定义控件做比较,贴出来作为自己学习的小结把,当然,能帮到初学Android的新人那就更好了。
边栏推荐
- Golang implements reliable delay queue based on redis
- 数商云:数字化供应链系统搭建,赋能企业实现物流供应链的优化升级
- 新人报道的笔记
- Cookie encryption 3+rpc solution
- Several important viewpoints on operation and maintenance, monitoring and aiops
- Interview MySQL
- Niuke.com: judge whether it is palindrome string
- PostgreSQL 字符串分隔函数(regexp_split_to_table)介绍以及示例应用
- 一款支持HomeKit的摄像头?智汀 IPC摄像头IC1开箱体验
- jniLibs. Srcdirs = ['LIBS'] what's the use?
猜你喜欢

UE4_UE5制作3DUI-跟随相机朝向(附工程)

Iplook, as a member of o-ran alliance, will jointly promote the development of 5g industry

Dynamically changing the style of label elements in a loop

链表4- 21 合并两个有序链表

如何在 FlowUs和Notion 等笔记软件中进行任务管理?

加工制造业智慧采购系统解决方案:助力企业实现全流程采购一体化协同
在循环中动态改变标签元素的样式

Niuke.com: consolidation interval

消息中间件(一)MQ详解及四大MQ比较

Service实战:使用Service完成一个下载任务
随机推荐
Redis usage scenario sharing (project practice)
2022 R2 mobile pressure vessel filling test question simulation test platform operation
数商云:数字化供应链系统搭建,赋能企业实现物流供应链的优化升级
Flutter2.0运行在web上不同渲染器的问题
TypeScript(7)泛型
chrome突然无法复制粘贴了
集群、分布式、微服务概念和区别
What happened to this page when sqlserver was saving
一些技术想法:
Static linked list (I)
codeup最长回文子串
消息中间件(一)MQ详解及四大MQ比较
wpa_ State machine migration of supplicant
函数的导数与微分的关系
《被讨厌的勇气》读后感
Some preliminary explorations of avoiding obstacles and finding paths by rays in unity
Golang 實現 Redis(10): 本地原子性事務
同花顺容易开户么?手机开户安全么?
线程池:ThreadPoolExcutor源码阅读
DBMS in Oracle_ output. put_ Example of line usage