当前位置:网站首页>Mmdeploy quick installation and instructions
Mmdeploy quick installation and instructions
2022-06-23 05:19:00 【Ten thousand miles' journey to】
Official website original detailed address
Quick start — mmdeploy 0.4.0 file
Here is a brief description of how to get started quickly ,mmdeploy Support open-mmlab Deployment of models in its multiple open source frameworks , The details are shown in the following figure .
1、 The main features
1.1 Full support OpenMMLab Model deployment
We are OpenMMLab Each algorithm library provides a unified model deployment toolkit . The supported algorithm libraries are as follows , More algorithm libraries will be supported in the future
MMClassification
MMDetection
MMSegmentation
MMEditing
MMOCR
MMPose
1.2 Support multiple reasoning backend
The model can be exported to a variety of inference engine files , And reasoning on the corresponding back end . The following backend supports , More backend support will follow .
ONNX Runtime
TensorRT
PPLNN
ncnn
OpenVINO
1.3 Highly scalable SDK Development framework (C/C++)
SDK All components in can be extended . For example, for image processing Transform, For deep learning network reasoning Net, In post-processing Module wait .
2、 install MMDeploy
First step : install mmcv-full
export MMCV_VERSION=1.5.0
export CUDA_STRING="${CUDA_VERSION/./""}"

python -m pip install mmcv-full==${
    MMCV_VERSION} -f https://download.openmmlab.com/mmcv/dist/cu${
    CUDA_STRING}/torch${
    PYTORCH_VERSION}/index.html
The second step : install MMDeploy
from v0.5.0 after ,MMDeploy Start providing precompiled packages . Depending on the target hardware and software platform , Select and download the precompiled package from here .
stay NVIDIA On the device , We recommend using MMDeploy-TensoRT Precompiled translation package :https://github.com/open-mmlab/mmdeploy/releases
export MMDEPLOY_VERSION=0.5.0
export TENSORRT_VERSION=8.2.3.0
export PYTHON_VERSION=3.7
export PYTHON_STRING="${PYTHON_VERSION/./""}"

wget https://github.com/open-mmlab/mmdeploy/releases/download/v${
    MMDEPLOY_VERSION}/mmdeploy-${
    MMDEPLOY_VERSION}-linux-x86_64-cuda${
    CUDA_VERSION}-tensorrt${
    TENSORRT_VERSION}.tar.gz
tar -zxvf mmdeploy-${
    MMDEPLOY_VERSION}-linux-x86_64-cuda${
    CUDA_VERSION}-tensorrt${
    TENSORRT_VERSION}.tar.gz
cd mmdeploy-${
    MMDEPLOY_VERSION}-linux-x86_64-cuda${
    CUDA_VERSION}-tensorrt${
    TENSORRT_VERSION}
python -m pip install dist/mmdeploy-*-py${
    PYTHON_STRING}*.whl
python -m pip install sdk/python/mmdeploy_python-*-cp${
    PYTHON_STRING}*.whl
export LD_LIBRARY_PATH=$(pwd)/sdk/lib:$LD_LIBRARY_PATH
cd ..
annotation : If MMDeploy There is no precompiled package for the target hardware and software platform you need , Please refer to the source installation documentation , Correct installation and configuration
The third step : Install the inference backend required by the precompiled package
In this case , We need to install TensorRT( contain cuDNN) Inference engine . Because of NVIDIA Download the software package on the official website , Login authentication is required , So please login in advance and download the required TensorRT and cuDNN. Please note that : TensorRT edition 、cuDNN Version and CUDA Version match
After downloading , You can refer to the following methods to install . here , We use TensorRT 8.2.3.0、cuDNN 8.2 For example :
export TENSORRT_VERSION=8.2.3.0
CUDA_MAJOR="${CUDA_VERSION/\.*/""}"

# from  NVIDIA  Download from the official website   And  cuda toolkit  Matching  tensorrt  Go to the current working directory
tar -zxvf TensorRT-${
    TENSORRT_VERSION}*cuda-${
    CUDA_MAJOR}*.tar.gz
python -m pip install TensorRT-${
    TENSORRT_VERSION}/python/tensorrt-*-cp${
    PYTHON_STRING}*.whl
python -m pip install pycuda
export TENSORRT_DIR=$(pwd)/TensorRT-${
    TENSORRT_VERSION}
export LD_LIBRARY_PATH=${
    TENSORRT_DIR}/lib:$LD_LIBRARY_PATH
from NVIDIA Download from the official website cuda toolkit,tensorrt Matching cudnn Go to the current working directory
tar -zxvf cudnn-${
    CUDA_MAJOR}.*-linux-x64*.tgz
export CUDNN_DIR=$(pwd)/cuda
export LD_LIBRARY_PATH=$CUDNN_DIR/lib64:$LD_LIBRARY_PATH
In the following chapters , We are all based on this environment , demonstration MMDeploy The function of .
at present , about MMDeploy Support various reasoning back-end installation methods , You can refer to the following documents :
ONNX Runtime
TensorRT
PPL.NN
ncnn
OpenVINO
LibTorch
3、 Model transformation
When the preparations are ready , We can use MMDeploy Tools in deploy.py, take OpenMMLab Of PyTorch The model is transformed into a format supported by the reasoning back end .
With MMDetection Medium Faster R-CNN For example , We can use the following command , take PyTorch The model is transformed to be deployable in NVIDIA GPU Upper TenorRT Model :
#  clone  mmdeploy  Warehouse . On conversion , Need to use  mmdeploy  Configuration files in the warehouse , Build conversion pipeline
git clone --recursive https://github.com/open-mmlab/mmdeploy.git
python -m pip install -r mmdeploy/requirements/runtime.txt
export MMDEPLOY_DIR=$(pwd)/mmdeploy

#  clone  mmdetection  Warehouse . On conversion , Need to use  mmdetection  Model configuration files in the warehouse , structure  PyTorch nn module
python -m pip install mmdet==2.24.0
git clone https://github.com/open-mmlab/mmdetection.git
export MMDET_DIR=$(pwd)/mmdetection

#  download  Faster R-CNN  Model weight
export CHECKPOINT_DIR=$(pwd)/checkpoints
wget -P ${
    CHECKPOINT_DIR} https://download.openmmlab.com/mmdetection/v2.0/faster_rcnn/faster_rcnn_r50_fpn_1x_coco/faster_rcnn_r50_fpn_1x_coco_20200130-047c8118.pth

#  Set work path
export WORK_DIR=$(pwd)/mmdeploy_models/faster-rcnn

#  Execute conversion command , Realize end-to-end transformation
python ${
    MMDEPLOY_DIR}/tools/deploy.py \
    ${
    MMDEPLOY_DIR}/configs/mmdet/detection/detection_tensorrt_dynamic-320x320-1344x1344.py \
    ${
    MMDET_DIR}/configs/faster_rcnn/faster_rcnn_r50_fpn_1x_coco.py \
    ${
    CHECKPOINT_DIR}/faster_rcnn_r50_fpn_1x_coco_20200130-047c8118.pth \
    ${
    MMDET_DIR}/demo/demo.jpg \
    --work-dir ${
    WORK_DIR} \
    --device cuda:0 \
    --dump-info
${MMDEPLOY_DIR}/tools/deploy.py It is a convenient tool for model transformation . You can read How to transform the model Learn more about .
detection_tensorrt_dynamic-320x320-1344x1344.py Is a parameter configuration file . The file is named according to the following rules :
< Task name >< Reasoning back end >-[ Back end features ]< Dynamic model support >.py
It is easy to determine the most suitable configuration file by file name . If you want to customize your transformation configuration , You can refer to How to write a configuration file to modify parameters .
4、 Model reasoning
After the conversion is complete , You can use either Model Converter Reasoning , You can also use Inference SDK. The former uses Python Development , The latter mainly uses C/C++ Development .
Use Model Converter The reasoning of API
Model Converter Shielding the difference of reasoning back-end interface , Reason about it API Unified packaging , The interface name is inference_model.
The above text Faster R-CNN Of TensorRT The model, for example , You can use the following methods for model reasoning :
from mmdeploy.apis import inference_model
import os

model_cfg = os.getenv('MMDET_DIR') + '/configs/faster_rcnn/faster_rcnn_r50_fpn_1x_coco.py'
deploy_cfg = os.getenv('MMDEPLOY_DIR') + '/configs/mmdet/detection/detection_tensorrt_dynamic-320x320-1344x1344.py'
backend_files = os.getenv('WORK_DIR') + '/end2end.engine'

result = inference_model(model_cfg, deploy_cfg, backend_files, img=img, device=device)
inference_model Will create an encapsulation of the back-end model , Reasoning through this encapsulation . The result of reasoning will remain the same as OpenMMLab The same format as the original model .
annotation
MMDeploy Back end model transferred out , You can use the backend directly API Reasoning . however , because MMDeploy Have TensorRT、ONNX
Runtime And so on , You need to load the corresponding custom operator library first , Then use the back end API.
5、 Use reasoning SDK
You can also use the MMDeploy SDK Reasoning . Transferred from the above article Faster R-CNN TensorRT The model, for example , The following sections will describe how to use SDK Of FFI Model reasoning .
Python API
from mmdeploy_python import Detector
import os
import cv2

#  Get the converted  mmdeploy model  route
model_path = os.getenv('WORK_DIR')
#  from  mmdetection repo  in , obtain  demo.jpg  route
image_path = '/'.join((os.getenv('MMDET_DIR'), 'demo/demo.jpg'))

img = cv2.imread(image_path)
detector = Detector(model_path, 'cuda', 0)
bboxes, labels, _ = detector([img])[0]

indices = [i for i in range(len(bboxes))]
for index, bbox, label_id in zip(indices, bboxes, labels):
  [left, top, right, bottom], score = bbox[0:4].astype(int),  bbox[4]
  if score < 0.3:
      continue
  cv2.rectangle(img, (left, top), (right, bottom), (0, 255, 0))

cv2.imwrite('output_detection.png', img)
More models SDK Python API Application examples , Please refer to here .
annotation
If you use the source installation method , Please put ${MMDEPLOY_DIR}/build/lib Add to environment variables PYTHONPATH in .
Otherwise, we will encounter mistakes ’ModuleNotFoundError: No module named ‘mmdeploy_python’
C API
Use C API The process of model reasoning conforms to the following pattern :
- graph LR A[ Create inference handle ] --> B( Read images )
- B --> C( Use handles for reasoning )
- C --> D[ Process reasoning results ]
- D -->E[ Destruction results ]
- E -->F[ Destroy inference handle ]
The following is the specific application process of this process :
#include <cstdlib>
#include <opencv2/opencv.hpp>
#include "detector.h"

int main() {

  const char* device_name = "cuda";
  int device_id = 0;

  //  Get the converted  mmdeploy model  route
  std::string model_path = std::getenv("WORK_DIR");
  //  from  mmdetection repo  in , obtain  demo.jpg  route
  std::string image_path = std::getenv("MMDET_DIR") + "/demo/demo.jpg";

  //  Create inference handle
  mm_handle_t detector{
    };
  int status{
    };
  status = mmdeploy_detector_create_by_path(model_path, device_name, device_id, &detector);
  assert(status == MM_SUCCESS);

  //  Read images
  cv::Mat img = cv::imread(image_path);
  assert(img.data);

  //  Use handles for reasoning
  mm_mat_t mat{
    img.data, img.rows, img.cols, 3, MM_BGR, MM_INT8};
  mm_detect_t *bboxes{
    };
  int *res_count{
    };
  status = mmdeploy_detector_apply(detector, &mat, 1, &bboxes, &res_count);
  assert (status == MM_SUCCESS);

  //  Process reasoning results :  Here we choose the visual reasoning result
  for (int i = 0; i < *res_count; ++i) {

    const auto &box = bboxes[i].bbox;
    if (bboxes[i].score < 0.3) {

      continue;
    }
    cv::rectangle(img, cv::Point{
    (int)box.left, (int)box.top},
                  cv::Point{
    (int)box.right, (int)box.bottom}, cv::Scalar{
    0, 255, 0});
  }

  cv::imwrite('output_detection.png', img);

  //  Destruction results
  mmdeploy_detector_release_result(bboxes, res_count, 1);
  //  Destroy inference handle
  mmdeploy_detector_destroy(detector);
  return 0;
}
In your project CMakeLists in , increase :
find_package(MMDeploy REQUIRED)
mmdeploy_load_static(${YOUR_AWESOME_TARGET} MMDeployStaticModules)
mmdeploy_load_dynamic(${YOUR_AWESOME_TARGET} MMDeployDynamicModules)
target_link_libraries(${YOUR_AWESOME_TARGET} PRIVATE MMDeployLibs)
Compile time , Use -DMMDeploy_DIR, Pass in MMDeloyConfig.cmake Path . It's in the precompiled package sdk/lib/cmake/MMDeloy Next . More models SDK C API Application examples , Please check here .
C# API
Limited space , This article does not show specific cases . Please refer to here , understand SDK C# API Usage of .
6、 Model accuracy evaluation
To test the accuracy of the deployment model , Reasoning efficiency , We provide tools/test.py To help complete the relevant work . The deployment model in the above article is taken as an example :
python ${
    MMDEPLOY_DIR}/tools/test.py \
    ${
    MMDEPLOY_DIR}/configs/detection/detection_tensorrt_dynamic-320x320-1344x1344.py \
    ${
    MMDET_DIR}/configs/faster_rcnn/faster_rcnn_r50_fpn_1x_coco.py \
    --model ${
    BACKEND_MODEL_FILES} \
    --metrics ${
    METRICS} \
    --device cuda:0
annotation
About –model Options , When using Model Converter In reasoning , It represents the file path of the converted reasoning back-end model . And when you use SDK
When testing model accuracy , This option represents MMDeploy Model The path of .
Please read How to evaluate the model Learn about tools/test.py Details of the use of .
边栏推荐
- Hcip fifth operation
- In unity, how to read and write a scriptableobject object in editor and runtime
- C语言栈实现
- UI automation positioning edge -xpath actual combat
- VMware network connection error unit network service not found
- 三层架构实验
- Open source ecology 𞓜 super practical open source license basic knowledge literacy post (Part 2)
- Laravel8 implementation of picture verification code
- [C language] keyword
- 计算欧式距离和余弦相似度
猜你喜欢

入行软件测试5年,跳槽3次,我摸透了软件测试这一行

Snippet Manager snippetslab

Arduino temperature and humidity sensor DHT11 (including code)
HCIP 交换机实验

PRCS-1016 : Failed to resolve Single Client Access Name

【opencv450】 图像相减、二值化、阈值分割

985测试工程师被吊打,学历和经验到底谁更重要?

STP总结
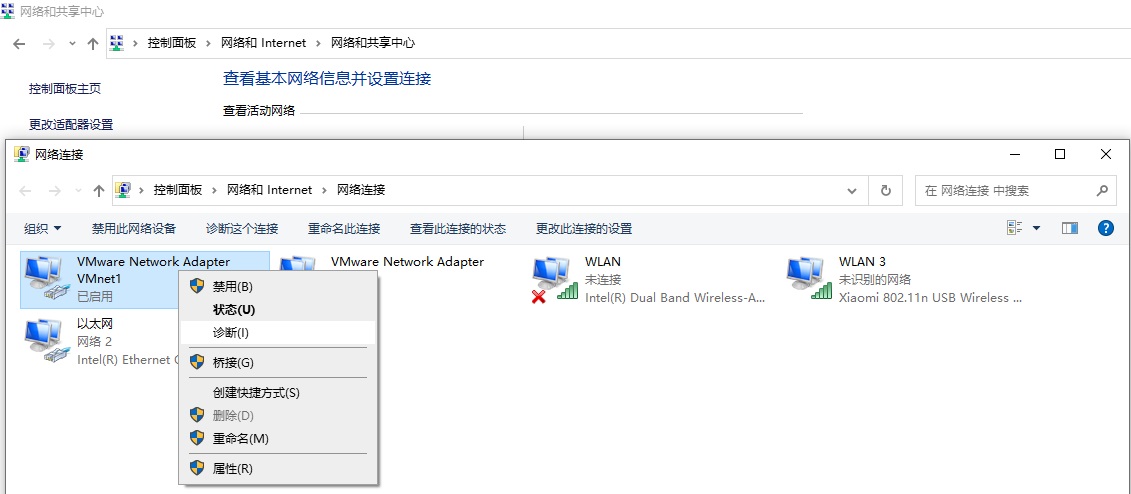
vmware网络连接出错Unit network.service not found

Open source ecology 𞓜 super practical open source license basic knowledge literacy post (Part 2)
随机推荐
Hcip fifth operation
Open source ecology 𞓜 super practical open source license basic knowledge literacy post (Part 2)
This markdown artifact will be charged!
BGP实验
Learn to draw Er graph in an article
Beyond chips and AI, why is hard technology capital becoming more and more "hard core"?
导出带水印的PDF
[C language] keyword
【C语言】关键字
工作5-8年的外包测试员,平均年薪有多少?
3 天完成小学期项目,手把手教你完成天气播报系统!
mongodb分片原理
Complete the primary school project in 3 days, and teach you to complete the weather broadcast system hand in hand!
985 test engineer is hanged. Who is more important in terms of education and experience?
BGP experiment
JSP入门级笔记
入行软件测试5年,跳槽3次,我摸透了软件测试这一行
李宏毅《机器学习》丨5. Tips for neural network design(神经网络设计技巧)
Web application security testing guide
功能测试人员如何做到花一个月的时间进阶自动化软件测试工程师