当前位置:网站首页>Shuttle global levitation button
Shuttle global levitation button
2022-06-24 00:05:00 【Front end small tips】
Method 1
  Offset _offset = Offset.zero;
  Scaffold(
        body: Stack(
          children: [
            _pageList[_currentIndex],
            Positioned(
              left: _offset.dx,
              top: _offset.dy,
              child: GestureDetector(
                onPanUpdate: (d) =>
                    setState(() => _offset += Offset(d.delta.dx, d.delta.dy)),
                child: FloatingActionButton(
                  onPressed: () {},
                  backgroundColor: Colors.orange,
                  child: Icon(Icons.add),
                ),
              ),
            ),
          ],
        ),
Method 2
 WidgetsBinding.instance
        .addPostFrameCallback((_) => _insertOverlay(context));
void _insertOverlay(BuildContext context) {
return Overlay.of(context).insert(
OverlayEntry(builder: (context) {
final size = MediaQuery.of(context).size;
print(size.width);
return Positioned(
width: 56,
height: 56,
top: size.height - 72,
left: size.width - 72,
child: Material(
color: Colors.transparent,
child: GestureDetector(
onTap: () => print('ON TAP OVERLAY!'),
child: Container(
decoration: BoxDecoration(
shape: BoxShape.circle, color: Colors.redAccent),
),
),
),
);
}),
);
}Method 3
1. scene Now we need to make a Test Button , Hover over all pages , And you can drag .
2. Ideas 1) The hover button can be used flutter Provided Overlay + OverlayEntry Combination to achieve
2) The drag and drop function can be used GestureDetector Gesture buttons or Draggable Realization (PS: I made a version Draggable Realized , But I found that it will have the original widget Float in place , Obviously not the effect I want )
3) When I click, I make it pop up a pop-up box at the bottom , Here you can play freely , This article will not be redundant
PubScaffold(
      child: MaterialApp(
        theme: CustomTheme.lightTheme,
        darkTheme: CustomTheme.darkTheme,
        themeMode: currentTheme.currentTheme,
        home: Scaffold(
          body: Stack(
            children: [
              _pageList[_currentIndex],
              // Positioned(
              //   left: _offset.dx,
              //   top: _offset.dy,
              //   child: GestureDetector(
              //     onPanUpdate: (d) =>
              //         setState(() => _offset += Offset(d.delta.dx, d.delta.dy)),
              //     child: FloatingActionButton(
              //       onPressed: () {},
              //       backgroundColor: Colors.orange,
              //       child: Icon(Icons.add),
              //     ),
              //   ),
              // ),
            ],
          ),
          bottomNavigationBar: CurvedNavigationBar(
            // key: _bottomNavigationKey,
            index: 0,
            height: 60.0,
            items: <Widget>[
              Icon(Icons.home, size: 30),
              Icon(Icons.list, size: 30),
              Icon(Icons.compare_arrows, size: 30),
              // Icon(Icons.call_split, size: 30),
            ],
            color: Colors.white,
            buttonBackgroundColor: Colors.white,
            backgroundColor: Colors.blueAccent,
            animationCurve: Curves.easeInOut,
            animationDuration: Duration(milliseconds: 600),
            onTap: (index) {
              setState(() {
                _currentIndex = index;
              });
            },
            // letIndexChange: (index) => true,
          ),
        ),
      ),
    );
there PubScaffold It's a floating button component I encapsulated , Wrap it in MaterialApp outside , You can achieve a button suspended on all components ( Of course, it can not be a button , Specific styles can be defined by yourself ). So let's see PubScaffold Code in ~
import 'dart:math';
import 'package:flutter/material.dart';
class PubScaffold extends StatefulWidget {
final Widget child;
PubScaffold({this.child});
@override
_PubScaffoldState createState() => _PubScaffoldState();
}
class _PubScaffoldState extends State<PubScaffold> {
bool draggable = false;
// At rest offset
Offset idleOffset = Offset(0, 0);
// The of this move offset
Offset moveOffset = Offset(0, 0);
// The last time down The event offset
Offset lastStartOffset = Offset(0, 0);
int count = 0;
final List<String> testWidgetList = [
' test 1',
' test 2',
];
testAppFun(e) {
// TODO: Your code logic
}
// Show a pop-up window at the bottom , Here is a list of tests
showTestList() {
showModalBottomSheet(
context: context,
enableDrag: false,
shape: RoundedRectangleBorder(
borderRadius: BorderRadius.only(
topLeft: Radius.circular(20.0),
topRight: Radius.circular(20.0),
),
),
builder: (BuildContext context) {
return ListView(
children: testWidgetList
.map(
(e) => Container(
decoration: BoxDecoration(
border: Border(
bottom: BorderSide(color: Color(0xFFe3e3e3)),
),
),
child: ListTile(
onTap: () => testAppFun(e),
title: Text(e),
),
),
)
.toList(),
);
},
);
}
@override
Widget build(BuildContext context) {
return LayoutBuilder(
builder: (context, constraints) {
// Display the hover button
WidgetsBinding.instance
.addPostFrameCallback((_) => _insertOverlay(context));
return widget.child;
},
);
}
// Hover button , Drag and drop ( Customizable styles )
void _insertOverlay(BuildContext context) {
    return Overlay.of(context).insert(
      OverlayEntry(builder: (context) {
        final size = MediaQuery.of(context).size;
        print(size.width);
        return Positioned(
          top: draggable ? moveOffset.dy : size.height - 102,
          left: draggable ? moveOffset.dx : size.width - 72,
          child: GestureDetector(
            //  Move start
            onPanStart: (DragStartDetails details) {
              setState(() {
                lastStartOffset = details.globalPosition;
                draggable = true;
              });
              if (count <= 1) {
                count++;
              }
            },
            //  Moving
            onPanUpdate: (DragUpdateDetails details) {
              setState(() {
                moveOffset =
                    details.globalPosition - lastStartOffset + idleOffset;
                if (count > 1) {
                  moveOffset = Offset(max(0, moveOffset.dx), moveOffset.dy);
                } else {
                  moveOffset = Offset(max(0, moveOffset.dx + (size.width - 72)),
                      moveOffset.dy + (size.height - 102));
                }
              });
            },
            //  End of move
            onPanEnd: (DragEndDetails detail) {
              setState(() {
                idleOffset = moveOffset * 1;
              });
            },
            child: TestContainer(
              onPress: () => showTestList(),
            ),
          ),
        );
      }),
    );
  }
}
// The style of the hover button
class TestContainer extends StatelessWidget {
final Function onPress;
TestContainer({this.onPress});
@override
Widget build(BuildContext context) {
return Material(
color: Colors.transparent,
child: GestureDetector(
onTap: onPress,
child: Container(
width: 56,
height: 56,
alignment: Alignment.center,
decoration: BoxDecoration(
shape: BoxShape.circle,
color: Colors.green[600],
),
child: Text(
"Test",
style: TextStyle(
color: Colors.white,
fontWeight: FontWeight.bold,
),
),
),
),
);
}
}Global hover button
Here we use flutter Self contained material In the library Overlay Components , The specific use method is as follows :
void _insertOverlay(BuildContext context) {
return Overlay.of(context).insert(
OverlayEntry(builder: (context) {
final size = MediaQuery.of(context).size;
print(size.width);
return Positioned(
top: draggable ? moveOffset.dy : size.height - 102,
left: draggable ? moveOffset.dx : size.width - 72,
child: GestureDetector(
// Move start
onPanStart: (DragStartDetails details) {
setState(() {
lastStartOffset = details.globalPosition;
draggable = true;
});
if (count <= 1) {
count++;
}
},
// Moving
onPanUpdate: (DragUpdateDetails details) {
setState(() {
moveOffset =
details.globalPosition - lastStartOffset + idleOffset;
if (count > 1) {
moveOffset = Offset(max(0, moveOffset.dx), moveOffset.dy);
} else {
moveOffset = Offset(max(0, moveOffset.dx + (size.width - 72)),
moveOffset.dy + (size.height - 102));
}
});
},
// End of move
onPanEnd: (DragEndDetails detail) {
setState(() {
idleOffset = moveOffset * 1;
});
},
child: TestContainer(
onPress: () => showTestList(),
),
),
);
}),
);
}边栏推荐
- 人工智能技术岗位面试要注意什么?
- Startup process analysis of APP performance optimization
- Keywords such as extern and struct
- Application of acrel-3000web power management system in Duba Expressway
- 迷茫的测试/开发程序员,不同人有着不同的故事、有着不同的迷茫......
- The input parameter is object, but it was passed as [object object] because it needs to be converted to JSON format
- 数据库中索引原理及填充因子
- What are the good solutions for industrial control safety of production line
- The group procurement management system of daily chemical supplies industry changes the traditional procurement mode and reduces the procurement cost
- 如何入门机器学习?
猜你喜欢

DO280OpenShift访问控制--管理项目和账户

Docker redis cluster configuration
【图像检测显著图】基于matlab失真提示鱼眼图显著图计算【含Matlab源码 1903期】

被同事坑到周末加班, 没见过把Redis用成这个鬼样子的。。。
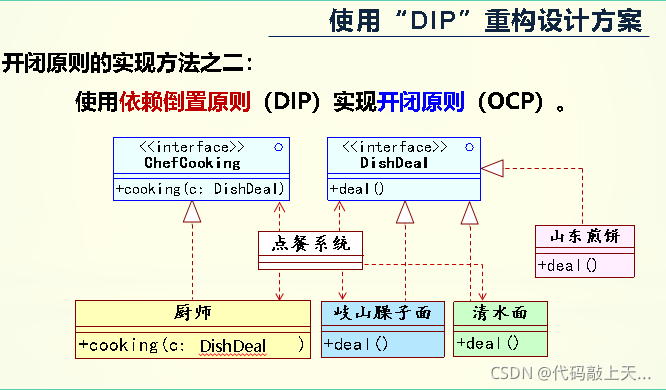
Dependency Inversion Principle

Improvement of DC power distribution with open hall current sensor
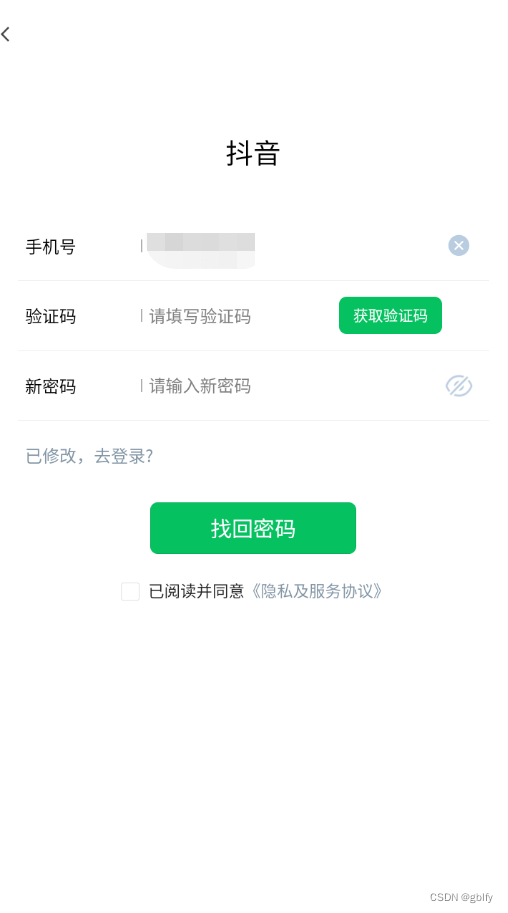
Tiktok practice ~ password retrieval

Cvpr2019/ image translation: transgaga: geometry aware unsupervised image to image translation

数据库中索引原理及填充因子

Dot and cross product
随机推荐
Cvpr2019/ image translation: transgaga: geometry aware unsupervised image to image translation
All 32 keyword classifications of C language C89 (C90)
Total number of combinations ii[each element can only be solved by + once]
Digital property management has become a trend. How can traditional property companies achieve digital butterfly change through transformation?
【面试经验包】面试被吊打经验总结(一)
Complete collection of development environment configuration -- Visual Studio 2022 installation
2021-11-23: Regulations: l[1] corresponds to a, l[2] corresponds to B, l[3] corresponds to C
【Bug】C# IQueryable里的元素更改不了值
Restore IP address [standard backtracking + standard pruning]
The easycvr program started abnormally as a service, but the process started normally. What is the reason?
节流和防抖
B2B transaction management system of electronic components industry: improve the data-based driving ability and promote the growth of enterprise sales performance
2018/gan:self attention generating adversarial networks
超标量处理器设计 姚永斌 第3章 虚拟存储器 --3.1~3.2 小节摘录
【数字信号】基于matlab模拟窗函数频谱细化【含Matlab源码 1906期】
Docker deploy redis
DO280OpenShift访问控制--管理项目和账户
Generative countermeasure networks (Gans) and variants
并发和并行有什么区别?
被同事坑到周末加班, 没见过把Redis用成这个鬼样子的。。。