当前位置:网站首页>Introduction to ground plane in unity
Introduction to ground plane in unity
2022-06-21 09:30:00 【have a rest】
This guide will guide you step-by-step through how to Unity Create an augmented reality experience in . We suggest that Vuforia The core sample is the starting point .
Be careful : Android,iOS and UWP Support ground aircraft . The ground plane is only associated with the platform enabler (ARKit / ARCore) Supported devices or Vuforia Engine Specially calibrated devices are compatible . of Latest equipment coverage , see also List of supported devices .
Unity Ground plane in
The ground level should preferably pass through Unity Vuforia Core examples to demonstrate , We recommend starting here to familiarize yourself with the concepts and components , To build your own surface inspection AR Experience .
- stay Unity in establish And open a new project . according to here Of 《 Getting started 》, Use Vuforia Engine settings .
- Navigate to Unity Asset Store( stay Web Browser ) And search for Vuforia.
- choice Vuforia Core Sample and add it to your assets . Make sure to use your Unity Account login .
- return Unity Editor , And then from window -> Package manager Tab to open package management device .
- In the drop-down menu , choice My assets

- choice Vuforia Core Samples, Then press Import. This will install Vuforia Engine And all necessary dependencies .
- After completion , Find and open 3 Ground level Scenarios under the project tab assets / Sample resources / scene
- To use “ Play mode ” Test the ground plane function , You must first print the destination . The target is located at assets / Editor / Vuforia / ImageTargetTextures / VuforiaEmulator /.
perhaps , Open the tab file -> Build settings , Then select your platform and build it into your device .
Ground plane scene structure
In addition to using the necessary components of the ground plane , The sample scenario also provided us with other useful parts , To create an intuitive AR Experience .
PlaneManager.cs The logic of the hit test that controls the surface and resets . It also defines what the following phases place in the real world :Anchor_Plane and Anchor_MidAir.
ProductPlacement.cs and TouchHandler.cs Shows logic on how to enable users to interact with placed content .
GroundPlaneUI.cs Have a to indicate and interact with each virtual content UI.
Create your first ground experience
In this section , We will add the ground plane function to an empty Unity In the project , And explain it when adding components . These steps will guide you through adding and testing ground planes .
- open Unity and establish A new project .
- Such as this paper Add Vuforia Engine SDK .
- Delete default Main camera , And add ARCamera Game objects By expanding Game objects Menu drop-down list and select Vuforia engine - > AR The camera .
- open Of Vuforia Engine configuration And add License key .
- In the same way as above , go to GameObject And add Vuforia Engine-> Ground Plane> Ground Plane Stage.

The Ground plane stage game object As Parent game object . Your content should be a child of this component .
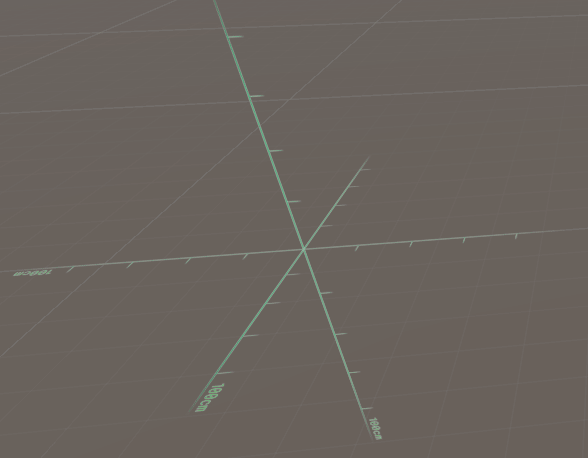
Please note that , There are visual signs on the ground level stage , Show that it is 100 square centimetre . These visual guides are available only in Unity Render in the editor , Used to determine the Unity The actual scale in the editor . Besides ,Ground Plane Stage Allows you to compare content to Ground Plane Position itself , This allows you to place content relative to the actual surface and scale .

We will add some content on the ground plane stage .
- Select... In the hierarchy “ Ground level stage ” GameObject, Then right-click to add 3D Object-> Capsule. Put it X,Y and Z The scale is set to 0.5.

- stay GameObject The menu , choice Vuforia Engine-> Ground Plane> Plane Finder.
The plane finder does the following :
- nail nchor Enter the listening behavior - Listening for input from the user ( for example , Taps on the device screen ).
- Plane finder behavior - Try to find the right plane to place the content in the real world .
- Content positioning behavior - take Put the content into the real world .
ad locum , You can personalize the indicator used to identify the surface , And according to the user input will “ Pattern ” Set up by “ Automatically ” For automatic detection or “ Interaction ” To test . You can also define the height for the desired distance between the device and the plane .
- take Ground level stage GameObject Drag onto “ Plane Finder GameObject” in “ Content positioning behavior ” Components Of “ Anchor stage ” Parameters in . This is all that is required for the normal operation of the ground level .

Build and test on the device
- We will deploy to this device to test our ground plane experience .
Make sure to use “ Ground level Supported devices ” Devices in the list . see also here , To get the settings “ Build settings ” and “ Player settings ” as well as Put the application Build and run To Description of the equipment . If the device is not available , See below “ Ground plane simulator ” part .
- Start the application , Look around your environment . Please note that , Lines should appear and be projected onto the plane .
Find the right surface , Click on the screen . You should see that the capsule is placed on the plane pointed by the marking line . Tap again to add other Capsules .

By default , Every time When positioning ,“ Content positioning behavior ” Will copy the stage and content . Instead, move the stage on each user's click , You can uncheck “ Content positioning behavior ” Of “ Repeat the stage ”.

Ground level simulator
If supported devices are not supported , It's in Unity Of “ Play mode ” Next Runtime , You can use Vuforia Engine Simulate the ground . This allows developers to test their... Without having to deploy to a device “ Ground plane ” Experience .
- To simulate the ground plane , Please navigate to “ project ” window , Then go to assets \ Vuforia \ database \ ForPrint \ Emulator \ Then open the Simulator ground plane .pdf The file is not scaled A4 Print template on size paper .

- Connect a standard webcam to your computer , And then in Unity Press “ Play ” Button . Point your webcam at “ Ground plane formwork ”.

- You should see that the capsule is relative to “ Ground level ” The template appears . without , Please make sure stay Vuforia To configure (Cmd + Shift + V or Ctrl + Shift + V) Lieutenant general “ Play mode ” Set correctly to WEBCAM .
Place floating content in your environment
The workflow for placing floating content is very similar to the workflow for placing content on an aircraft . This section will focus on the main differences between floating content and basic content .
- Instead of creating Ground level stage , Not as good as establish Air stage . from GameObject The menu , choice Vuforia Engine-> Mid Air> Mid Air Stage.
- stay Mid air stage game object As Parent game object , The content is treated as a child .
Please note that , There are visual signs on the aerial stage , Indicates that it is 100 square centimetre . These visual guides are available only in Unity Render in the editor , Used to determine the Unity The actual scale in the editor .
- Add your content as a child of the air stage . In this example , We added a model of an unmanned aircraft in the air stage .

- Use a real scale on the mid air stage to correctly position and scale the content relative to the stage ( apart 50cm).

- stay GameObject The menu , choice Vuforia Engine> Mid Air> Mid Air Positioner. The behavior of the aerial locator is related to “ Plane Finder ” The behavior toward ground level is very similar .
The aerial stage performs the following operations :
- Anchor input listener behavior - Listen Input from users ( for example , Click... On the device screen ).
- Air locator behavior - Try to find the right plane to put content on .
Here you can configure the distance between the indicator and the camera . You can also customize the indicators .
- Content positioning behavior - take Put the content into the real world .
- take Air stage GameObject Drag onto “ Content positioning behavior ” Component's “ Anchor stage ” Parameter .

- Now? , Build or test scenarios using standard webcams . You will see a green translucent sphere in the middle of the screen . The green sphere indicates where to place the content when you click .


Advanced settings
The ground plane example demonstrates only one way to build application logic and create immersive and interactive AR The way to experience . The components used to enable the ground plane are only used for common use cases , It can be easily configured to build your own application logic .
To customize , You can write your own logic , To position the content on an empty anchor when the hit test results return to the appropriate surface . Replace... With a custom script ContentPositioningBehaviour , The script uses PositionalDeviceTracker API Create an empty anchor . then , Give Way MidAirPositionerBehaviour and PlaneFinderBehaviour Call custom script .
Change how hit tests are passed to, for example, user input . Integrate your own UI System , And invoke the event by pressing the button . In short , call MidAirPositionerBehaviour and PlaneFinderBehaviour event , It is usually called by AnchorInputListener
边栏推荐
- The spingboot microservice is packaged into a docker image and connected to the database
- Solve the problem of error when typescript object gets value
- Observation on the salary data of the post-90s: poor, counselled and serious
- Introduction and template of segment tree Foundation (I)
- Common basic functions of R language: call the data editor with edit function to manually customize and edit the data object without changing the content of the original data object, and call the data
- [practice] STM32 FreeRTOS migration series tutorial 5:freertos message queue
- R language through rprofile Site file, user-defined configuration of R language development environment startup parameters, shutdown parameters, user-defined specified cran local image source download
- poi实现操作生成word表格和操作word中的图表数据
- Token, cookie and session
- stm32mp1 Cortex M4开发篇10:扩展板数码管控制
猜你喜欢

Pingcap was selected as the "voice of customers" of Gartner cloud database in 2022, and won the highest score of "outstanding performer"
PingCAP 入选 2022 Gartner 云数据库“客户之声”,获评“卓越表现者”最高分

Stm32mp1 cortex M4 development part 12: expansion board vibration motor control

Electron checks the CPU and memory performance when the module is introduced

Full stack development

The internal structure of MySQL and how an SQL statement is executed

Storage of floating point numbers in C language in memory

A command starts the monitoring journey!

【实战】STM32MP157开发教程之FreeRTOS系统篇3:FreeRTOS 计数型信号量

108. detailed use of Redux (case)
随机推荐
Lodash real on demand approach
Prefix sum and difference
123. deep and shallow copy of JS implementation -- code text explanation
音视频格式简介、编解码、音视频同步
121. Redux detailed summary + effect drawing + Case
基于Retrotfit2.1+Material Design+ijkplayer开发的一个APP
[actual combat] STM32 FreeRTOS migration series tutorial 2: FreeRTOS mutually exclusive semaphores
并发编程高级部分:并行流,Tasks和Executors以及CompletableFuture类
PingCAP 入选 2022 Gartner 云数据库“客户之声”,获评“卓越表现者”最高分
Binary search (non recursive, no repeating elements)
Quick sort_ sort
并发-条件变量
Retrofit extended reading
\Processing method of ufeff
113. summary of common usage of moment.js
111. solve the problem of prohibiting scripts from running on vs code. For more information, see error reporting
1. is god horse a meta universe?
Solve the problem of error when typescript object gets value
Stm32mp1 cortex M4 Development Chapter 11: expansion board buzzer control
Embedded remote post, part-time job, order receiving, crowdsourcing platform