当前位置:网站首页>[flask introduction series] flask processing request and response
[flask introduction series] flask processing request and response
2022-06-26 02:44:00 【Hall owner a Niu】
Personal profile
- Author's brief introduction : Hello everyone , I'm Daniel , New star creator of the whole stack .
- Blogger's personal website : A Niu's blog house
- Stand by me : give the thumbs-up + Collection ️+ Leaving a message.
- Series column :flask Framework quick start
- Maxim : So far, all life is about failure , But it doesn't prevent me from moving forward !

Catalog
Preface
In the last section, I wrote flask Get the path parameters and the use of the converter , In this section, we will talk about how to obtain parameters in other places and flask How to handle the response .
flask Processing request request object
If you want to get parameters elsewhere , Can pass Flask Provided request Object to read ,
Parameters in different locations are stored in request In different properties of , Look at the table below :
| attribute | explain | type |
|---|---|---|
| data | Record the requested data , And convert it to a string | * |
| form | Record the form data in the request | MultDict |
| args | Record the query parameters in the request | MultDict |
| cookies | Record... In the request cookies Information | Dict |
| headers | Record the message header in the request | EnvironHeaders |
| method | Record the http Method | GET/POST |
| url | Record the requested URL Address | string |
| files | Record the file requested to upload | * |
for example , Want to get the request /articles?channel_id Parameters of , It can be used as follows :
# Import Flask Classes and request object
from flask import Flask,request

app = Flask(__name__)

@app.route('/articles')
def get_articles():
    channel_id = request.args.get('channel_id')
    return 'you want get articles of channel {}'.format(channel_id)

differ django,django Of requset The object must be the first argument to the view function , and Flask Different , We need to use from flask import request, And there is no need to write... In the view function parameters request.
To upload pictures
The client uploads the picture , And save it to the server
@app.route('/upload',methods=['POST'])
def upload_files():
    f = request.files['pic']  # pic For the file name
    # with open('./demo.png','wb') as new_file:
    # new_file.write(f.read())
    f.save('./demo.png') #  Save the picture  save() Method is the method of quickly saving files provided by the framework
    return 'ok'
This is the route and view for storing uploaded files , You can also write a submission file form The form corresponds to html, Then the back end returns this html Routing and view of files , The form submits the file to the above route , This implementation will not be written here , You can use postman This software can submit pictures to this path for testing , When you are working on a front-end and back-end project, you will gradually master these things !
Process response
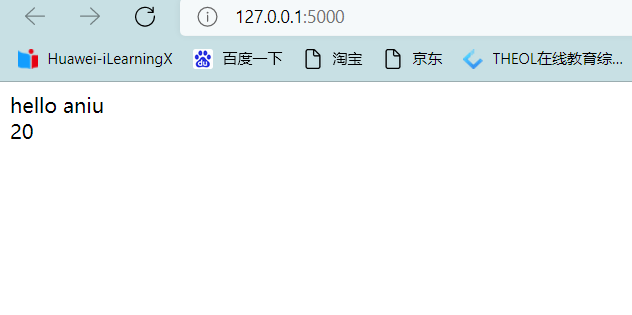
1. Back to template render_template
Use render_template Method renders the template and returns
for example , Create a new template index.html, Put it in templates Under the table of contents :
<!DOCTYPE html>
<html lang="en">
<head>
    <meta charset="UTF-8">
    <meta http-equiv="X-UA-Compatible" content="IE=edge">
    <meta name="viewport" content="width=device-width, initial-scale=1.0">
    <title>Document</title>

</head>
<body>
    <div>{
   { my_str }}</div>
    <div>{
   { my_int }}</div>
</body>
</html>
In code { { }} by jinja2 Template syntax .
from flask import Flask,render_template
app = Flask(__name__)

@app.route('/')
def index():
    mystr = "hello aniu"
    mint = 20
    return render_template('index.html',my_str=mystr,my_int=mint)
Follow django The difference is , The parameters returned to the front end are directly put into render_template Methods , and django Is encapsulated into a dictionary , Of course , utilize python The grammar of , We can also encapsulate it into a dictionary .
@app.route('/')
def index():
    data = {

        'my_str':'hello aniu',
        'my_int':20
    }
    return render_template('index.html',**data)
**data Will convert the dictionary into independent parameters , Equivalent to the following line of code :
return render_template('index.html',my_str='hello aniu',my_int=20)
2. Redirect redirect
from flask import Flask,redirect
app = Flask(__name__)

app.route('/demo1')
def demo1():
    return redirect("https://www.aniu.space/")
3. return JSON
from flask import Flask,jsonify
app = Flask(__name__)

@app.route('/demo2')
def demo2():
    json_dict = {

        "user_id":10,
        "user_name":"aniu"
    }
    return jsonify(json_dict)
jsonify() Follow json Module json.dumps() The difference between :
1.json.dumps() It just converts the dictionary into json character string , It hasn't changed HTTP In the response message Content-Type.
2.jsonify() Not only does the dictionary translate into json character string , And will HTTP In the response message Content-Type Change the value to application/json.

4. Custom status and response headers
1. Tuple mode
You can return a tuple , Such a tuple must be (response,status,headers) In the form of , And contain at least one element . status Value will override the status code , headers It can be a list or a dictionary , As an additional message header value .
@app.route('/demo3')
def demo2():
    return (' Status code 666',666,{
    'aniu':'hahaha'})

2.make _ response The way
from flask import Flask,make_response
app = Flask(__name__)

@app.route('/demo4')
def demo4():
    resp = make_response("make_response test ")
    resp.headers['aniu'] = 'hahaha'
    resp.status = "404 not found"
    return resp

Conclusion
If you think the blogger's writing is good , You can pay attention to the current column , Bloggers will finish this series ! You are also welcome to subscribe to other good columns of bloggers .
Series column
Soft grinding css
Hard bubble javascript
The front end is practical and small demo
For more columns, please go to the blogger's home page ! Bloggers are also very interesting , You can patronize : A Niu's blog house
边栏推荐
- How did the thief unlock the password after the iPhone was stolen? After reading the long knowledge
- Implement decorator pattern for servicecollection
- Which securities company should I choose to open an account online? Is it safe to open an account online?
- 为 ServiceCollection 实现装饰器模式
- Digital commodity DGE -- the dark horse of wealth in digital economy
- golang--channal与select
- Multi surveyor Gongshu campus Xiao sir_ Page error in Jenkins
- GD32 ADC采集电压
- One year's work
- 在 R 中创建非线性最小二乘检验
猜你喜欢

Chapter I: essential information collection of penetration test

Implement decorator pattern for servicecollection

奶牛排序问题

How do I take a screenshot of the iPad? 7 ways to take quick screenshots of iPad

多测师拱墅肖sir_工作目录下的use websocket报错解决方案

Redis6.0 new feature - ACL (permission control list) implements the restriction of user executable commands and keys

Blazor University (33)表单 —— EditContext、FieldIdentifiers

How to check and cancel subscription auto renewal on iPhone or iPad

MySQL必须掌握4种语言!

Explain the JVM clearly at one time and don't be asked by the interviewer again
随机推荐
Breadth first traversal based on adjacency matrix
Redis classic 20 questions
短信插件哪个好用万能表单需要发短信着急测试
ORB-SLAM3论文概述
. Net7 miniapi (special part):preview5 optimizes JWT verification (Part 2)
Cox 回归模型
图的广度优先遍历
Matlab|基于BP神经网络进行电力系统短期负荷预测
OpenAPI 3.0 规范-食用指南
2022-06-25:给定一个正数n, 表示有0~n-1号任务, 给定一个长度为n的数组time,time[i]表示i号任务做完的时间, 给定一个二维数组matrix, matrix[j] = {a,
@Query difficult and miscellaneous diseases
Never criticize
Redis6.0新特性——ACL(权限控制列表)实现限制用户可执行命令和KEY
55 pictures make you feel a bit B-tree at one time
DF reports an error stale file handle
Redis6.0 new feature - ACL (permission control list) implements the restriction of user executable commands and keys
在同花顺网上开户安全吗?如何网上开一个券商账户
Blazor University (33) form - editcontext, fieldidentifiers
win32
云答题不显示第三方登陆按钮是什么情况