当前位置:网站首页>Application of ansible automation
Application of ansible automation
2022-06-26 15:42:00 【N64-HanYeWei】
1、ansible-playbook Realization MySQL Binary deployment of
Write give ssh key Certified scripts han_ssh.sh
#!/bin/bash
#
#*********************************************
#Author:            Cry 3 tears 4 me
#QQ:                2512129751
#Date:              2022-06-17
#FileName:         han_ssh.sh
#Mail:              [email protected]
#Description:      The best script
#Copyright (C):     2022 All rights reserved
#*********************************************
PASS=123456
# Set the last address of the network segment ,4-255 Between , The smaller the scan, the faster
END=254

IP=`ip a s eth0 | awk -F'[ /]+' 'NR==3{print $3}'`
NET=${IP%.*}.

rm -f /root/.ssh/id_rsa
[ -e ./SCANIP.log ] && rm -f SCANIP.log
for((i=3;i<="$END";i++));do
ping -c 1 -w 1  ${NET}$i &> /dev/null  && echo "${NET}$i" >> SCANIP.log &
done
wait

ssh-keygen -P "" -f /root/.ssh/id_rsa
rpm -q sshpass || yum -y install sshpass
sshpass -p $PASS ssh-copy-id -o StrictHostKeyChecking=no $IP

AliveIP=(`cat SCANIP.log`)
for n in ${AliveIP[*]};do
sshpass -p $PASS scp -o StrictHostKeyChecking=no -r /root/.ssh [email protected]${n}:
done

# hold .ssh/known_hosts Copy to all hosts , So that they don't need to enter carriage return when they visit each other for the first time
for n in ${AliveIP[*]};do
scp /root/.ssh/known_hosts ${n}:.ssh/
done
After the certification is completed, it is ansible The controlled host can communicate with each other :

(1) Experiment preparation :

mkdir roles/mysql/{tasks,vars,files} -pv(2) Configure database my.cnf file
[[email protected] files]# cat my.cnf
[mysqld]
server-id=1
log-bin
datadir=/data/mysql
socket=/data/mysql/mysql.sock
log-error=/data/mysql/mysql.log
pid-file=/data/mysql/mysql.pid
[client]
socket=/data/mysql/mysql.sock
(3) Prepare to change the parameters in vars Prepare under folder :
[[email protected] vars]# cat main.yml
mysql_version: 8.0.19
mysql_file: mysql-{
   {mysql_version}}-linux-glibc2.12-x86_64.tar.xz
mysql_root_password: 123456
(4) Get ready mysql-8.0.19-linux-glibc2.12-x86_64.tar.xz Install the package in files Under the document :
(5) To write yml modular , use role To achieve ansible Automated database installation :
[[email protected] tasks]# cat config.yml
- name: config my.cnf
  copy: src=/data/ansible/roles/mysql/files/my.cnf dest=/etc/my.cnf
[[email protected] tasks]# cat  data.yml
- name: data dir
  shell: /usr/local/mysql/bin/mysqld --initialize-insecure --user=mysql --datadir=/data/mysql
  tags: data
[[email protected] tasks]# cat  group.yml
- name: create mysql group
  group: name=mysql gid=306
[[email protected] tasks]# cat  install.yml
- name: install packages
  yum:
    name:
      - libaio
      - numactl-libs
[[email protected] tasks]# cat  linkfile.yml
- name: create linkfile /usr/local/mysql
  file: src=/usr/local/mysql-{
   { mysql_version }}-linux-glibc2.12-x86_64 dest=/usr/local/mysql state=link
[[email protected] tasks]# cat path.yml
- name: PATH variable
  copy: content='PATH=/usr/local/mysql/bin:$PATH' dest=/etc/profile.d/mysql.sh
[[email protected] tasks]# cat script.yml
- name: service script
  shell: /bin/cp /usr/local/mysql/support-files/mysql.server /etc/init.d/mysqld
[[email protected] tasks]# cat secure.yml
- name: change password
  shell: /usr/local/mysql/bin/mysqladmin -uroot password {
   {mysql_root_password}}
[[email protected] tasks]# cat service.yml
- name: enable service
  shell: chkconfig --add mysqld;/etc/init.d/mysqld start
  tags: service
[[email protected] tasks]# cat unarchive.yml
- name: copy tar to remote host and file mode
  unarchive: src={
   {mysql_file}} dest=/usr/local/ owner=root group=root
[[email protected] tasks]# cat user.yml
- name: create mysql user
  user: name=mysql uid=306 group=mysql shell=/sbin/nologin system=yes create_home=no home=/data/mysql
[[email protected] tasks]# cat main.yml
- include: install.yml
- include: group.yml
- include: user.yml
- include: unarchive.yml
- include: linkfile.yml
- include: data.yml
- include: config.yml
- include: script.yml
- include: path.yml
- include: service.yml
- include: secure.yml
(6) Finally, write the running script role_mysql.yml
[[email protected] ansible]# cat role_mysql.yml
---
- hosts: 10.0.0.6
  remote_user: root
  gather_facts: no

  roles:
    - mysql

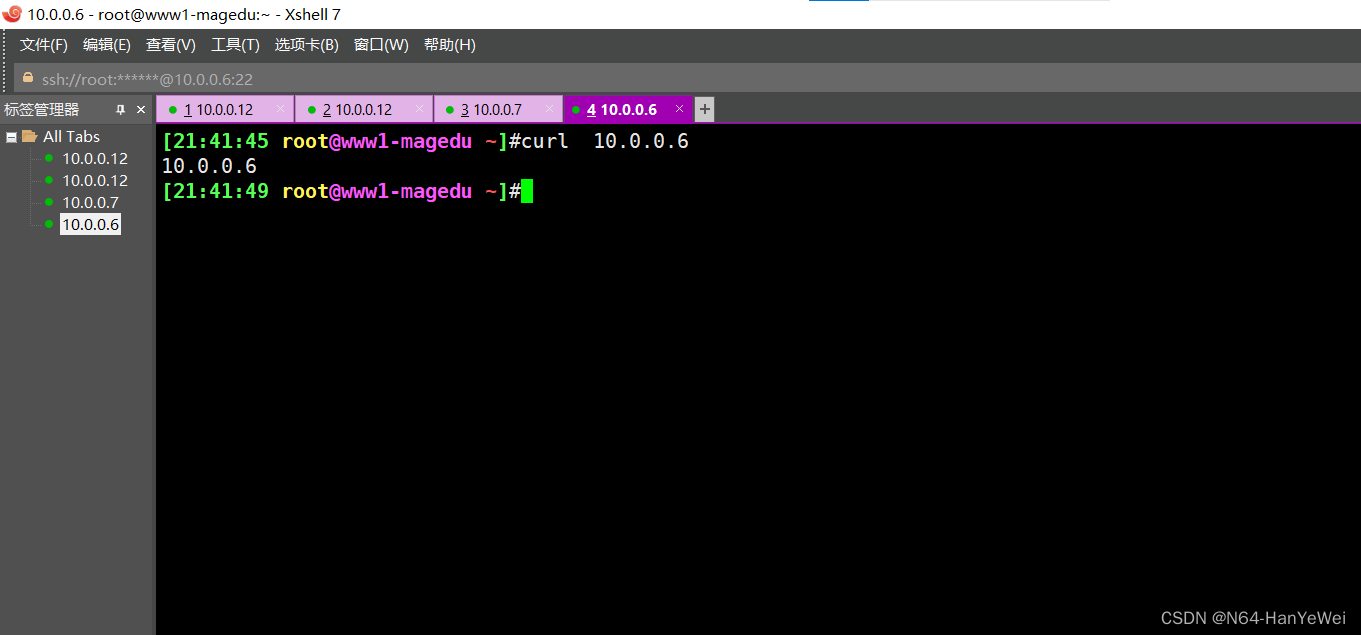
(7) Verify whether the experiment is successful

stay 10.0.0.6 Put on mysql The client program of :
yum -y  install  mysql-8.0.21-1.module_el8.2.0+493+63b41e36.x86_64
mysql -uroot -p123456

2、Ansible playbook Realization apache Mass deployment , Different hosts are provided with their own IP Address for content index.html、
roles: Collection directory of multiple roles , Multiple... Can be role, Put them into roles In a separate subdirectory under the directory ;
roles role :
simply ,roles It's about putting variables 、 file 、 Mission 、 Templates and processors are placed in separate directories , And it's easy to include Their - Species mechanism . Roles are generally used in the scenario of building services based on hosts , But it can also be used in scenarios such as building daemons .
Complex operation and maintenance scenarios : It is recommended to use roles, High code reuse
roles: Collection directory of multiple roles , Multiple... Can be role, Put them into roles In a separate subdirectory under the directory roles Each record 、roles/project/: Project name , There are the following subdirectories files/: Store by copy or script Module and so on ;
templates/: template The module looks up the directory of the required template file ;
tasks/: Definition task,role The basic elements of , There should be at least one named main.yml The file of ; Other files need to be passed in this file include To include
handlers/: There should be at least one named main.yml The file of ; Other files in this directory need to be communicated in this file include To include ;
vars/: Defining variables , There should be at least one named main.yml The file of ;
Other variable files in this directory need to pass... In this file include To include ;
metal: Define the special settings and dependencies of the current role , There should be at least one named main.yml The file of , Other documents need to be passed in this document include To include ;
defaultl: Use... In this directory when setting default variables main.yml file , Than vars The priority is low ;
Preparatory work :
Get ready roles Folder of roles
mkdir roles/nginx/{tasks,templates,handlers,files} -pv
mkdir roles/httpd/{tasks,templates,handlers,files} -pv

Write installation nginx Of playbook Templates :
[[email protected] tasks]# cat yum.yml
- name: Install nginx
  yum: name=nginx  state=present
[[email protected] tasks]# cat config.yml.yml
cat: config.yml.yml: No such file or directory
[[email protected] tasks]# cat config.yml
- name: Modify web page
  copy: content='{
   { ansible_eth0.ipv4.address }}\n' dest=/usr/share/nginx/html/index.html
[[email protected] tasks]# cat service.yml
- name: start service
  service: name=nginx state=started enabled=yes
[[email protected] tasks]# cat main.yml
- include: yum.yml
- include: config.yml
- include: service.yml
[[email protected] nginx]# cd ..
[[email protected] nginx]# cd handlers/
[[email protected] handlers]# cat main.yml
- name: restart
  service: nmae=nginx state=restarted
To write nginx.yml
[[email protected] ansible]# cat nginx.yml
---
- hosts: websrvs
  remote_user: root

  roles:
    - nginx
Modify the file to control the host
[[email protected] ansible]# cat /etc/ansible/hosts 
Check the script for problems
 Run script

Check the experimental phenomena :

httpd Construction and nginx Is very similar , But the best controlled hosts are installed net-tools Software for , To automatically create a file :
[[email protected] tasks]# cat config.yml
- name: Modify web page
  copy: content='{
   { ansible_eth0.ipv4.address }}\n' dest=/var/www/html/index.html
[[email protected] tasks]# cat yum.yml
- name: Install httpd
  yum: name=httpd  state=present
[[email protected] tasks]# cat yum1.yml
- name: Install net-tools
  yum: name=net-tools state=present
[[email protected] tasks]# cat service.yml
- name: start service
  service: name=httpd state=started enabled=yes
[[email protected] tasks]# cat main.yml
- include: yum.yml
- include: yum1.yml
- include: config.yml
- include: service.yml
To configure httpd.yml
[[email protected] ansible]# cat httpd.yml
---
# httpd role
- hosts: websrvs
  remote_user: root

  roles:
    - httpd
3、http Summary of message structure and status code


HTTP Message is divided into request message and response message , These two types of messages are composed of three parts :
(1) Go ahead : Distinguish between request message and response message
(2) Head office : Description browser 、 Some information about the subject of the server message
(3) Entity subject
The beginning line of the request message includes : Method ( The request method is as follows: get、post、put、trace etc. )、URL、 Protocol version
The beginning line of the response message includes : edition 、 Status code 、 The phrase ( Used to simply explain the status code )
The status codes in the response message are divided into five categories , common 33 Kind of :
1XX Means the notification information , If the request is received or is being processed
2XX It means success , To accept or know
3XX Indicates redirection , Further action must be taken to complete the request
4XX Indicates the customer's error , If the request contains syntax errors or cannot be completed
5XX Indicates a server error , If the server fails to complete the request
Common status code :
202 Accepted Accept
400 Bad Reque Wrong request
404 Not Found Can't find
边栏推荐
- [CEPH] cephfs internal implementation (IV): how is MDS started-- Undigested
- IDEA本地代理后,无法下载插件
- Audio and video learning (I) -- PTZ control principle
- Is it safe to open a stock account through the account opening link of the broker manager? Or is it safe to open an account in a securities company?
- Auto Sharding Policy will apply Data Sharding policy as it failed to apply file Sharding Policy
- selenium将元素保存为图片
- 【问题解决】新版webots纹理等资源文件加载/下载时间过长
- 【文件】VFS四大struct:file、dentry、inode、super_block 是什么?区别?关系?--编辑中
- 【leetcode】48. Rotate image
- SAP sales data actual shipment data export sales
猜你喜欢

还存在过有键盘的kindle?

svg上升的彩色气泡动画

【ceph】cephfs的锁 笔记

【TcaplusDB知识库】TcaplusDB单据受理-创建游戏区介绍
[tcapulusdb knowledge base] tcapulusdb operation and maintenance doc introduction
Ansible自动化的运用

Inaccurate data accuracy in ETL process

# 粒子滤波 PF——三维匀速运动CV目标跟踪(粒子滤波VS扩展卡尔曼滤波)
![[CEPH] cephfs internal implementation (II): example -- undigested](/img/87/6eb214550faf1f0500565c1610ff3b.png)
[CEPH] cephfs internal implementation (II): example -- undigested
Mr. Du said that the website was updated with illustrations

随机推荐
JS simple deepcopy (Introduction recursion)
SQLite loads CSV files and performs data analysis
10 minutes to understand bim+gis fusion, common BIM data formats and characteristics
【leetcode】331. 验证二叉树的前序序列化
On which platform is it safe to buy shares and open an account? Ask for guidance
TweenMax+SVG切换颜色动画场景
[C language practice - printing hollow upper triangle and its deformation]
Function: crypto JS encryption and decryption
[tcapulusdb knowledge base] tcapulusdb doc acceptance - table creation approval introduction
【leetcode】701. Insert operation in binary search tree
HW safety response
Use of abortcontroller
学习内存屏障
在重新格式化时不要删除自定义换行符(Don‘t remove custom line breaks on reformat)
[file] VFS four structs: file, dentry, inode and super_ What is a block? difference? Relationship-- Editing
Using restcloud ETL shell component to schedule dataX offline tasks
音视频学习(三)——sip协议
selenium将元素保存为图片
# 粒子滤波 PF——三维匀速运动CV目标跟踪(粒子滤波VS扩展卡尔曼滤波)
【ceph】CephFS 内部实现(三):快照